Author / Naz

Stew Uncategorized

A Music Education and a Pomegranate and Walnut Stew – Khoresh Fesenjan

George Michael and Andrew Ridgely.  They dreamily look deep into my soul – unearthing every little secret and thought as I flop on my bed – chin resting on hands looking even  deeper into their souls – the intensity of my stare almost burning a hole in the album cover – held inches from my nose.  I fancy myself Andrew’s best bud and the next Mrs. George Michael.

Well – we all know how that all turned out.  But that’s what you do when you’re twelve and a mad fan of Wham!.

Losing myself in a selfie slow-dance to the heartbreak that is Careless Whisper – and always ending with a big finale of me forgiving George (this one time) for his cheating ways – a radically different sound pounds through my bedroom floor knocking me off my feet and leaving the Careless Whisper sax solo whimpering in the dust.  My brother’s music.
Hands on hips, an I-mean-business glare in my eyes, and ready to confront the injustice that has been assailed upon me and George (the same look I now spot in Soleil to much hilarity) – I storm down the stairs ready to unleash all my pre-teen angst on my older brother.  But halfway down I stop, and the fumes rising out of me slowly fizzle out.  For days afterward I sneak halfway down to the basement, take a seat on the stairs and listen to this sound that is planets away from anything I have heard before.  But you can sneak around secretly enjoying your older brother’s music for only so long before you’re caught.

He doesn’t tell me to take a hike, or embarrass me, or make me feel like a silly little WHAM!-loving twelve-year-old that I am.  Instead he invites me in – passionately sharing with me this new world of music.  Excitedly he rattles off facts – stories – one thought quickly leading to another – faster than I can keep up – as is his way to this day.  We listen through his entire record collection – the MOD/PUNK/”alternative music”/SKA canon. The Jam – Dead Kennedys – The Cramps – Madness – The Specials – Bahaus – The Smiths – Style Council – The Clash – The Stranglers – Talking Heads – The Who – Velvet Underground….

Weekends become about trips downtown to Odyssey Imports on Granville Street (before Granville Street became the tourist hub that it is now) to check out the latest import releases out of the UK.  When there was a distinct rivalry between the music coming from the UK vs the US.  When the freshly mohawked punk rockers had claimed the front entrance to Eatons as theirs and theirs alone.  All frightening and exhilarating at the same time for my pre-teen eyes.

Those early years in Vancouver, after a day spent record shopping, Saturday nights were also synonymous with a dinner party at our family friends house – the K’s.  Where we would all gather seeking comfort in the company of other families – expats – having gone through similar travels, similar adversities.

New immigrants to a new land.

Where you could be guaranteed plenty of dancing and plenty of Mrs. K’s mouth-watering Khoresh Fesenjan – Pomegrante Walnut Stew.
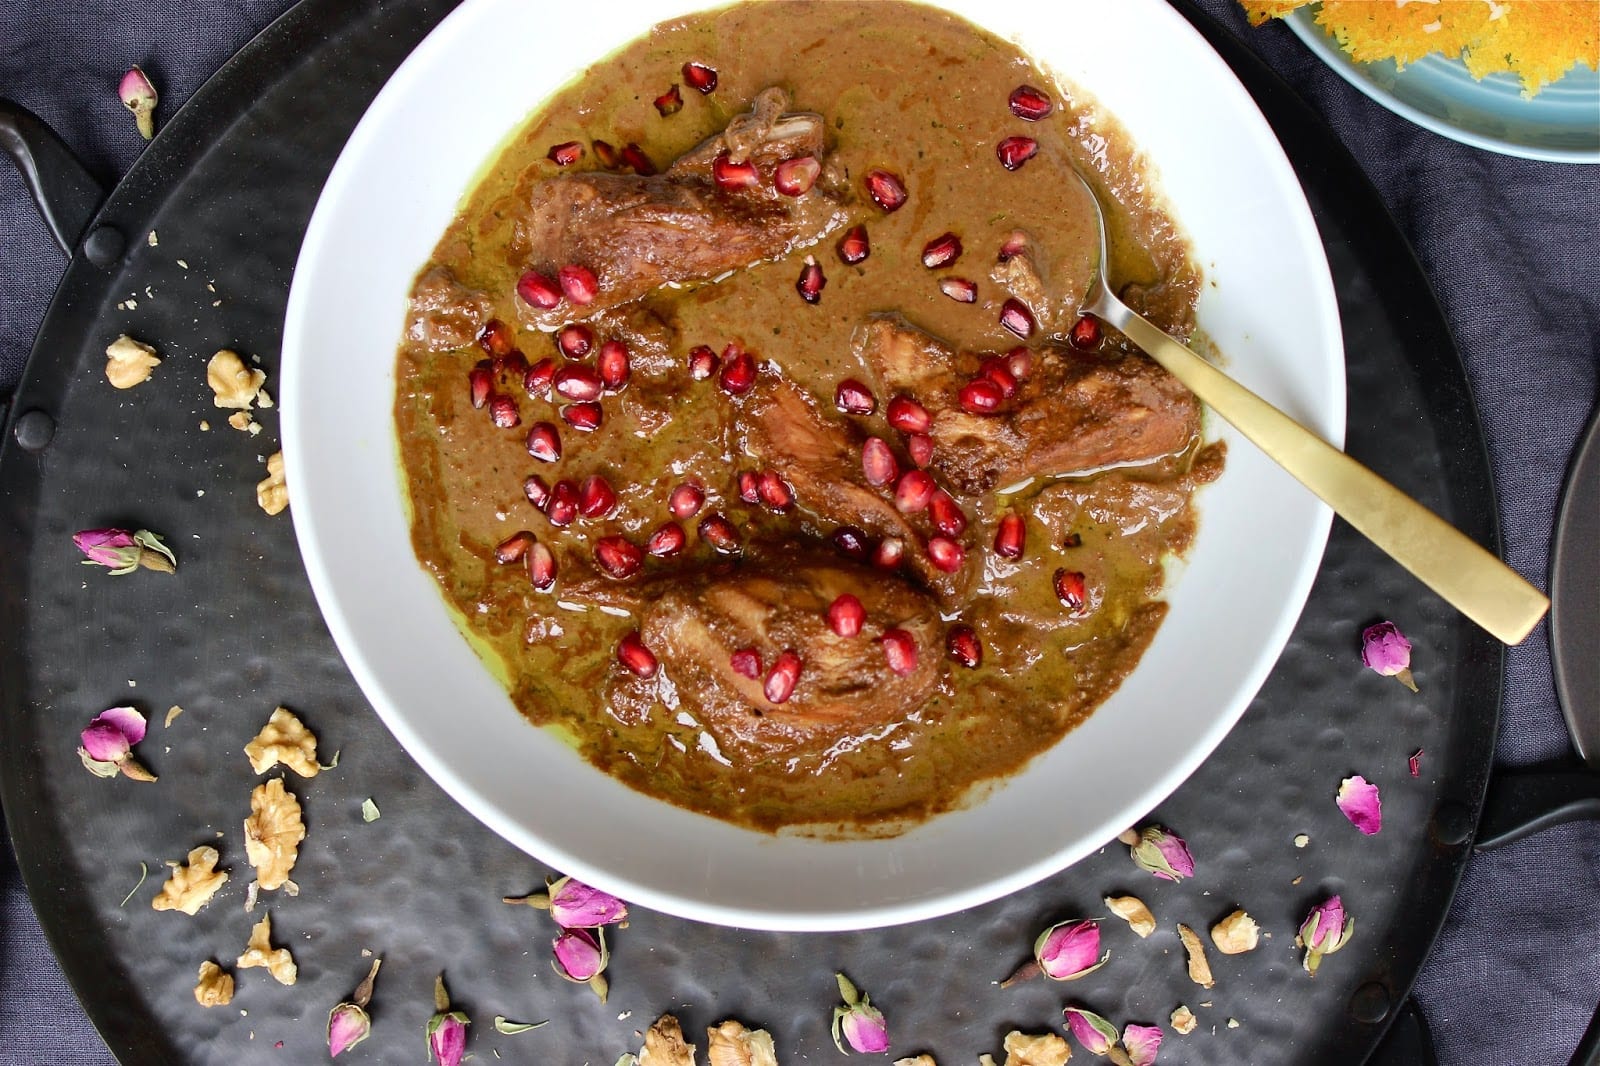
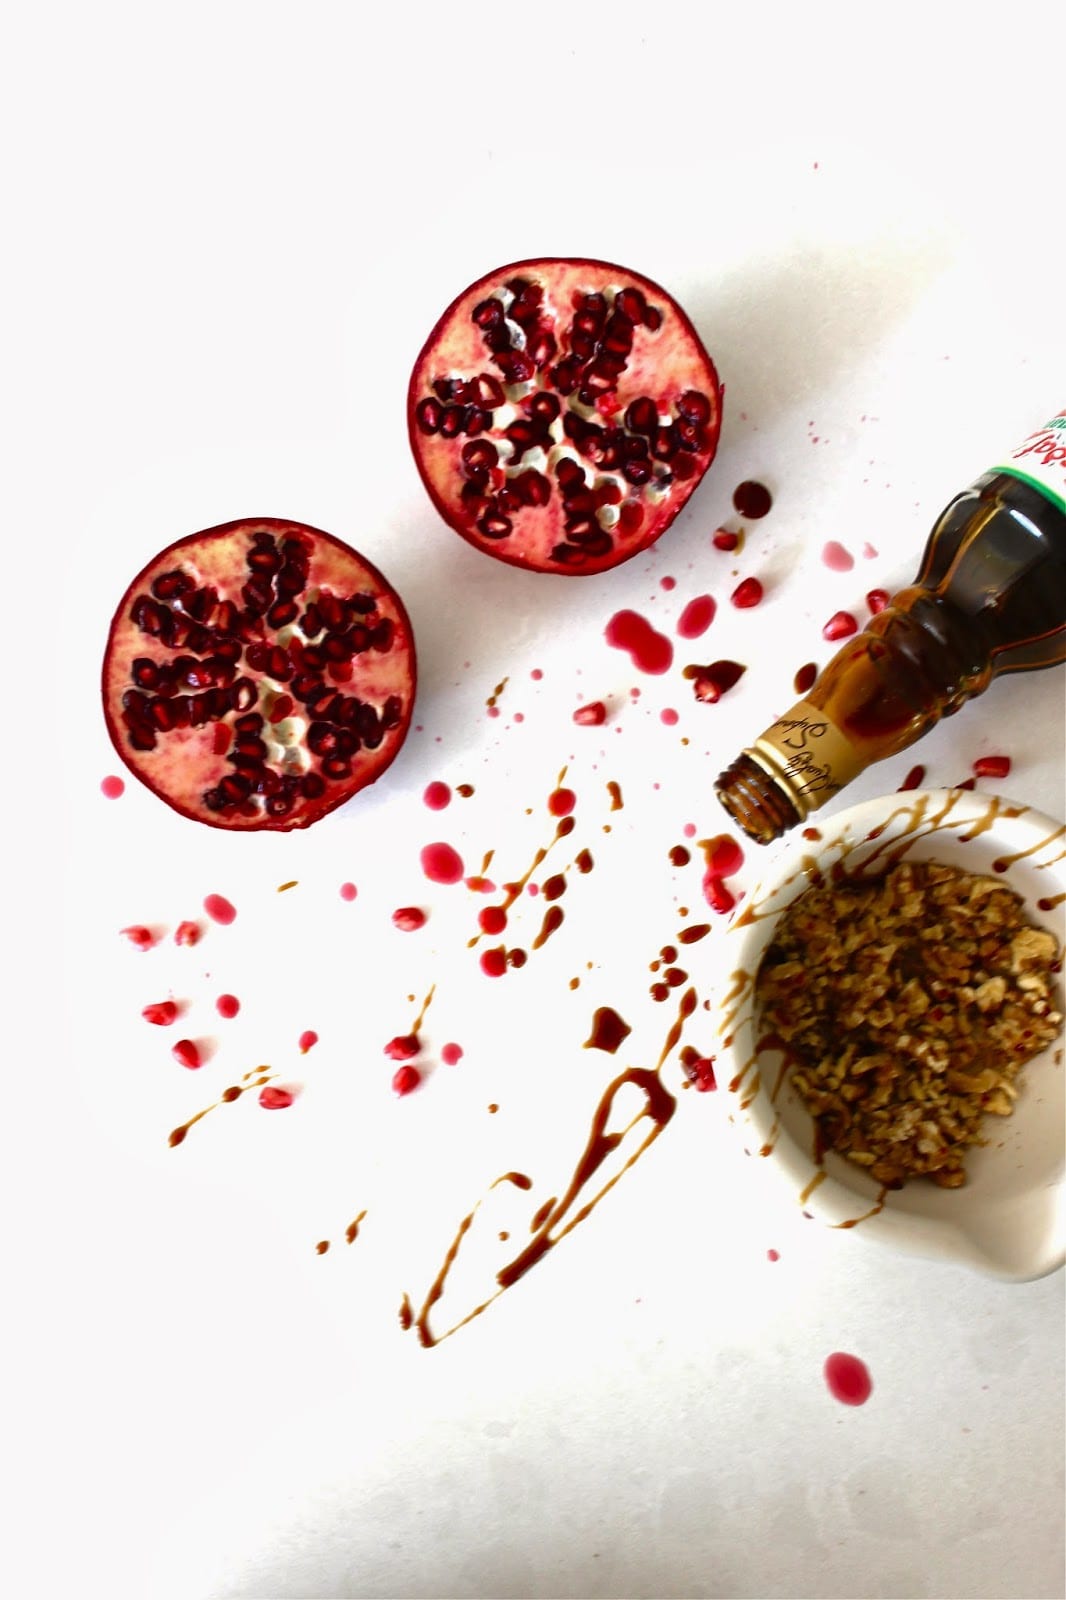
Food in general demands our respect.  Khoresh Fesenjan commands our respect.  The respect of time and patience.  The respect of slowly and lovingly allowing a much celebrated stew of walnuts and pomegranate molasses simmer quietly away for a few hours on your stove on a Sunday afternoon.  Warming up your home with its tantalizing aromas – transporting you to a faraway land –  a faraway orchard – or – simply as my mother puts it – allowing all the flavors come to life.
Sweet or Sour – Pomegranate Molasses
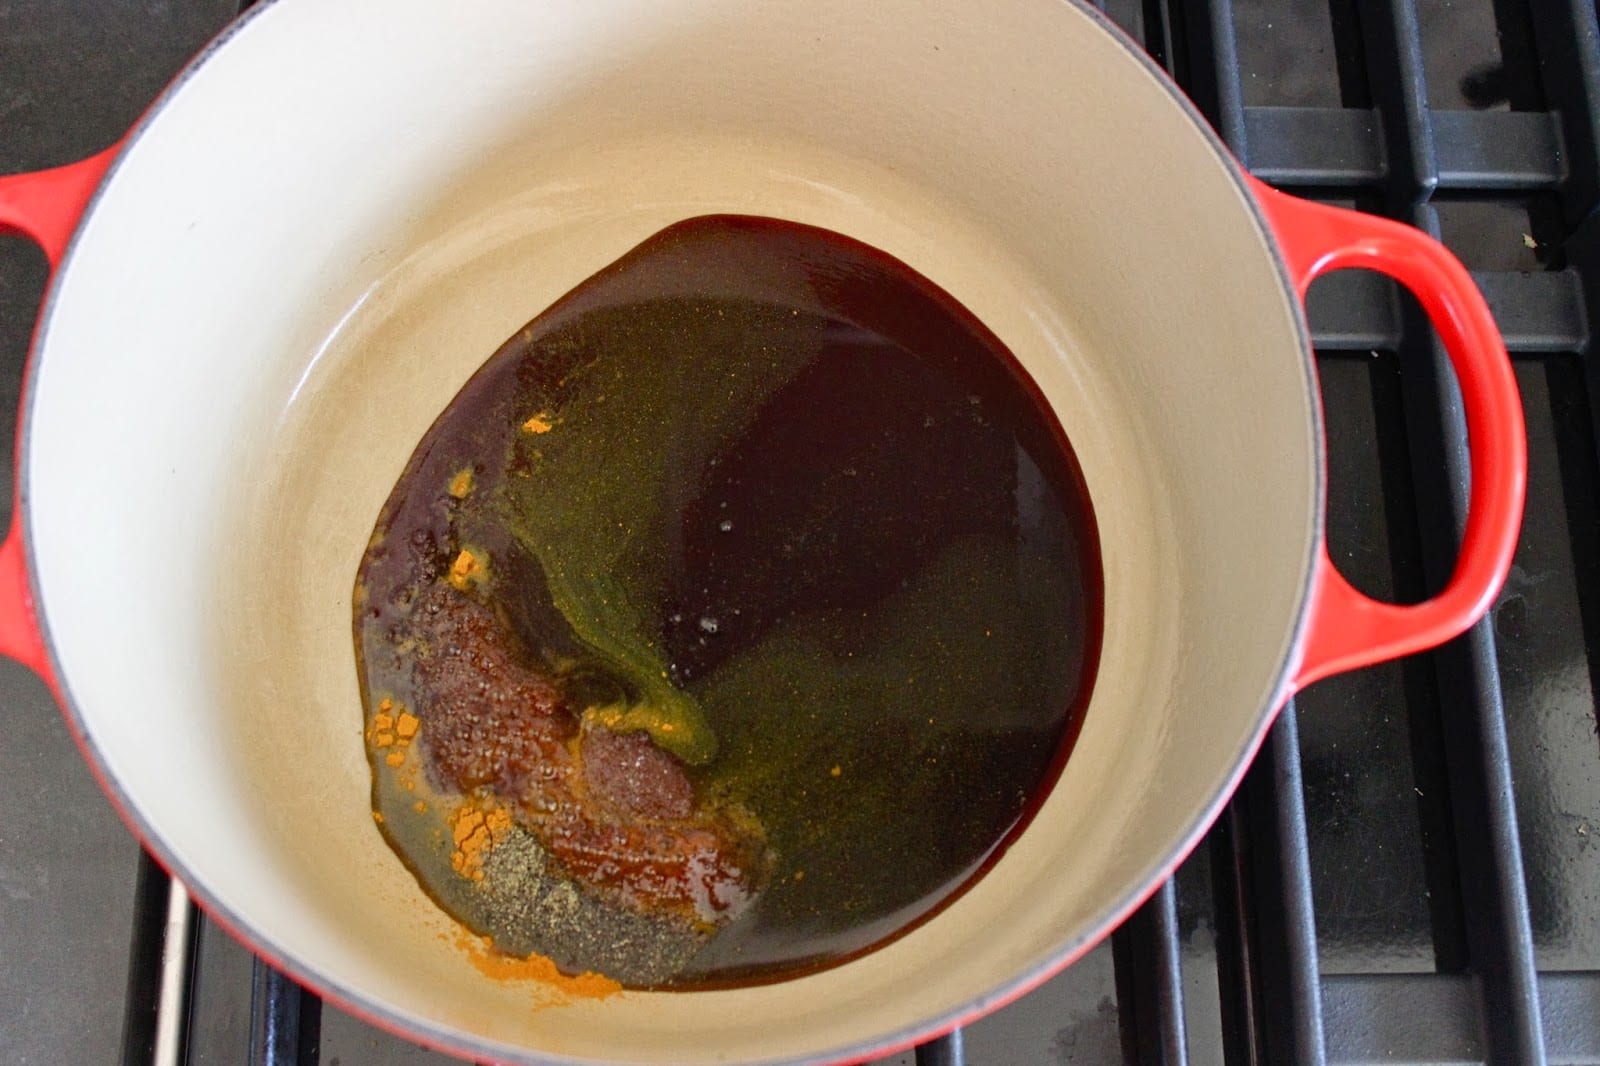
Contrary to popular belief Khoresh Fesenjan is quite simple to prepare.  At its simplest preparation it is nothing more than ground up walnuts, pomegranate molasses, water, chicken (or vegetable of choice), salt to taste.  That’s all you need.  But for a little added depth of flavor you can enhance with some extra spices. I like to use a little bit of turmeric, ground up dried rose petals and cinnamon. However, this simple yet sumptuous dish is often quite polarizing as to how it should be prepared.  This divisiveness comes down to a personal preference for what type of pomegranate molasses to use.  Sweet or sour or something in between – sweet and sour.  It is not uncommon for people to get quite particular and passionate about this preference.  You know you are talking about quite a special dish when there is so much passion and intensity surrounding it. I like and prepare my Fesenjan sour – the way Mrs. K and my mom prepare it – the way it is prepared in Gilan – Shomal – the Northern region of Iran bordering the Caspian sea  – known for its Khoresh Fesenjan.  Now, by sour I don’t mean a mouth-puckering taste that makes you wince.  It only means that there is no sugar or other type of sweetener added to the stew.  It is a subtle and satisfying tartness which is dictated by the kind of pomegranate molasses that is used.  I use this pomegranate molasses which says sour on it.  If you are new to Khoresh Fesenjan I recommend trying different kinds of pomegranate molasses and see what suits your palate best.

Walnuts
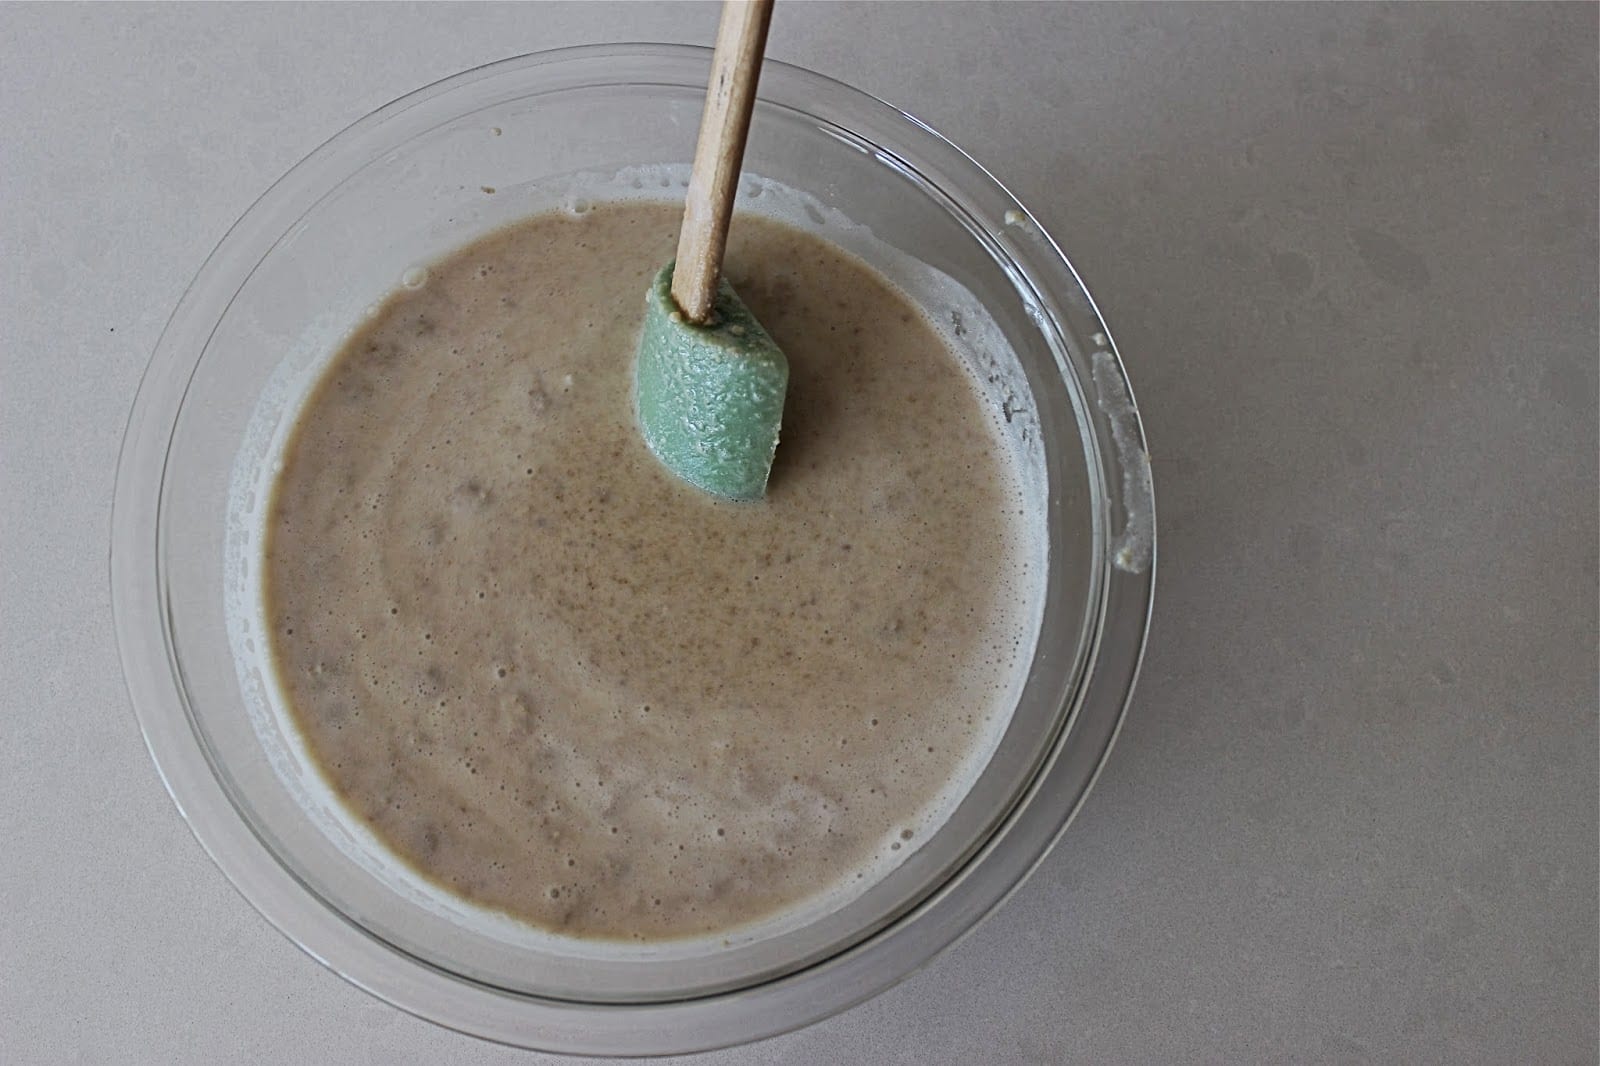
There is also a debate as to how fine the walnuts in the stew should be ground up.  Again, this comes down to a personal preference.  Some like the texture of a rougher grind, where you can feel the crunch of the walnut in the stew.  I prefer my Fesenjan smooth so I grind up the walnuts to a fine meal, or even to a paste. You’re looking for a grind resembling a flour like texture or smoother. The walnut meal is then mixed with some water and added to the pomegranate paste in the pot.
Simmer, Simmer and Simmer Some More
There is one thing about the preparation of this stew that is not up for debate.  And that is allowing the pomegranate/walnut sauce to sit and simmer slowly for at least a couple of hours before adding your meat or vegetable.  No quick fixes here.  The color, depth of flavor and richness of this dish depend on this step.  Just like any good stew or braise, this is your chance to bring the flavors to life.  Specifically to bring the walnuts to life .  As the stew simmers, the walnuts will slowly start to release their natural oils.  The more the walnuts release their oils the more they will come out of their raw state and the color of the stew will start turning from a very pale cappuccino shade to a rich brown .  That is what we are looking for.  The walnuts can make this dish a very rich and hearty dish, so you want to skim off as much of those oils that come to the surface as possible to cut down on some of that richness.  Also we don’t want a raw walnut aftertaste in the stew which can often be rather bitter. As the stew sits and simmers uncovered it will start thickening so you want to keep adding about half a cup of water to it every half hour or so.  This process should take about 2 hours.  You will know the sauce is ready when its color has turned to a rich brown, when most of the walnut oil has been released and when it is at the desired consistency: not too thick and not too watered down.  At this point you should taste the sauce and make any necessary adjustments like adding more pomegranate molasses if necessary.  This is also where I add the cinnamon and ground rose petals, if using.  The sauce can be made ahead of time up to this point and kept in the fridge before adding the chicken.  If I am pressed for time or preparing for a dinner party  I usually make the sauce one day ahead.

Duck, Chicken or Vegetables
Traditionally, Khoresh Fesenjan was served with a whole duck placed in the sauce and cooked through.  It has now become more common to make Fesenjan with chicken – whole or cut up into pieces – which is how I like to prepare it. Some preparations also use mini meatballs which cook through in the sauce.  You can also make a vegetarian version with eggplant or mushrooms or various types of squash.  It goes without saying that Fesenjan, or Fesenjoon as it is more colloquially called, should be enjoyed over rice.  This dish is also a perfect example of the Persian tradition of balancing a meal. A rich and satisfying stew like Fesenjan should always be accompanied with something fresh, raw and crisp to aid in digestion.

We are a culture obsessed with digestion.

So you will most definitely find Sabzi Khordan – a platter of fresh herbs and radishes (I love using watermelon radishes when available) at the table along with a bowl of crisp, fresh turnips as is tradition in Gilan and at Mrs. K’s house.
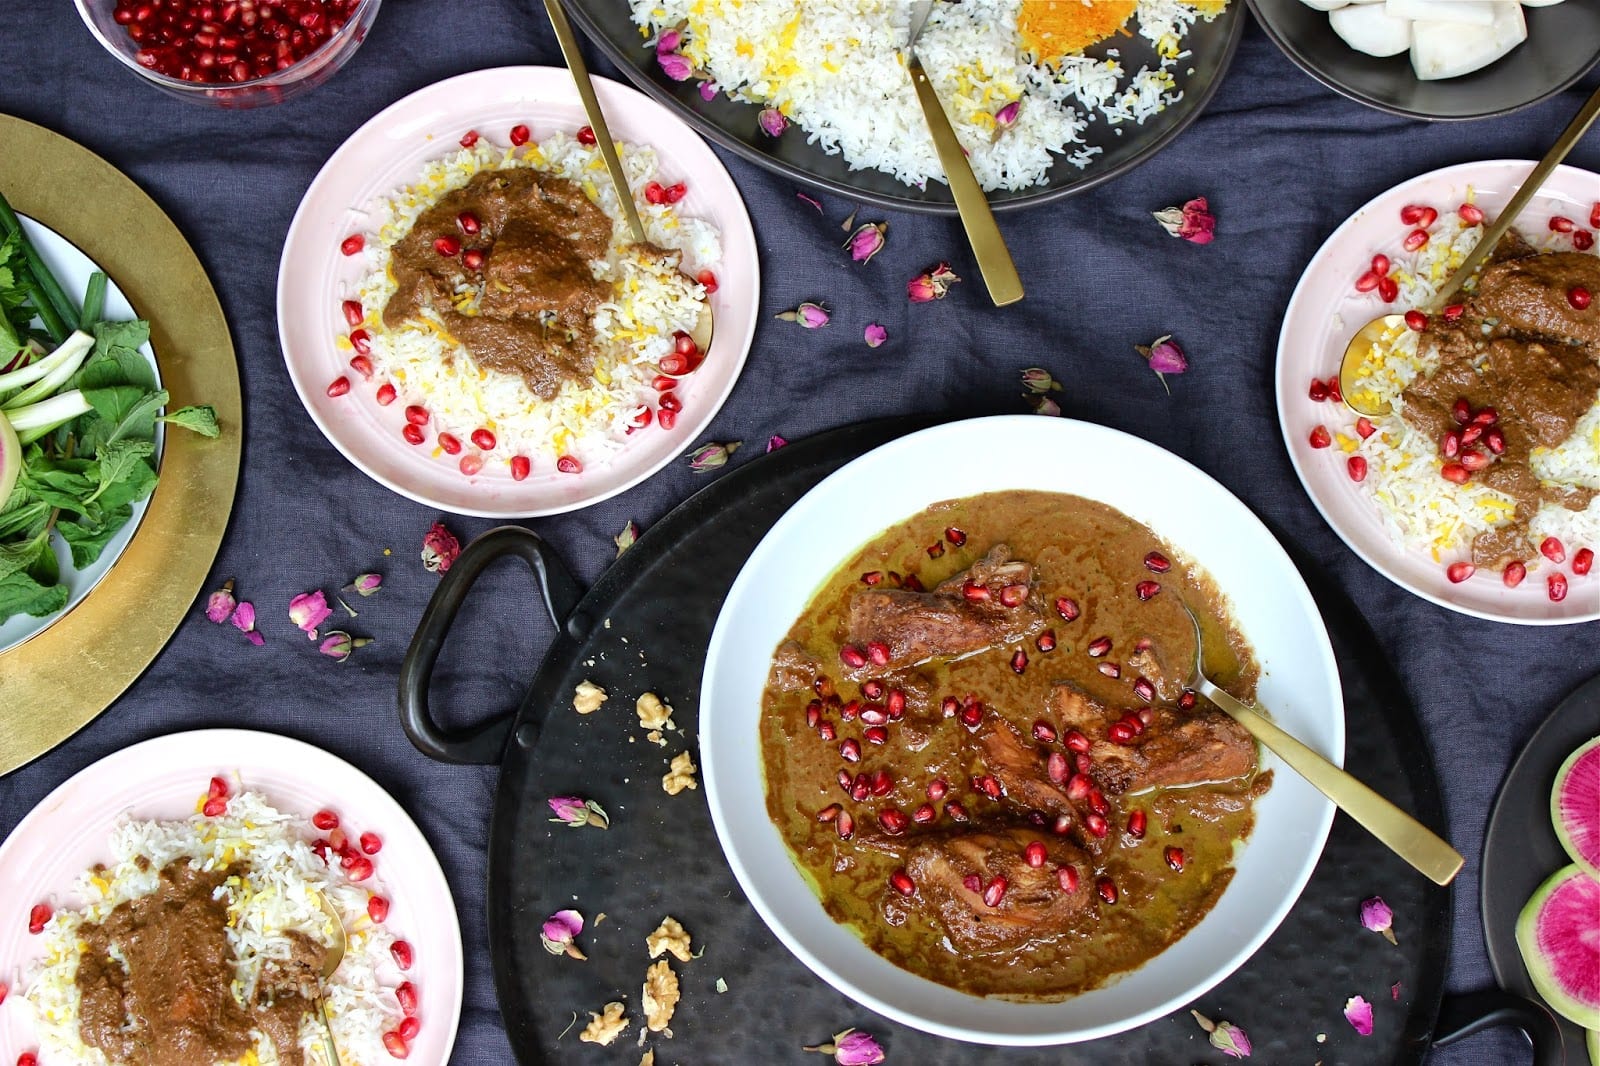
Those Saturday nights at Mrs. K’s, after a feast of Fesenjan, Baghali Ghatogh, Mirza Ghasemi and smoked fish – following the obligatory after-dinner tray of tea and dates (for digestion of course) was passed around – after the platter of fruit (for digestion, of course) was served – after the dancing and clapping (also for digestion, of course) – my best friend S. and her older sister M. and I would watch my brother, their older brother B. and another good friend F. go through their ritual of getting ready for a night out.

It almost always involved excessive amounts of hair gel.

I secretly longed to one day tag along, be a part of that world.  But until then I was quite content with George upstairs in my room and the new world order I was experiencing downstairs in my brother’s room.  Clinging to my childhood but on the threshold of crossing over to something new, exciting and nerve-racking: the teenage years.

That’s what happens when you’re twelve.

On the cusp of when his music, becomes our music – my music.

Dedicated to the memory of Farzad and Sepideh.


WALNUT AND POMEGRANATE STEW – KHORESH FESENJAN

Inspired by Mrs. K. and Maman

Ingredients:

Serves 6 – 8

1 lb/450 grams shelled walnuts, ground up to a fine meal
water
3/4 cup sour pomegranate molasses, or pomegranate molasses of choice
1/2 teaspoon turmeric
salt
1/2 teaspoon cinammon
*1/8 teaspoon ground dried rose petals (optional but highly recommended)
2 1/2 – 3 lbs. skinless, boneless chicken pieces, I use 2 breasts/2 drumsticks/4 thighs
pomegranate seeds, for garnish (optional)
pepper

* You can grind up dried rose petals in a spice grinder.  You can buy dried rose petals at Middle Eastern markets or here or here for organic ones.

1- In a medium size bowl mix the ground up walnut meal with 3 cups room temperature water.

2- Heat a large dutch oven style pot over medium heat.  Add the pomegranate molasses, 1 teaspoon salt and turmeric and stir to combine.  Keep a close eye on it. As soon as the molasses starts to bubble and come to a gentle boil add the walnut/water mixture.  Stir and allow to gently boil for about 5 minutes.  Turn the heat down to low and gently simmer the sauce uncovered.

3- You will be simmering the sauce uncovered for the next 2 hours or so. Add about 1/2 cup of water every half hour or so.  You will know it’s time to add more water as the sauce starts to thicken and the walnut oil starts to rise to the top.  Make sure you stir once in a while making sure nothing is sticking to the bottom of the pot and your sauce isn’t burning at the bottom.  Skim off any oils that come to the surface.  The color of the sauce will start turning from a pale beige to a rich brown throughout this process.  Once the sauce is ready add the cinnamon and ground up rose petals.  Taste and make adjustments.  I usually add another 1/4 cup of pomegranate molasses.  Hold off on adding more salt because the chicken will be seasoned with salt.  The sauce can be made ahead of time up to this point.  Or carry on right to the next step.

4- Cut up the chicken breasts and thighs into medium sized pieces.  I cut the thighs in half and the chicken breasts into 3 or 4 pieces.  Season the chicken with salt and pepper.  Add the chicken to the sauce and simmer for 45 minutes – 1 hour until the chicken is cooked through (if the stew starts thinning out turn up the heat slightly, just make sure you are stirring so nothing sticks or burns).  I prefer the stew on the thinner side than the thicker side.  Taste and adjust seasoning if necessary.

Serve over rice and garnish with pomegranate seeds if you like.  Enjoy with a side of Sabzi Khordan and/or raw turnips for digestion of course!

Will keep in the fridge for up to 3 days and in the freezer for up to 3 months.

Dinner

A Swiss Chard Reduction – A Shrimp and Quinoa Paella – Fun Friday

It’s not a graceful entrance.

We crash/bang/sing/stumble/dance/pontificate/drag/whine/laugh our way into the house.  Backpacks hit the the floor with a thunderous clatter. Jackets are tossed in one direction – even though the coat hooks are at arms length – and at kid height.  Two sets of shoes fly up and come crashing back down – briefly electrifying the room with a shower of sparkly lights.  The strategically placed shoe cabinet looks on in dismay – hungry for its daily feed (we all know that our slightly OCD-inclined dad of the house will put them away).  Sweaty socks peel off, each in the distinct form of the body part they once enveloped, leaving a trail behind. Newly freed feet pitter-patter their way to the living room.

Girls! Wash your hands first!

And so begins the ritual that is Fun Fridays.

The girls are not yet old enough to have their calendars filled with all-consuming extra-curricular activities and social responsibilities.  It could also be that we have chosen not to fill every extra minute with something to do.  Or that our days are jam-packed enough already.  Most likely – it’s because we are just homebodies at heart.  So we have chosen to keep Fridays open.  Anything goes.  Free play time, no homework, time to unwind and just be, and most importantly: time to watch some television.  Seriously – with everything that we pack in a week – wouldn’t you want your Fridays to be about all that?

With that laissez-faire spirit in mind I had also decided to join in on Fun Fridays.  With no dinner plans in the works – no Friday Night Loobia Polo – I had resolved earlier in the day that we were going to order in.  Not a regular occurrence in our house but a necessary one from time to time.  I was taking a break from the kitchen tonight.  Oh – yes – I – was.

As the girls settle in to watch Wild Kratts and Doc McStuffins, I take the opportunity to retire to the study for a cocktail and my current obsession/read.  A perfect setting for David Tannis to teach me a thing or two about artichokes (overlooking the minor details that we don’t actually have a study, I don’t like to drink at 5pm, and David Tannis’  book isn’t really about artichokes.  Minor details – minor details.)  I have a vision of how the afternoon will unfold – and I’m sticking to it.  The spot on the couch next to the girls will serve just fine as said study.  Mr. Tannis will teach and inspire, and after all this day is about breaking the rules – so my cocktail of choice is, of course – A Campari Cocktail.

I lovingly set the Campari bottle on the counter with one hand as the other hand reaches back to open the fridge door – in search of a lime to accompany my drink. And thus begins the beginning of the end.  Instantly my eyes fall upon the bountiful bunch of Swiss Chard from our recent farm box delivery.  There I stand – arms outstretched – one hand on a beautiful red-hued bottle – the other hand holding open the fridge door.  My eyes quickly dart back and forth between the two adversaries.  This should be an easy choice – the plan is already in motion – I’m not cooking tonight – it’s cocktail hour – the study – the book – the drink – the vision.  But the unwelcome voice of reason starts wiggling its way in.  The chard should be used soon – if I drink now I’ll get sleepy and cranky – and the truth is – I simply can’t take my eyes off those dark leafy greens.  I turn and face the Campari bottle – apologetically and gently nudging it to the edge of the counter.  I turn back and face the fridge.  I give my hair a quick flick, lower my eyes slightly, feel a coy smile creep up the sides of my mouth, extend my arm and grab the chard.  It’s on.

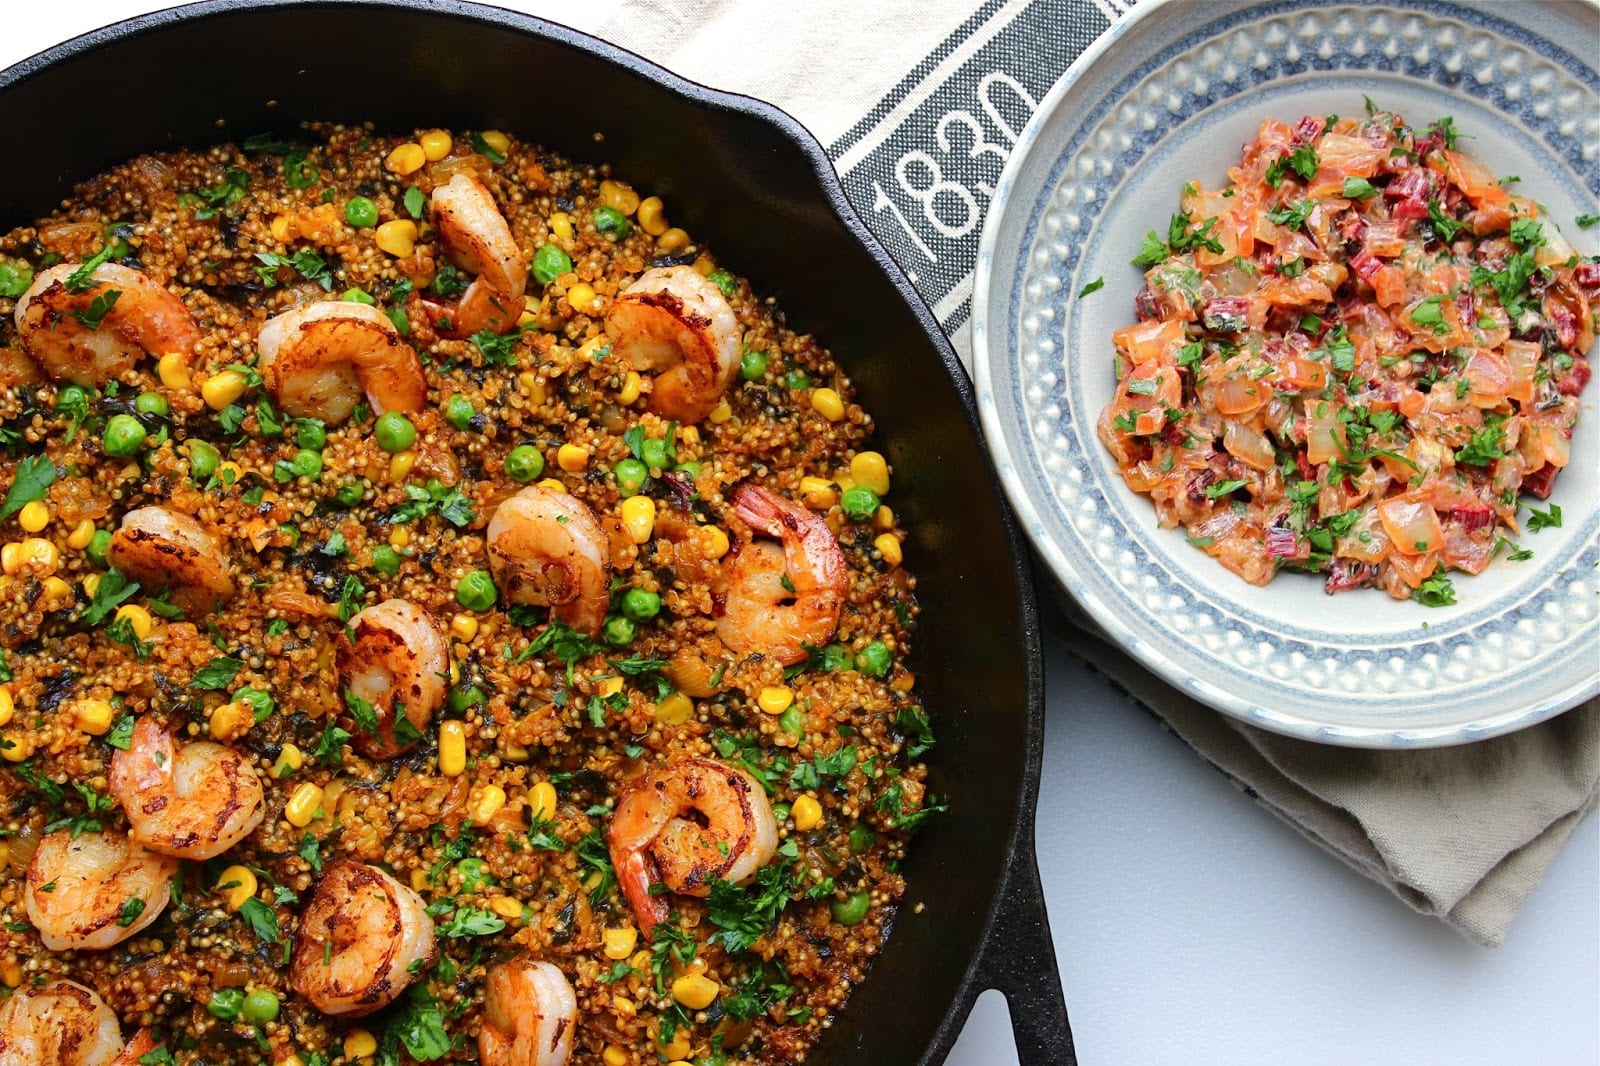
Everyone is always looking for a quick go-to recipe.  This quinoa “paella” is ours.  Quinoa is a superfood commonly used as a whole grain substitute.  It is technically not a grain but an immensely nutrient rich seed – which makes it a great choice for those looking for a gluten-free grain alternative.  It also makes for a perfect vegan choice since it is considered a complete protein – containing all nine essential amino acids. Quinoa has been a staple in our house for some time now, right up there with our beloved rice and pasta.  Drew loves it.  The four-year-old loves it.  I still like it and consume it in abundance but truth be told, I have somewhat grown tired of it (interesting how I never seem to tire of rice and pasta…hmm).  And the seven-year-old is on the brink of jumping the quinoa ship completely.  So I’m always looking for ways to change it up and make it a little more interesting – like adding it to our morning oatmeal (a great way adding much needed protein to our breakfast), working it into soups, salads – recreating it any number of ways, like paella.

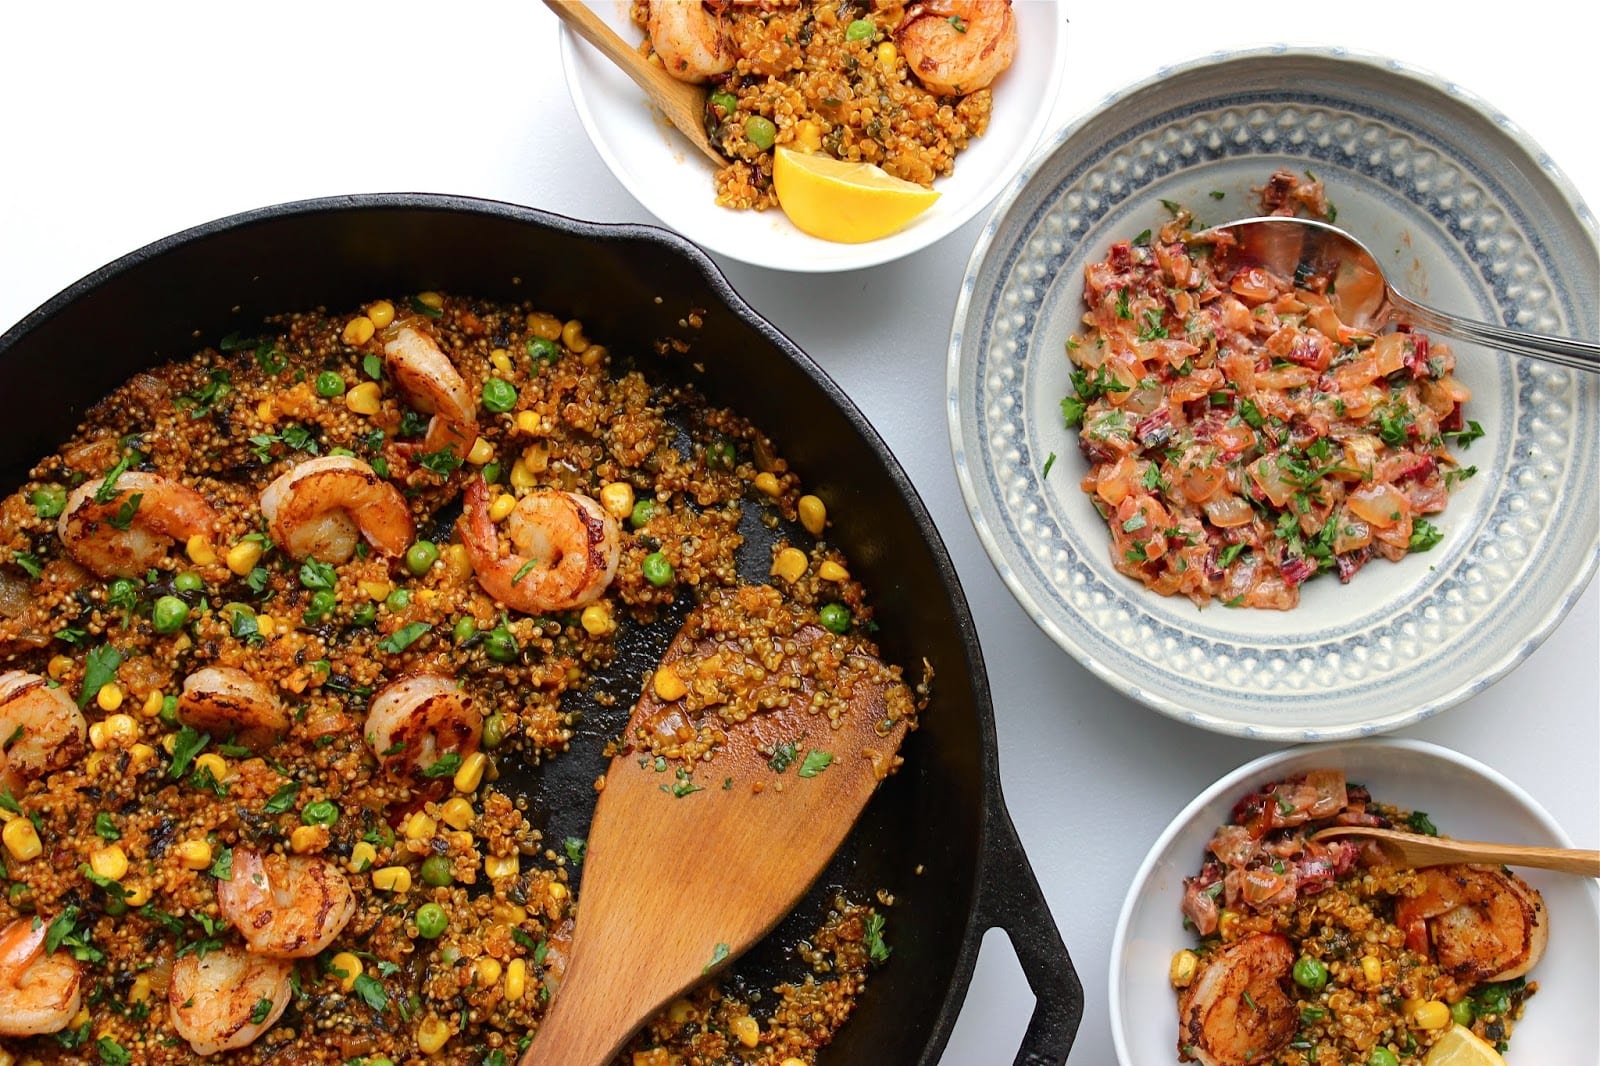
This dish is inspired by the traditional Spanish paella.  The best part about it is that it can essentially be made with whatever you have on hand and can be prepared fairly quickly.  I usually get a lot of help from my freezer goods.  You can use chicken, other types of seafood, sausage, crack an egg on top, or keep it vegetarian (I’m dreaming of mushrooms, asparagus..you get the picture).  I usually have a bag of frozen shrimp saved for those last-minute meals.  And as is the case with all our seafood consumption, I always make sure to check in with Seafood Watch.  They also have a great app which is very helpful when you’re at the seafood counter and not sure about the quality, safety and sustainability of what you’re about to purchase.  Our other freezer staples are bags of frozen peas and corn.  Perfect for the makings of a paella.  Whenever possible I also try to sneak in our dark leafy greens like the chard here but you could also use kale or spinach.  The trick here is to finely chop up the greens or cut them into thin ribbons so they get well-incorporated into the dish; also ensuring no complaints from the little ones. I don’t use the chard stalks in the paella but instead quickly saute them up in olive oil with some chopped onion, garlic and lemon zest.  Then stir in a little yogurt, a hit of parsley and enjoy it as a salsa alongside the paella.  This also makes a great dip you can serve with grilled or sauteed shrimp.

The basis for a traditional paella is the sofrito – the sauce made up of sauteed aromatic vegetables like onion, garlic, green or red peppers, and tomatoes.  I have very loosely recreated a sofrito here, leaving out the peppers (you can include peppers if you like) and adding anchovies.  Now – before you balk at the idea of the little salty fish – I assure you that you will not be able to taste them in the final product – they are used here to add a depth of flavor, a je ne sais quoi, an overall yumminess to the dish.  If you’re still not convinced, you can leave them out but just know you’ll be missing out.  In keeping with a paella preparation methods I add the quinoa to the sofrito for a couple of minutes before adding my cooking liquid.  This allows the quinoa to toast a little, drawing out more of its flavor.  Once the cooking liquid is added I cover the pan and allow the quinoa to cook, uncovering for the last 5 minutes of cooking time. The quinoa should be fluffy, not soggy or mushy.  Right before serving, garnish it with a little chopped parsley and make sure to squeeze a juicy lemon over the whole thing.  And serve alongside the chard stem salsa, or some guacamole, and you know if I can work in a dollop yogurt on top I will.  Delicious goodness in one pan.

I lift the heavy cast iron off the stove – turn – and come face to face with Drew.  Home just in time.

Thought you could use this.  It is Friday after all.

He presents me with a glorious tumbler of Campari Cocktail.  I look to him – to the drink – back at the heavy paella pan precariously balancing in my arms – the room starts pounding with this hip shimmying beat.  I give my hair a quick flick, lower my eyes, place the pan on the counter, give my husband a teasing smile and yell out:

DANCE PARTY

The four of us spontaneously bounce, wiggle, jiggle, shimmy, taking turns showing  off our moves.  And then follow the sock trail back to the kitchen table to tuck into some shrimp and quinoa paella.

Happy Fun Fridays.

Happy New Year.


SHRIMP AND QUINOA PAELLA

Ingredients:

Serves 4-6

1 pound shrimp, peeled and deveined, (thawed if frozen)
1/2 teaspoon paprika, divided
1 lemon, halved
4 tablespoons olive oil, divided
1/2 a medium onion, chopped
1 clove garlic, chopped
2 anchovies in oil
2 tablespoons tomato paste
1 cup quinoa, rinsed
2 cups chicken stock or vegetable stock or water
1/2 bunch swiss chard, off the stem and finely chopped
1/8 teaspoon ground saffron or a pinch of saffron threads
1/2 cup frozen green peas, thawed
1/2 cup frozen corn, thawed
salt
pepper
parsley, chopped for garnish

1- In a medium sized bowl season shrimp with salt and pepper, 1/4 teaspoon paprika and the juice of half a lemon.  Toss to coat well and set aside for 10-30 minutes if you have time otherwise cook right away.
2- In a large pan (cast iron works well) heat 2 tablespoons olive oil over medium/high heat.  Add shrimp and cook for 2-3 minutes on each side.  Do in batches if necessary. Make sure you don’t over cook the shrimp.  Transfer shrimp to a plate and set aside.
3- Turn the heat down to medium and add the remaining 2 tablespoons of olive oil.  Add onion and cook until the onion softens 4-6 minutes.
4- Add garlic and anchovies.  Stir and gently break down the anchovies.  Melting them into the onion and garlic.  About 1 minute.
5- Add the tomato paste and stir into the onion, garlic and anchovy mix. Keep stirring until you get a fragrant sofrito.  About 2-4 minutes.
6- Add quinoa and stir into sofrito.  Toast for 2 minutes.
7- Add swiss chard, stock or water, remaining 1/4 teaspoon of paprika and saffron.  Give a quick stir to incorporate and turn the heat up and bring to a quick boil.  Cover and lower heat.  Simmer for about 10 minutes.
8- Remove lid.  Add the green peas and corn.  Adjust seasoning if necessary.  I usually add some salt and pepper.  Warm the peas and corn through about 5 minutes.  Add the shrimp back to the pan the last 2 minutes of cooking and warm through.  Garnish with parsley and a squeeze of lemon over the whole thing and serve with the swiss chard stalk salsa.

SWISS CHARD STALK SALSA

Ingeredients:

1 tablespoon olive oil
1/2 medium onion, chopped
1 clove garlic, chopped
Swiss chard stalks, from about half a bunch, chopped
zest of 1 lemon
1 tablespoon yogurt
a handful parsley, chopped
salt
pepper

1- Heat the olive oil in a small pan over medium heat.
2- Add onion with a small pinch of salt and saute until the onion softens a little.  About 4 minutes.  Add chard stalks, garlic and lemon zest.  Saute until stalks soften a little and become fragrant.  About 5-8 minutes.
3- Remove from heat and allow to cool a few minutes.  Transfer to serving bowl.  Stir in yogurt, parsley, and squeeze of lemon.  Season with salt and pepper to taste.  Add more yogurt or lemon juice to taste.  Serve with Shrimp and Quinoa Paella.

Dinner

A Thanksgiving Offering – A Rice and Lentil Dish – Adas Polo

He bursts through the front door – unwittingly inviting in the crisp November breeze.  Out of breath and on a mission, he spreads out a world map on the kitchen table.  An explorer out at sea – years in search of a long-lost exotic land.  And now so close to setting his eyes upon it.  Almost within reach. Running his aged fingers along the map and smoothing out its creases, he turns and focuses his periscope on me – the unknowing representative of said exotic land.

Now show me – where have you lived – exactly where are you from?

Uncle Ned.  Drew’s great-uncle.  Sweet, sweet Uncle Ned.

We were spending Thanksgiving with Drew’s grandparents and extended family in Battle Creek, Michigan. Over the years my travels had taken me throughout the United States –  the Pacific Northwest, West Coast, East Coast, the South. But somehow I had always simply flown over the middle of the country – with maybe a brief (or at times not so brief) layover at Chicago’s O’Hare.  This was officially my first visit to The Midwest.  In the heart of the country to celebrate a mighty American tradition: Thanksgiving.

I didn’t grow up celebrating Thanksgiving.  Whole turkeys are kind of hard to come by in Rome or Tehran.  But having attended American schools, I was fully versed in the tradition and folklore of this holiday.  Later when we moved to Canada, the Thanksgiving celebration shifted to early in October.  My understanding of the difference of dates between the two countries is simple geography. Thanksgiving is essentially a celebration of the end of the harvest, and it is believed that since Canada is farther north, the end of the harvest and the onset of winter comes earlier. Another notable difference is the fervor and intensity with which this holiday is celebrated in America, versus the slightly more subdued approach Canadians take in all things (the current Toronto mayor buffoonery not-withstanding). Regardless – even tough this holiday is not cemented in my past – it is a gathering I can fully appreciate.  An event centered around family, food, warmth, togetherness, love, and the mandatory familial tensions and misunderstandings.  Yes – a gathering I can fully understand and embrace.

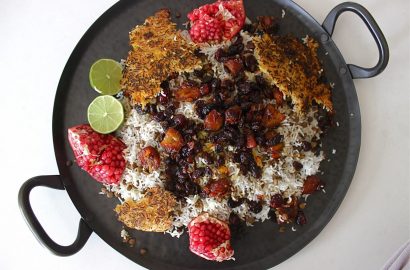
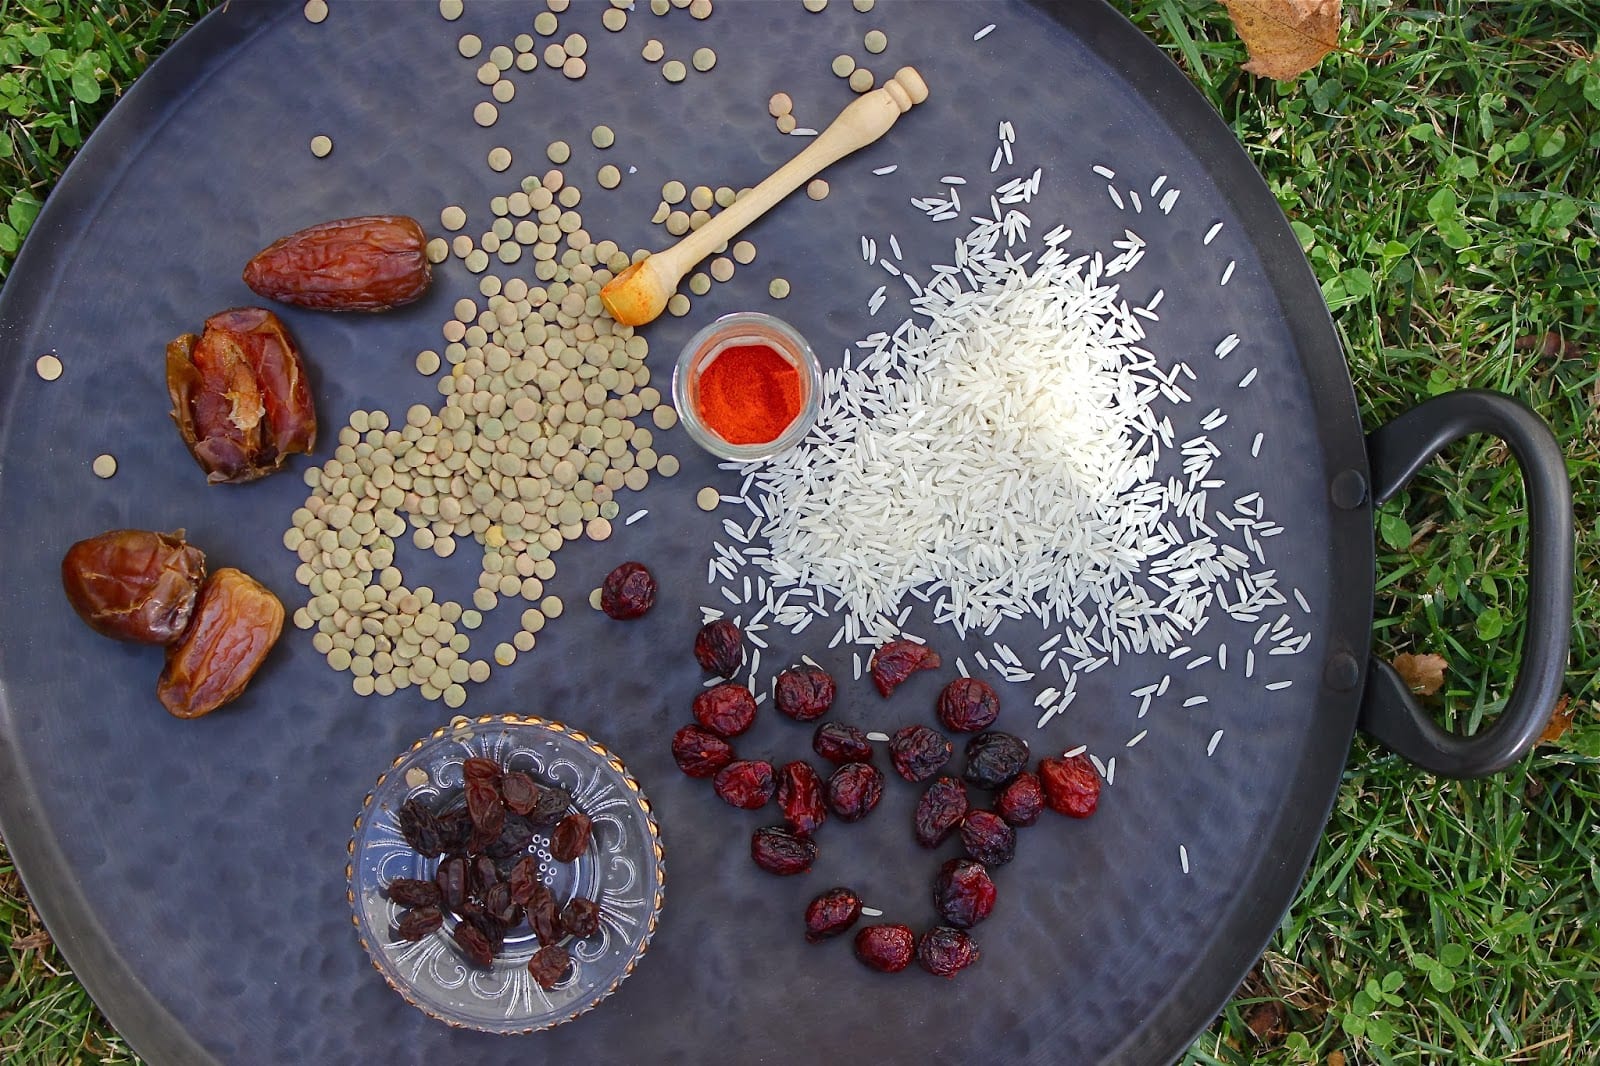
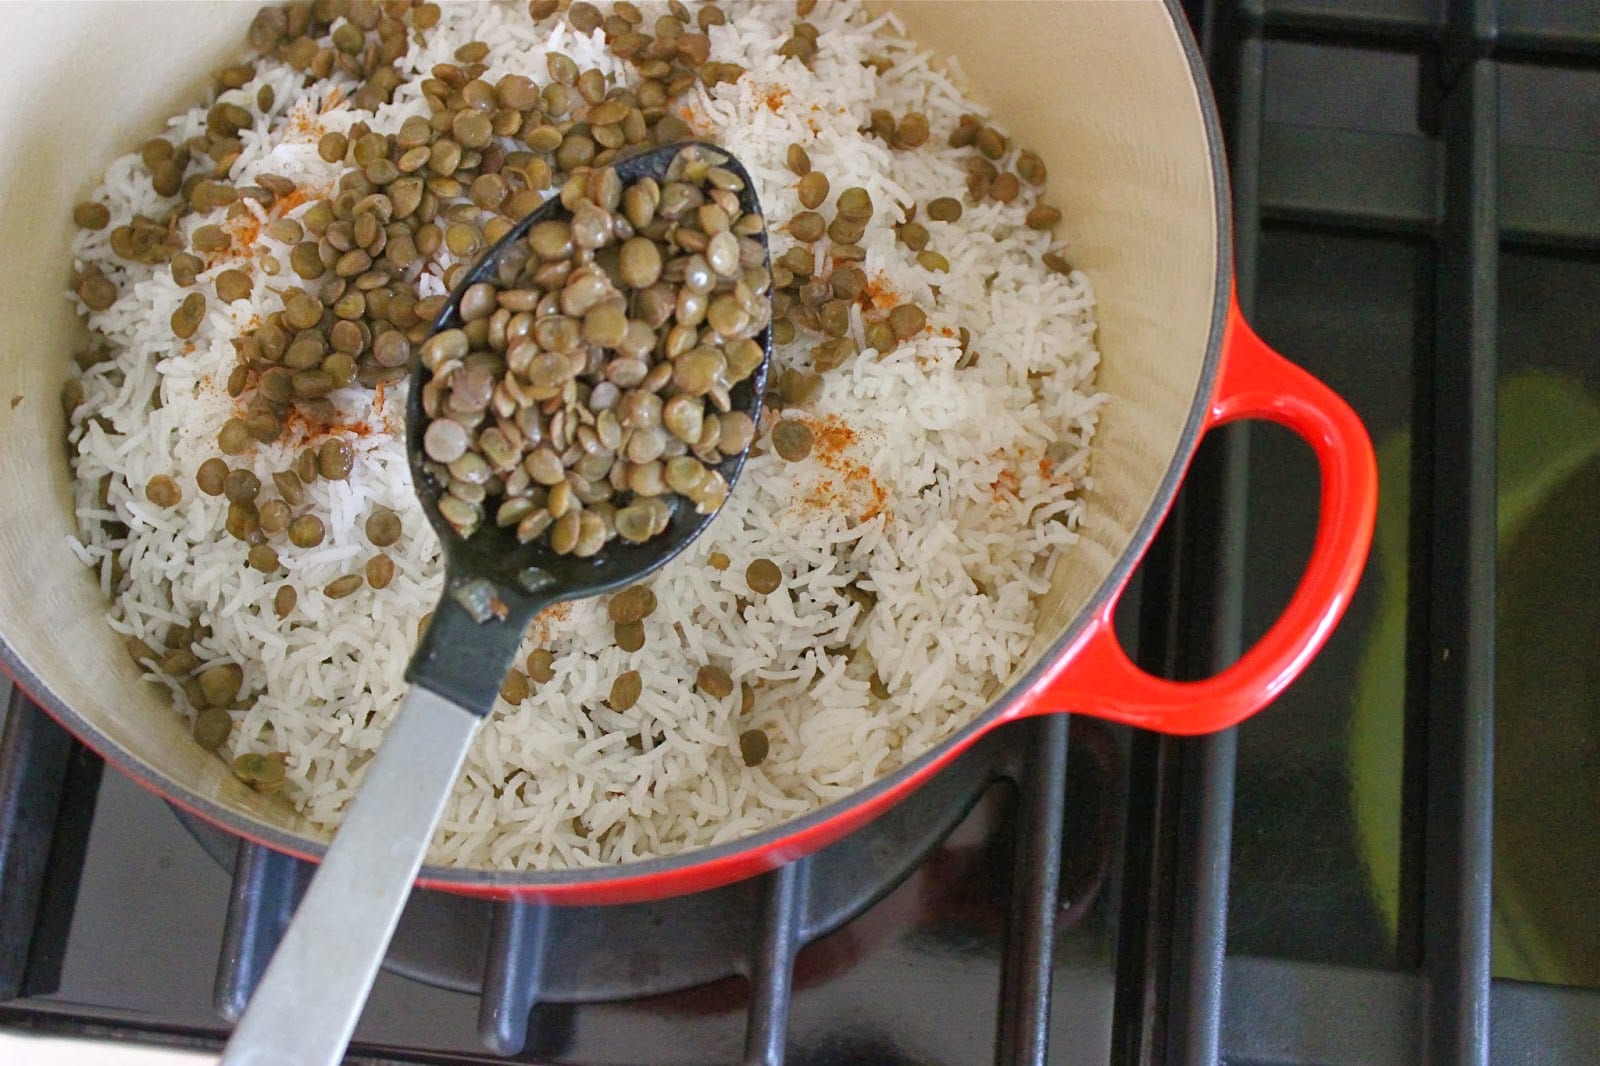
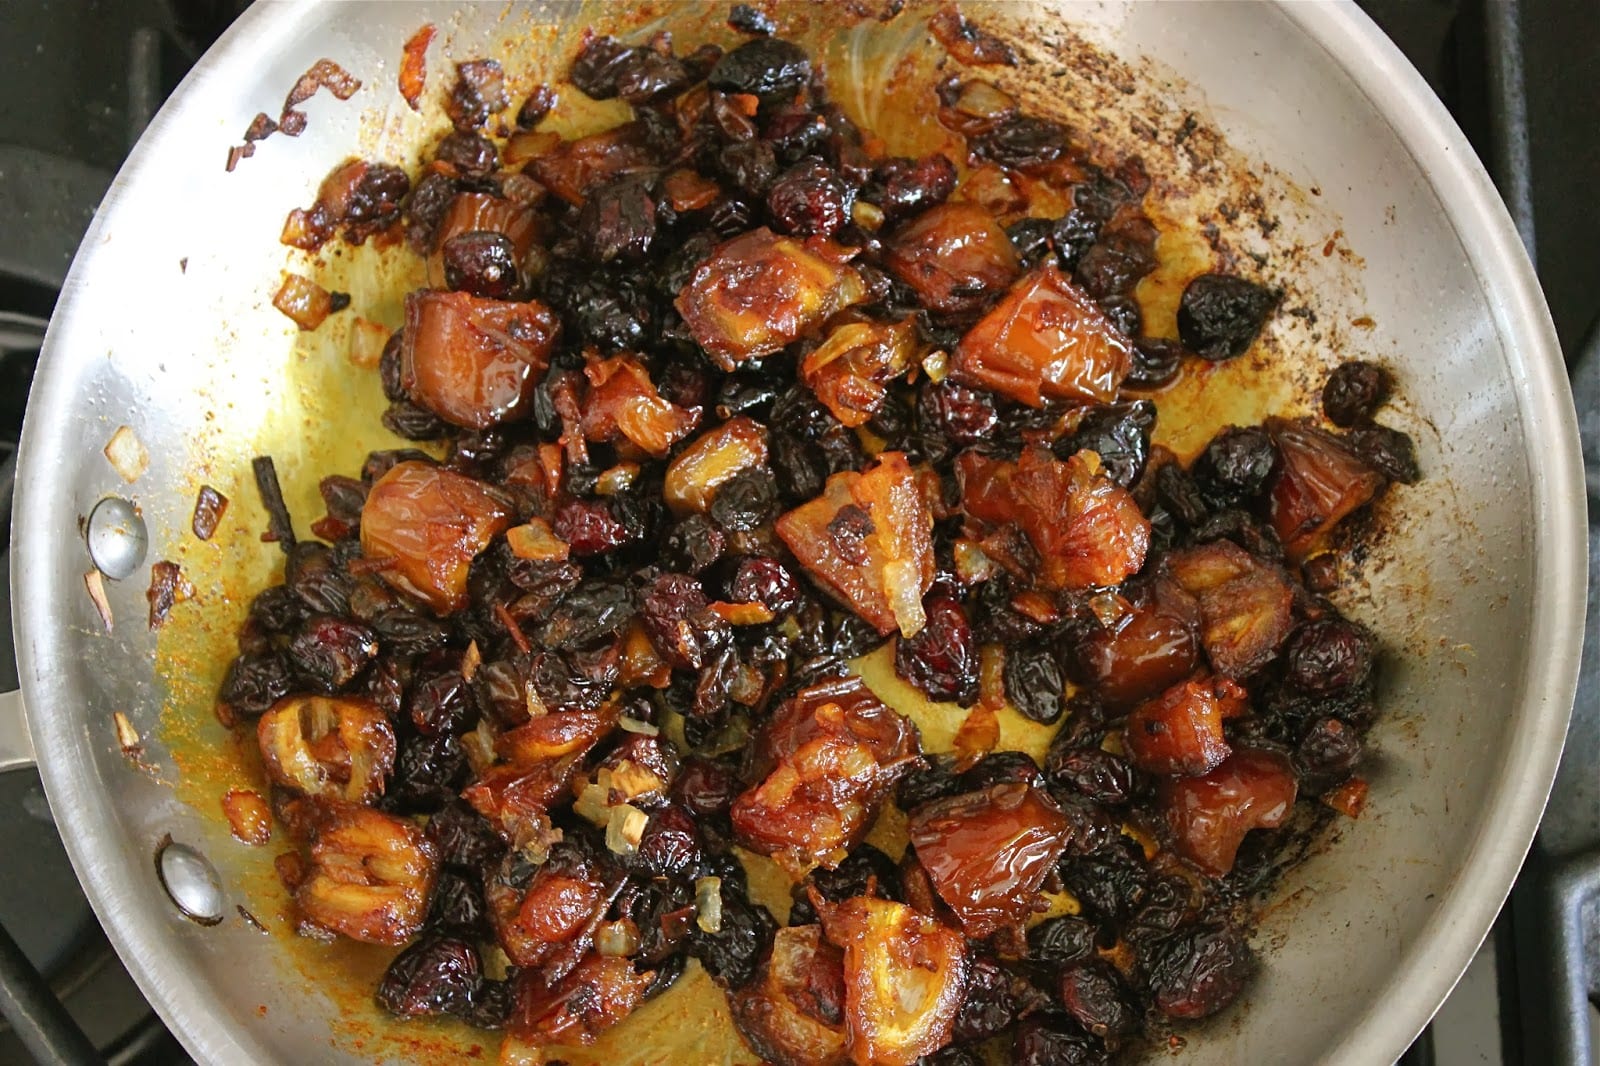
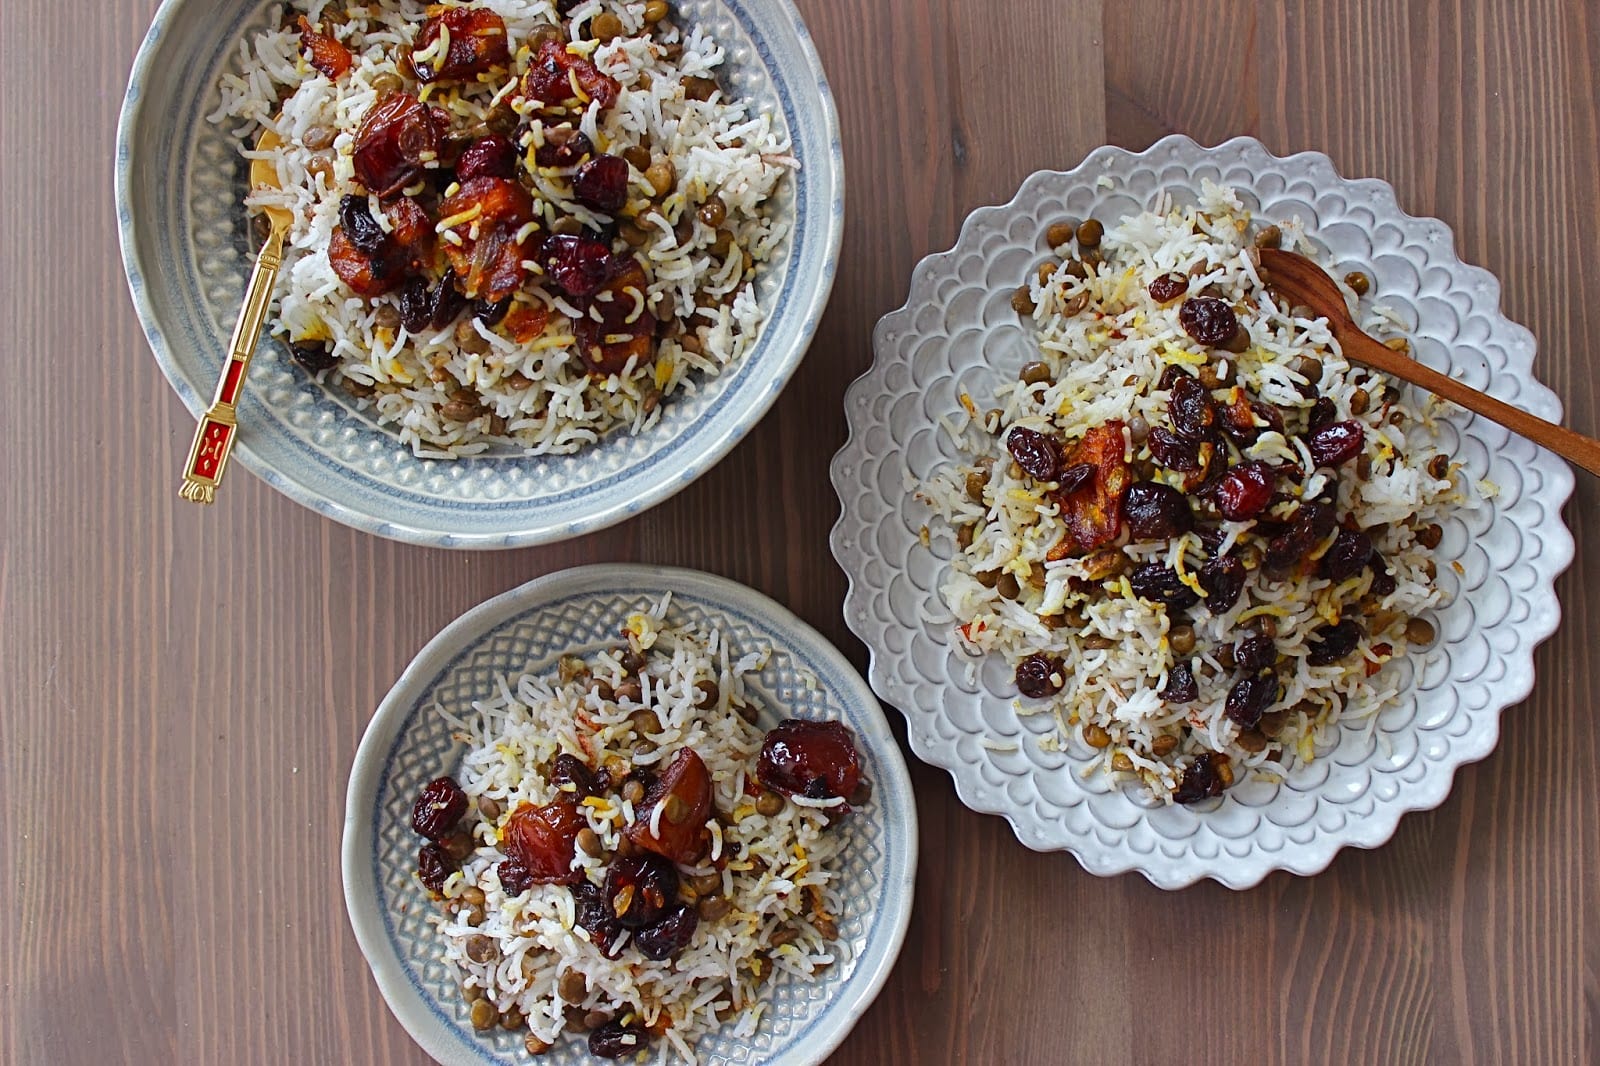
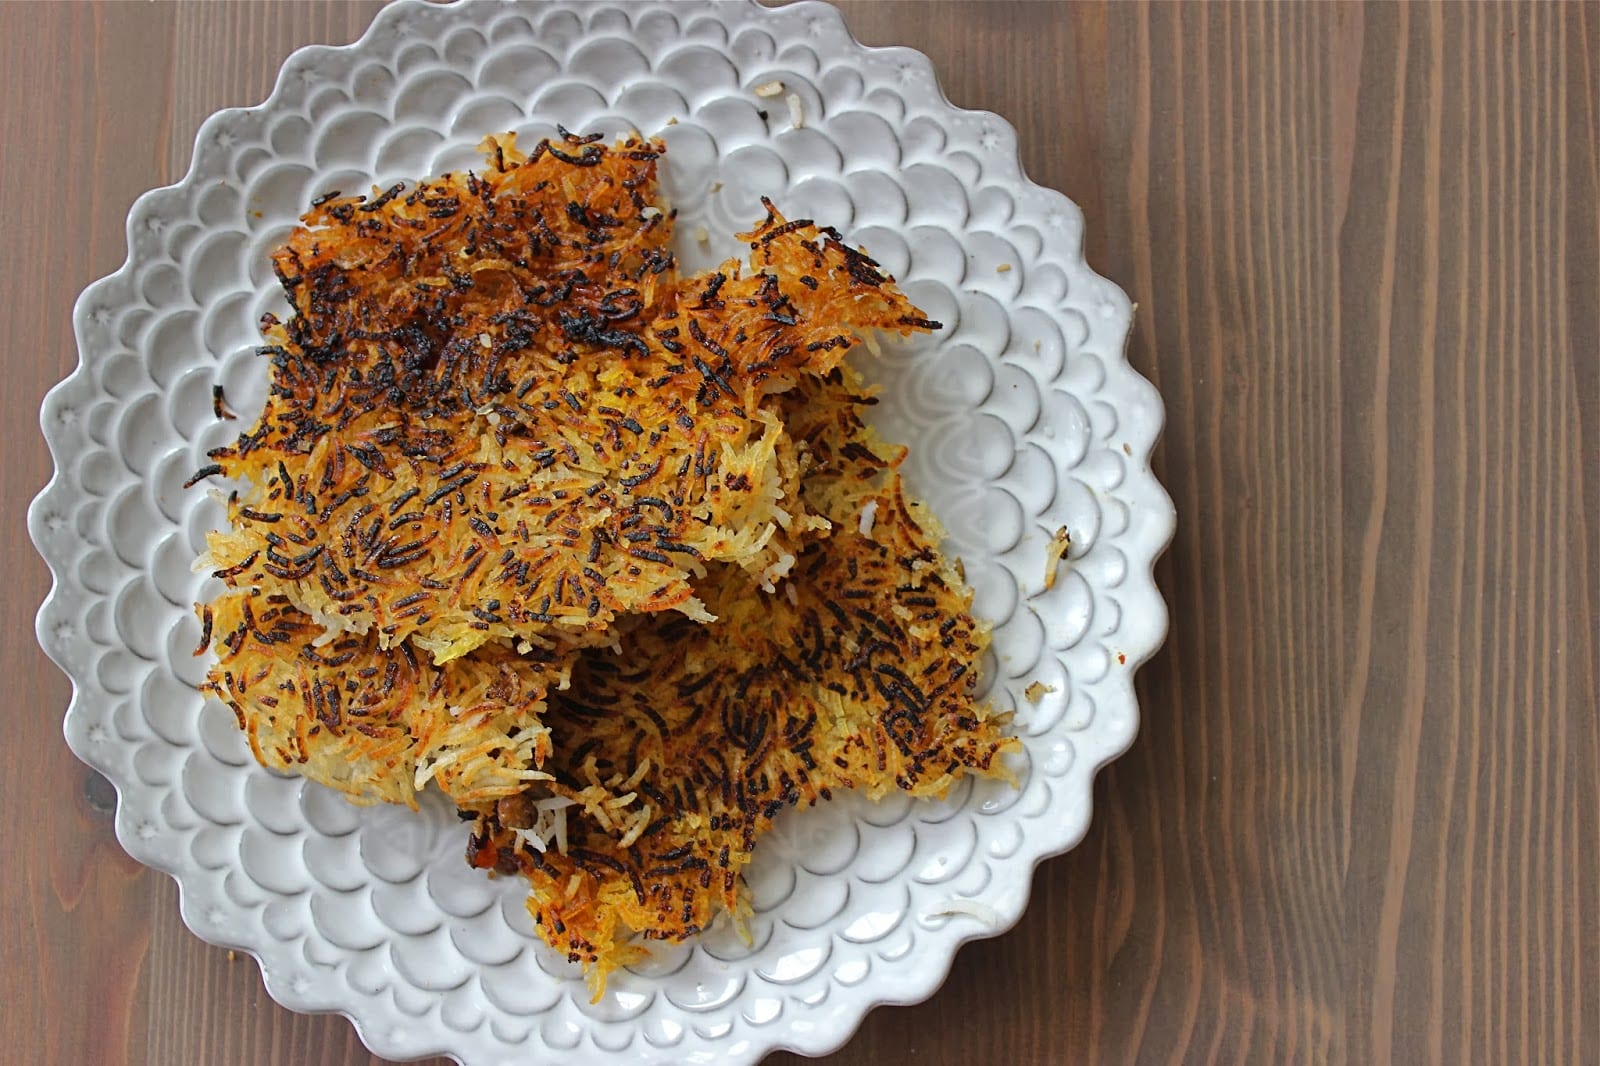
Adas polo literally means lentils and rice.  It is a very common, everyday dish typically served with a fried, or hard-boiled egg.  I think a poached egg would also be great.  Ultimate comfort food.  It has also taken on the role of the side dish to serve for Thanksgiving in many Persian homes.  The addition of the dates, raisins, cranberries and a hint of cinnamon sprinkled in the rice give it a beautiful festive autumnal appeal and add just the right amount of sweetness and texture.  It is also a great vegetarian alternative.  Typically,  adas polo is prepared with tahdig in mind.  Which means you would go through the two step method of preparing the rice.  First parboiling the rice and also cooking your lentils separately until they’re  al-dente.  Then steaming the two together until everything is cooked through and you have crunchy golden tahdig.  You also have the option of adding the dried fruits mixture to the steaming process or simply scattering them on top of your rice when serving – as I have done here. But if you don’t want to make tahdig you can prepare your basmati rice (white or brown) as you like, cook your lentils completely through separately, prepare the dried fruits mixture and mix them all together at the very end when serving.  But you know I’m going to urge you all to try and make tahdig.  And actually, steaming the rice and lentils together wonderfully melds all the flavors.

I was seven years old the last time my entire extended family had the opportunity to gather in one place.  This was before many of them scattered to various corners of the world, while some stayed – living through a revolution, a war and other struggles brought on by these events.  We might have been celebrating a birthday, it might have been Persian New Year, it might have simply been a dinner – a get-together.  As hard as I try, I can’t remember the exact occasion.  And at the time I’m sure no one had an inkling that this particular get-together would be the last time we would all be laughing, eating, and bickering together.  That those casual good nights and kisses at the door would be our very last.

As foreign as Battle Creek, Michigan might have seemed to me – as foreign and exotic as I might have seemed to Battle Creek – spending that Thanksgiving at Drew’s grandparents house was as familiar and loving as any family get-together from my childhood.  The linoleum-floored cozy kitchen, the shaggy rug, playing Canasata with Grandma and great-aunt Lolie, Grandpa’s morning coffee and doughnut ritual, Grandma’s Steinway piano and German antiques, the cuckoo clock, Grandpa enchanting me with his tales of serving in the Coast Guard in Alaska during World War 2, bringing down boxes full of black and white photographs capturing those moments (some of which now adorn our walls), Lolie and Ned sharing their love story and how they loved to go out dancing.  And of course the day long madness of preparing the great meal.  Tip-toeing around individual desires and needs of what and how a dish should be prepared.  (I’ve come to understand that it really takes some diplomatic, ambassadorial savvy to successfully get everything on the table to everyone’s liking).  And finally opening up the card tables, attaching them to the antique dining table, spreading out the table cloth and gathering around the table.  No matter what is served, or how it is served – it’s that moment of togetherness that is forever going to be etched in our memories.

All the elders of the family are now gone.  Grandma, Grandpa, Lolie & Ned.  As are my own grandparents and great uncles and aunts. All of them hearts and souls of the family.  We are told Thanksgiving is a day to give thanks and be thankful. And so I give thanks for that Thanksgiving in Michigan.  For the warm embrace of all those sweet people.  And with that same sentiment I offer you a lentil and rice dish.  It might not be familiar, it might not be traditional, but it is delicious and made with love.  And I hope at some point it can find its way to your table.

When the explorer sets foot on the foreign land gifts are exchanged, customs and languages described.  And when he leaves to make his long journey back home he returns with new stories, new discoveries and hopefully a box full of new recipes.

Happy Thanksgiving.

* For a more detailed guide to cooking Persian rice please see this post.
* If you don’t want to make tahdig (but you really should!) you can prepare white or brown basmati rice, prepare the lentils as described below, just make sure to add a little more water so they cook through, prepare the dried fruits mixture as described below and mix everything together when serving.


LENTILS AND RICE DISH WITH TAHDIG AND DRIED FRUITS – ADAS POLO

Ingredients:

Serves 4-6 as a main dish or 8-10 as a side dish

3 cups white basmati rice, washed and soaked in 2 cups cold water with 3 tablespoons kosher salt for 30 mins or up to 1 hour
water
salt
1 cup lentils, picked over and rinsed
2 1/2 tablespoons butter or ghee for rice, plus more for dotting, plus 2 tablespoons for dried fruits mixture
cinnamon, for sprinkling
1/2 teaspoon ground saffron, steeped in 2 tablespoons hot water, plus a small pich for tahdig
1/2 medium onion, chopped
8 large dates, quartered
1/2 cup dried cranberries, roughly chopped if they are large
1/3 cup raisins

1- While the rice soaks place the lentils in a medium sized pot and cover with 1 and 1/4 cups water and 1/4 teaspoon salt. Gently stir and cover with the lid slightly ajar  and bring to a boil over medium-high heat.  Once at a boil turn down the heat to medium-low and cook until all the water has evaporated and the lentils are cooked al-dente.  About 20 minutes.  Set aside.

2- In a large  non-stick pot or heavy bottomed pot (not stainless steel) bring 12 cups water and 4 tablespoons salt to a boil.  Once at a boil drain the rice and add the rice to the pot (do not stir!).  Return to a boil and keep a close eye on it.  Skim off any foam.   Test your rice after 6-8 minutes until the rice is al-dente.  Once al-dente drain the rice and give a quick gentle rinse under cold water.  Allow the rice to drain completely.

3- Give your pot a quick rinse.  Have the rice and lentils close by.  Melt 2 and 1/2 tablespoons butter or ghee over low heat.  Make sure the melted butter covers the entire surface of your pot and along the sides.  If not add more butter accordingly.  Add a pinch of saffron to the oil and swirl around.  With a spatula add enough rice to fully cover the bottom of the pot. Using the back of the spatula or the back of a wooden spoon pack down the rice firmly. Sprinkle with a little bit of cinnamon.  Add a layer of lentils.  Add a layer of rice sprinkle top of rice with cinnamon.  Repeat, alternating rice, cinnamon, lentil layer in the shape of a pyramid.  Your top layer should be a rice layer.  Using the handle of a wooden spoon poke a couple of holes in the rice to allow the steam to escape.  Dot with a little butter or drizzle with a little olive oil.  Cover and turn up heat to medium-high.  Cook for 10 minutes.  (Don’t go anywhere!  The tahdig can burn very quickly)

4-  Turn down the heat to medium.  Lift the lid and cover with a clean kitchen towel or a couple of layers of paper towel.  Place the lid firmly back on the pot and cook for 10 minutes.

5- Turn the heat down to low.  Place a heat diffuser under the pot and cook for 40 minutes.  In the meantime prepare the dried fruits mixture.

6- In a medium sauté pan melt 2 tablespoons butter (you can use coconut oil or olive oil instead as well) over medium-high heat.  Add onion and a pinch of salt.  Stir constantly for 5-8 minutes.  Turn down heat to medium-low and cook for another 10 minutes, until the onion has softened and turned golden.  Turn heat up to medium and add all dried fruits.  Give a quick stir and add half of the saffron water.  Stir and allow dried fruits to soften.  About 10 minutes.  Take off heat and set aside.

7- When the rice is done remove lid and with a spatula gently scatter the rice and lentils mixture on a serving platter.  Drizzle the top with the remaining saffron water and scatter the dried fruit mixture on top.  Gently remove the tahdig and serve on the side.

Will keep in the fridge for up to 3 days and in the freezer for up to 3 months.

Uncategorized

AN EGGPLANT DIP WITH KASHK AND THE TALE OF A LEATHER JACKET – KASHKI BADEMJAN


♪ Music we’re cooking to ♪

Mama, today at school – at lunch time – I dipped my carrots in the hummus.  When my carrots finished I dipped the apples.  When the apples finished – it was…(dramatic pause) FINGERS TIME! – Soleil

Have you heard?  The motorcycle jacket is back.  A fashion magazine told me so.  So it must be true.  It was a couple of months ago though – so it’s probably old news by now. But still – it begs the age-old fashion question: if you wore it the first time around (or more like in its second or third incarnation) can you still pull it off? 


9:00 pm – the kids are tucked in bed.  Drew and I – operating on automatic – clock out and shuffle into the decompression chamber – aka the office. No words are exchanged.  We retreat to our respective posts.  Me – in front of the computer.  He – at his bass guitar – providing my nightly soundtrack. He’s rehearsing for the upcoming school event.  A band made up of slightly aged, musically inclined parents along with fresh-faced school faculty. His agile fingers work through the familiar chords.  Elvis Costello, early years REM, Pete Townshend (like I said slightly aged parents). And just like that – my eyes glaze over – once again hypnotized and transported to another time and place by those few simple chords.  I stand, slowly, but with purpose.  Hypnosis has fully set in.  I walk over to the closet.  My arms stretch in to reach the very deep dark back.  I know it’s there.  My hands fumble over other garments now packed away; just in case: what if I’m invited to a formal ball (vintage cape – mine), what if I hike Mt. Everest (Taiga – his), what if we get hit by a major snow storm in L.A. (parkas – ours).  I know it’s there – what’s so funny – I’m on my toes – about peace – reaching deeper – love – I know it’s there – andreach – understanding – there it is.  Sturdy, smooth, zippers in all the right places,  with that oh-so-familiar and comforting smell of worn-in  leather. My motorcycle jacket.  

Hello, old friend.

For an entire year I worked after schools and all summer long to save up for this jacket. And the events of the day when I bought it were just as momentous as the purchase itself.  My Aunt Dixie had taken me to a leather goods bazaar somewhere in downtown Manhattan. I was visiting New York City for the very first time.  The trip that sealed my everlasting love affair with that city.  It was the late 80’s and I was in my early teens.  Life was exciting and full of promise, the music that accompanied the need for the jacket pounded with anarchy and rebellion.  And fashion was…a black motorcycle jacket to go along with the other big ticket item that drained a teenager’s life savings – Fluevogs

Ceremoniously I take the jacket off the hanger, and with a sense of ease and familiarity, slip it on.  Just like I had done every fall and winter (and sometimes even in the warmer months) all those years before it got finally stored away in the solitary confinement of the closet. The heavy weight of the jacket rests comfortably on my not-so-broad shoulders; the warm embrace of a long-lost companion.  The safety pin I had attached to the broken front zipper dangles back and forth, setting me deeper into my hypnotic state.  

Rainy and grey Vancouver skies, musty and crowded bus rides, high school, first love, first heartbreak, countless concerts, night clubs, university, warm breezy nights playing billiards and making haughty and broad proclamations about Joyce, Beckett and Shepard as only twenty-year-olds can, artistic endeavors, achievements and disappointments, travel across borders, a new life, palm trees and sunny skies, shiny blue Buicks and meeting the love that currently serenades me nightly.  This jacket has borne witness to my story and could probably tell it better than I can. Up until roughly 1997 that is.

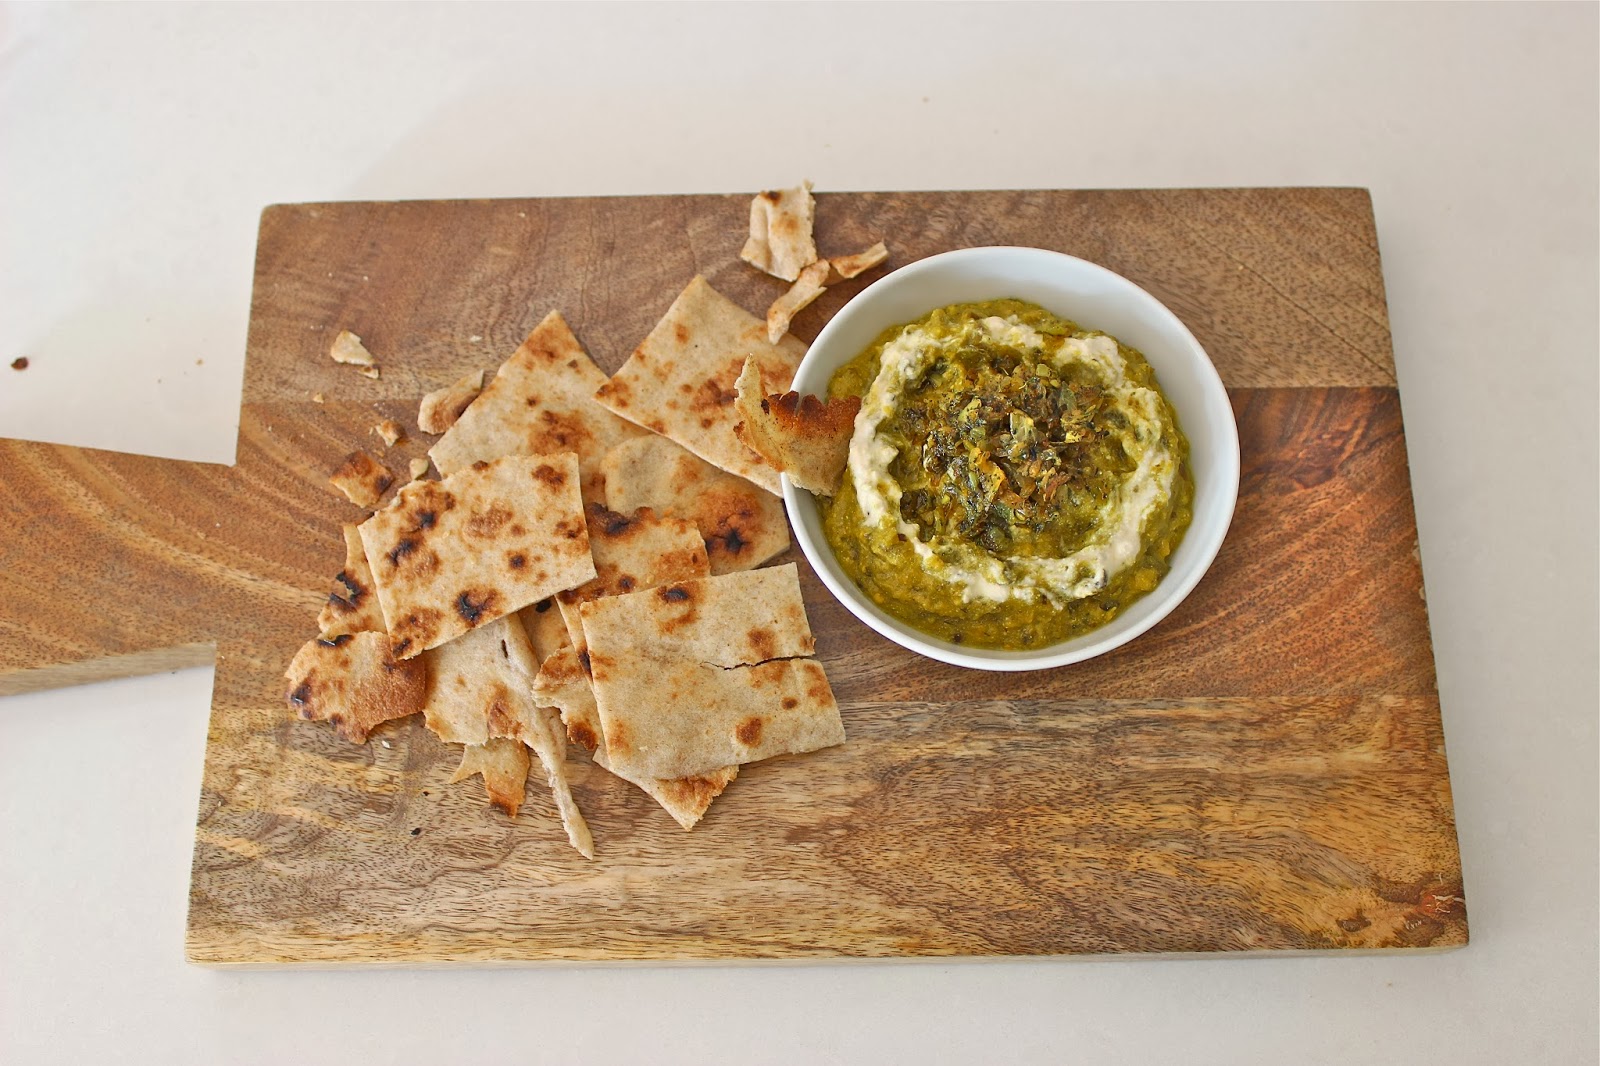
Kashki Bademjan is an eggplant dip that I guarantee will give baba ganoush a run for its money.  Its ingredients and preparation are quite simple. First, you roast the eggplant in the oven and then finish cooking it off on the stove with a little water, sauteed onions and maybe a sprinkle of turmeric and saffron.  But it’s the finishing garnishes that really give this dish its maximum flavor impact and make it dangerously addictive and delicious. I recommend using Japanese eggplants since they have thinner skins and I find them to be more flavorful.  Japanese eggplants also have less seeds so they are not as bitter as other varieties. Because of their thinner skin I don’t peel them; but if you do use any other type make sure you peel the skin.  Traditionally the eggplant for Kashki Bademjan is first fried in a pan. I’m not a big fan of frying anything.  Not only for health reasons but also because I can’t stand all the oil spattering everywhere and the mess.  So I like to roast the eggplant first in the oven for about 20 minutes or so.  The result is just as fantastic as frying them.  Kashki Bademjan is served warm with bread as an appetizer/ dip or can be served alongside the main meal as a side dish.  And of course, if you run out of bread there is always (dramatic pause) FINGERS TIME!

Caramelized onion, mint and garlic – naana dagh/piaz dadgh/seer dagh – is a garnish used quite frequently in many Persian dishes.  You can always prepare a large batch of caramelized onion, mint and garlic ahead of time and store it in the freezer for future use.  You can use it on soups, other dips like hummus or even on burgers.  Patience is the secret ingredient in well caramelized (not burnt) onions and garlic.  It takes about 30 mins but it is well worth it to draw out the natural sweetness from both the onions and the garlic.  You can caramelize the onion and garlic separately or together.  Dried mint is also added to the caramelized onion and garlic but only at the very end so that it doesn’t burn.


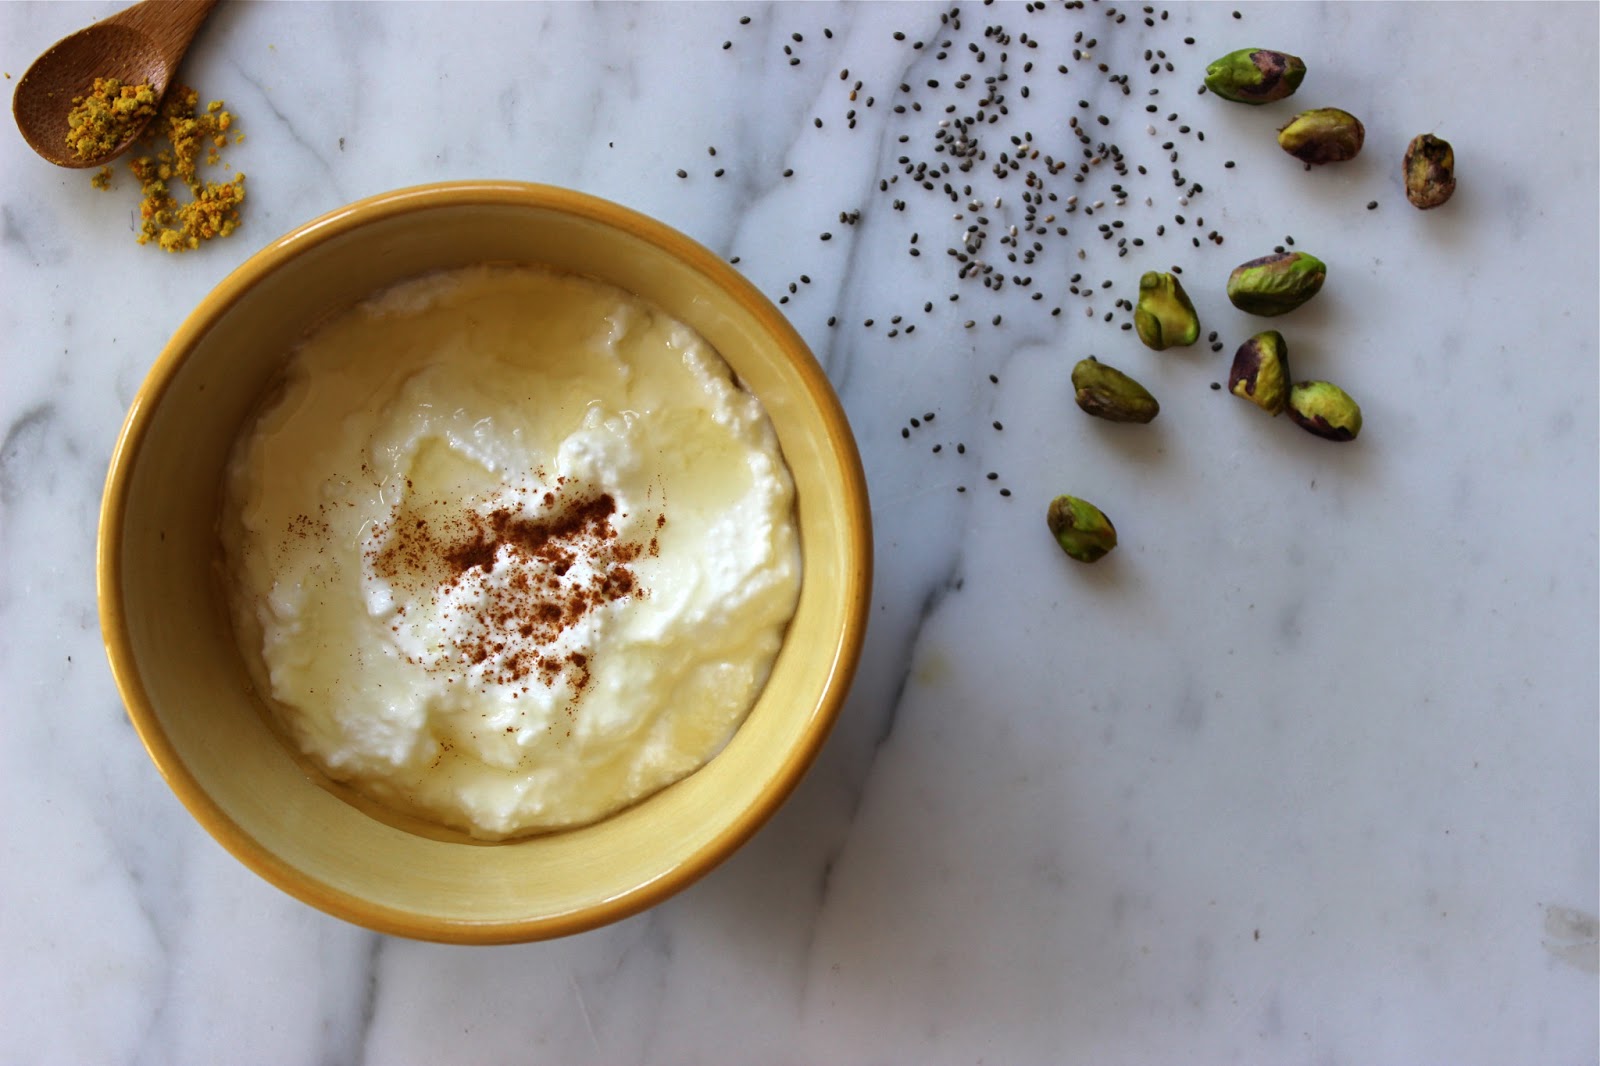
The last thing that is mixed in to the eggplant dip is a creamy slightly tart ingredient. This can be in the form of strained (Greek) yogurt, sour cream, or even creme fraiche.  (I haven’t tried it with creme fraiche yet but I think it would be great.  If you do please let me know!  And personally I’m not a fan of sour cream.)  But traditionally it is an ingredient called kashk.  Hence the name of the dish – kashki bademjan – which literally means kashk and eggplant.  Kashk is often referred to as whey – but it is not whey.  It is fermented yogurt.  And it can either be found in a liquid or dried form.  If you use the dried form you have to add water to it to reconstitute it.  I practically jumped off my chair when I came across this article about kashk.  It is so exciting to see all these spices and ingredients that were such a part of my everyday meals as a child become so popular now.  Sumaq, turmeric, saffron, cardamom, rose water and now kashk.  You know kashk has made it if Mr. Ottolenghi is talking about it!  Kashk is typically used to add a depth of flavor and creamy consistency to soups (like a variety of aash – thick soups), dips such as kashki bademjan or even to everyday scrambled eggs.  For non-Persians kashk could be considered an acquired taste.  When making this dip my mom will often substitute strained yogurt for kashk if she is serving non-Persians.  But I urge you all to try this “umami flavor” (Mr. Ottolenghi’s words).  Just start with small amounts.  And for the record I’m still trying to figure out exactly what umami is.  I’m going to go with – deliciousness.  Kashk can be found in Middle Eastern grocery stores.  I recommend using the liquid variety as it is less work than the dried kind.  I recently tried my hand at homemade kashk (pictured at the top of this post). More to come on that later.


I slip my hands in the front pockets of my motorcycle jacket.  Before my fingers are fully immersed I anticipate and instinctually reach for the soft cottonball-like sensation of the torn-up lining – the holes in both pockets so wide and deep they reach halfway around the bottom of the jacket.  There is a comfort in these rips and tears. These pockets that for so many years kept my hands warm.  As I dig deeper I pull out various artifacts of a time long past – paper clips, torn up pieces of paper, old bus transfers.  I look at the date and times on the bus transfers and try to imagine where I was, where I was going, whom I was meeting.  I put everything back in the pockets.  I don’t have the heart to throw them out. These scraps have now become one with the jacket.  This is where they belong.  Before taking the jacket off I pop open the smallest pocket that is fastened with a button.  Keep in mind motorcycle jackets have many pockets.  I don’t expect to find anything there. Without much thought my fingers reach in and I pull out – ahem – an unmentionable.  My mouth drops open and I stand there aghast.  Drew looks up from his bass and stares stunned at me.  Our eyes meet and we break into uncontrollable laughter.  The hypnosis is broken. I take off my jacket – quite un-ceremoniously.  It gets hung back up.  The motorcycle jacket might be back in vogue – but this motorcycle jacket’s days have come and gone.  That is until my girls decide to break it out, dust it off and breathe new life and stories into it.

And for the record I own an identical white motorcycle jacket too.


EGGPLANT DIP WITH KASHK – KASHKI BADEMJAN

Serves 8-10 as an appetizer or as a side dish

Ingeredients

5 medium Japanese eggpant
1/3 cup olive oil, plus 2 tablespoons
1 medium yellow onion, peeled and sliced
3 cloves garlic, peeled and roughly chopped
1/4 teaspoon turmeric
1/8 teaspoon ground saffron (optional)
salt, to taste
pepper, to taste
water, roughly 1/2 cup
kashk OR strained yogurt OR creme fraiche, to taste
caramelized onion and garlic (recipe below)
walnuts, roughly chopped (optional)
saffron water (optional)

Preheat the oven at 400 degrees F.

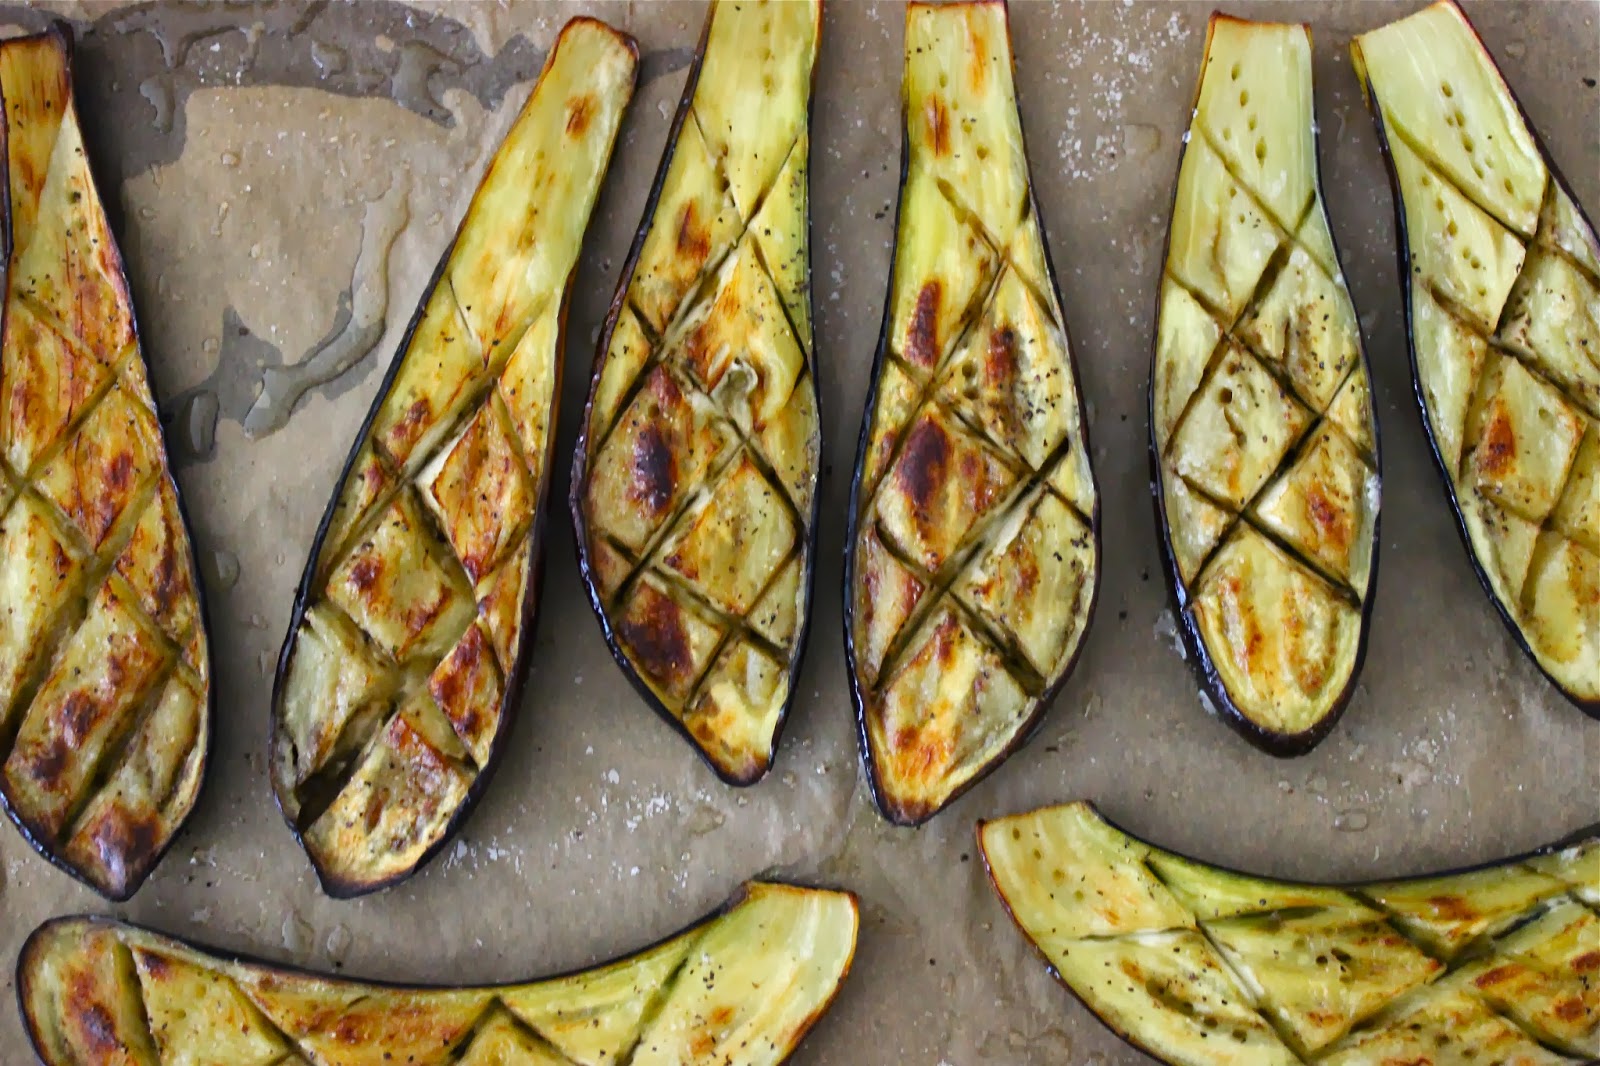
1- Wash the eggplant well and cut off the tops.  Cut the eggplants in half lengthwise.  Carefully score the eggplant on the flesh side in a cross-hatched pattern.  Be careful not pierce through the skin. Place the eggplant halves flesh side up on a baking sheet lined with parchment paper.  Cover each eggplant half with the olive oil. You can use a brush or your fingers.  You will probably need to use all of the 1/3 cup of oil.  Eggplant absorbs a lot of oil.  Liberally sprinkle each half with salt.  Roast the eggplant in the oven for 20-25 minutes.  Until the eggplant has softened and browned.  Once you place the eggplant in the oven you can simultaneously start caramelizing the onion and garlic (recipe below).

2- Heat 2 table spoons of olive oil in a large pan over medium heat.  Add the sliced onion, sprinkle with a little salt and saute until the onion softens and is translucent stirring to make sure the onion doesn’t burn or stick. About 10 minutes.  

3- Add the garlic and and saute for another 10-15 minutes.  Until the garlic softens. Turn down the heat if necessary.

4- Add the roasted eggplant to the the onion and garlic mixture.  Add about 1/2 cup water, to barely cover the whole mixture.  Make sure it’s not too watery.  Start with less water and add more if necessary.  Add the turmeric and salt and pepper to taste ( I added about 1/4 teaspoon salt) and sprinkle in the ground saffron if using.  Bring the whole thing up to a gentle boil and turn the heat down to medium and allow to simmer for 10 minutes uncovered until the water has been absorbed and all the flavors have melded.  Stirring occasionally.

5- Turn off the heat.  Mash the eggplant mixture with a fork or place in a food processor and pulse a few times.  Place mixture back in the pan. 

6- One tablespoon at a time stir in the kashk, strained yogurt or creme fraiche.  Taste and add more to taste.  I used about 3 tablespoons kashk, OR 2 tablespoons strained yogurt.  Adjust seasoning to taste and garnish with about 1 tablespoon of the caramelized onion, mint and garlic.  Add chopped walnuts on top if using.  You can also drizzle on a little saffron water for added color.

Serve warm or at room temperature with some bread.

Will keep in the fridge for up to 3 days or in the freezer for up to 3 months.

CARAMELIZED ONION, MINT AND GARLIC – NAANA DAGH, PIAZ DAGH, SEER DAGH

makes about 1/2 cup

Ingredients

1 large yellow onion, finely chopped
5 large cloves garlic, finely chopped
1/2 cup olive oil or oil of choice 
1/2 teaspoon salt
1 1/2 teaspoon turmeric
3 tablespoons dried mint

1- Heat the oil in a medium pan over medium-high heat.  Add the onion and saute for about 6-8 minutes.  Stirring continuously so the onion doesn’t burn.

2- Turn down the heat to medium-low and add the salt and garlic.  Saute for about 25 minutes. Stirring often until the onion and garlic are nicely caramelized (not burnt!).  Turn down the heat if needed.  In the last few minutes add the turmeric and stir.

3- Turn the heat off and add the mint.  Stir to incorporate. 

Serve warm as a garnish over kashki bademjan or other dips such as hummus or on top of soups and aashes.

Use as much as desired and save the rest in the fridge for up to 3 days or in the freezer for up to 3 months.


Uncategorized

JARRING TOMATOES – CALABRESE STYLE – PART 2

Continued from Part 1

Before continuing my conversation with Teresa about her family’s annual tomato jarring tradition, I’d like to thank all the families involved in this years pomodori event and for sharing the ins and outs of this amazing tradition.  Thank you to the families Tiano, Marelli, Mercuriano, Novia, Cipollone, Corbo, Ferrara and Deravian.  And to my brother Ramin for the great photos (stills!).  Grazie mille a tutti.

Can you walk us through the jarring process?

Try to buy ripe but firm tomatoes.  Once you get the tomatoes home you need to take them out of the bushels.  They need to be sorted in case there are any rotten ones (if they stay in the bushel the rot will spread).
  
The tomatoes need to be laid out on a large flat dry surface in a single layer.  We normally use three or four large folding tables.  The tomatoes need to ripen because the riper they are the more sauce they will yield. This process can take anywhere from 4-10 days depending on how ripe the tomatoes were when you purchased them. 

You need to ensure that the mason jars are sterilized .  Lids need to be sterilized as well and you need to be sure there are no dents, dirt or rust on them (if they are being reused).

The sauce can be made indoors or outdoors.  My family makes it outdoors.  We usually make it at my sister’s house using the space in the garage (thoroughly cleaned) and her driveway.

SUPPLIES: (based on making 4 bushels or 96 kilos which should yield approximately 55-60 jars; enough for one year for one family if you use 1 jar per week)

jars – 15 per bushel of tomatoes, with lids
extra large wooden spoon/spatulas (2 or 3)
extra large colanders with long handles (there are specially designed ones)
stainless steel heavy duty pots (42 litre size minimum)
4-6 clean plastic buckets (large size)
electric tomato squeezer machine
burners (my family has two going)
propane gas tanks
access to cold water
clean bushels (at least 4)
cheese cloths (large 4)
long aluminum skewers (2)
ladle
medium cooking pot (everyday pot is fine) 
canning jar funnel
oven heat-resistant glove

STEPS:  Day of tomato sauce making.

REMEMBER: STEPS 2-10 ARE DONE SIMULTANEOUSLY IN AN ASSEMBLY LINE LIKE FASHION AND EACH STEP REQUIRES A MINIMUM OF TWO PEOPLE.

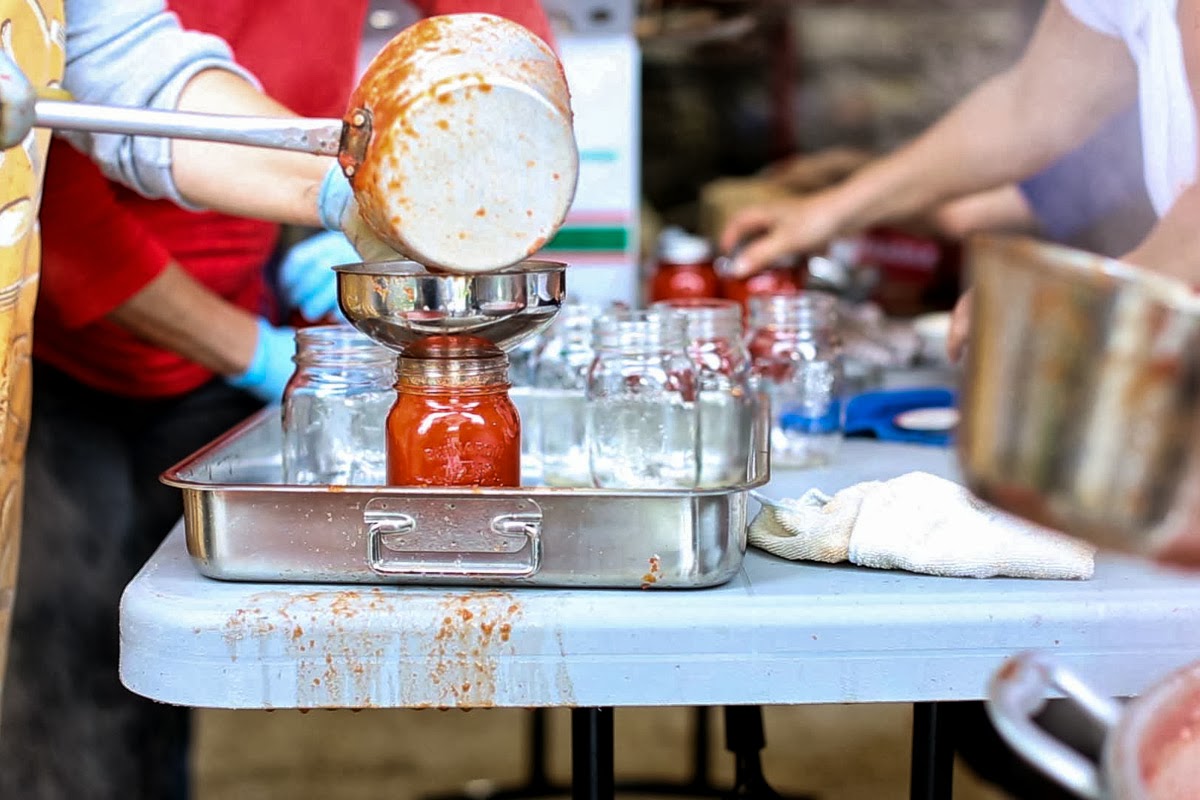
1. Assemble your electric tomato squeezer machine on a table and have 1 clean plastic bucket or pot placed below it where the puree comes out, a medium aluminum roasting pan beneath the nozzle where the skin and seeds come out and another bucket to pour the seeds and skin into.  Place your bushels over large pots or buckets. 

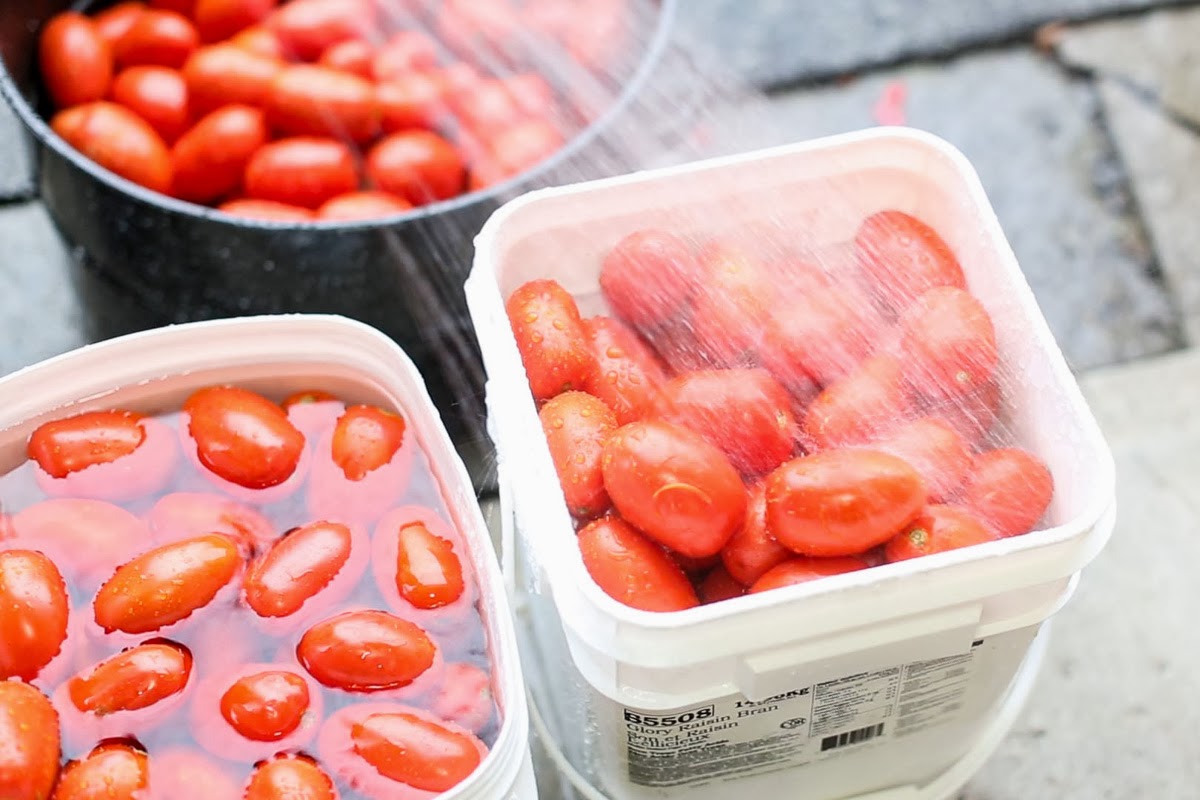
2.  Tomatoes need to be washed thoroughly, to do this put as many tomatoes  as can fit into your buckets and wash thoroughly with cold water (see pictures in Part 1).  Drain the dirty water.  Fill your stainless steel pots about 2/3 with water so that all tomatoes are submerged.

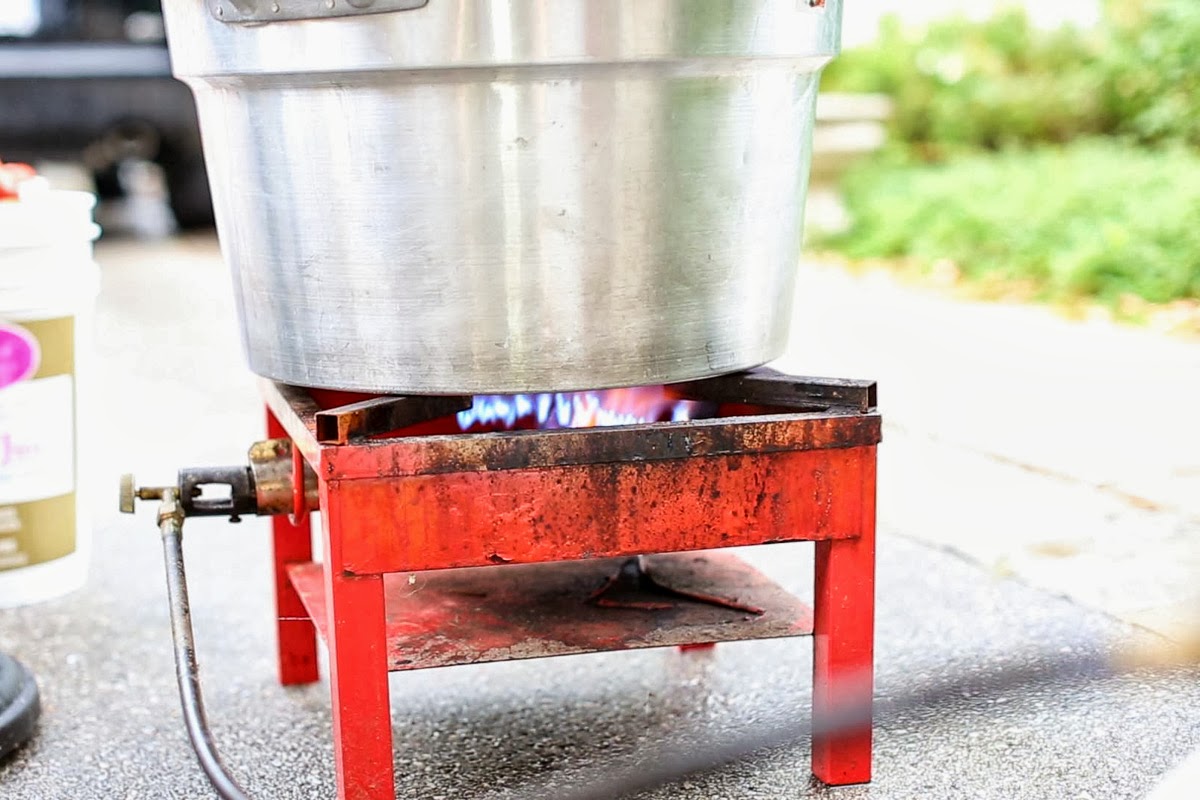
3.  Place the pots on burners, turn the fire on and bring the water to a full boil.  Let tomatoes cook for about 20 minutes, stirring regularly to ensure they do not stick to the bottom of the pot.

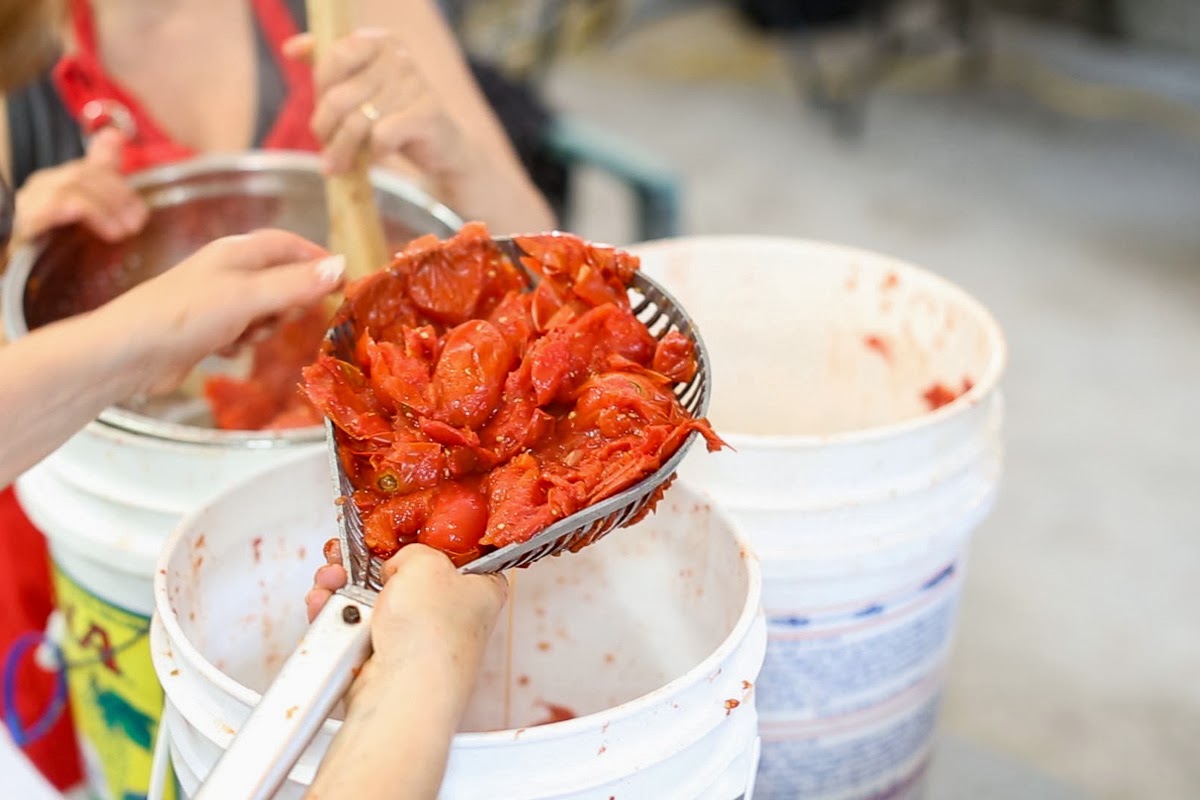
4.  Place cheesecloth in bushel (cover bottom and sides) and carefully pour cooked tomatoes into bushel.  Poke the cooked tomatoes with skewers to allow excess juice to be strained through cheesecloth (approximately 10-15 minutes).

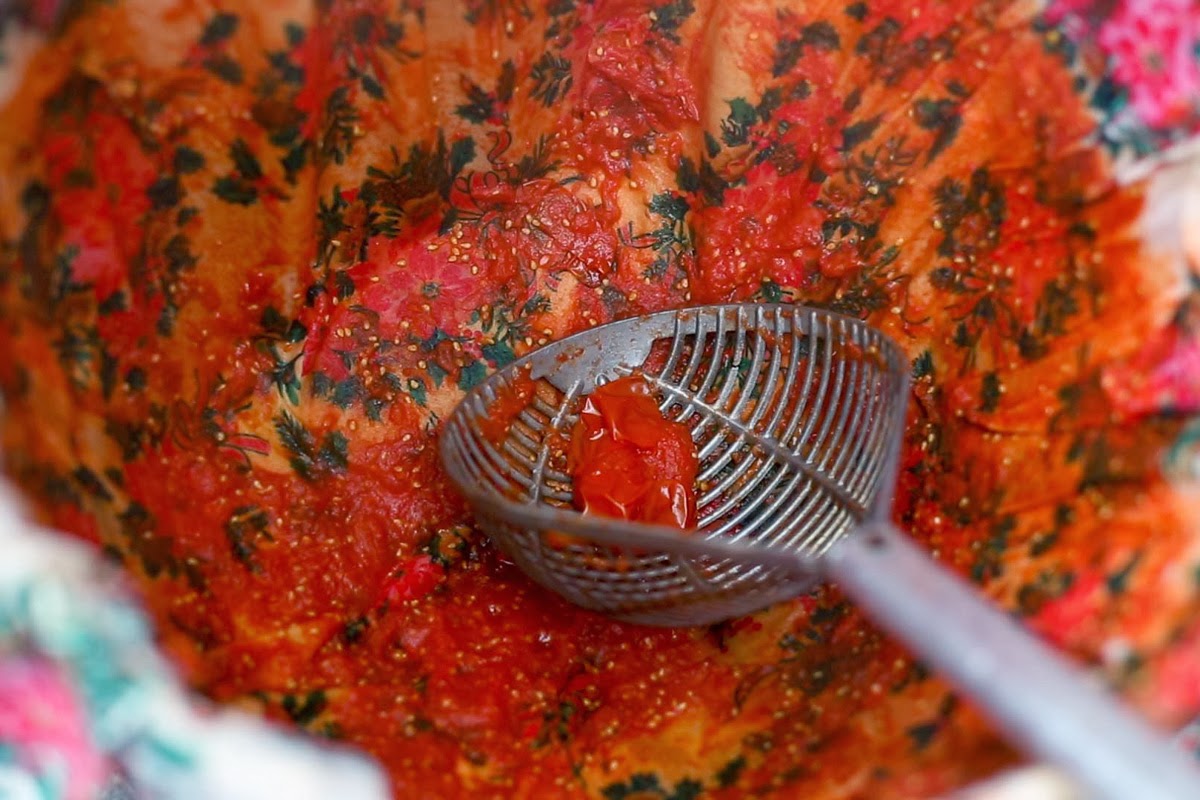
5.  Once the excess juice has been strained, it has to be pureed through the electric tomato squeezer.  This portion usually requires three people; one person to continuously place tomatoes into funnel part of machine, one person to operate the machine and one person to constantly clean the nozzle so that it doesn’t clog up and to ensure the skins go into the pan and then into the bucket. Once the bucket has been filled place it aside.

6.  You may choose to repeat Step 5 one more time using the skins and seeds.  This depends on how thick the puree is initially.


7.  Once you have pureed your cooked tomatoes you pour the puree into the large pot.  2-3 inches from the top.

8.  The pot needs to be placed on the burner and brought to a full boil, stirring regularly.

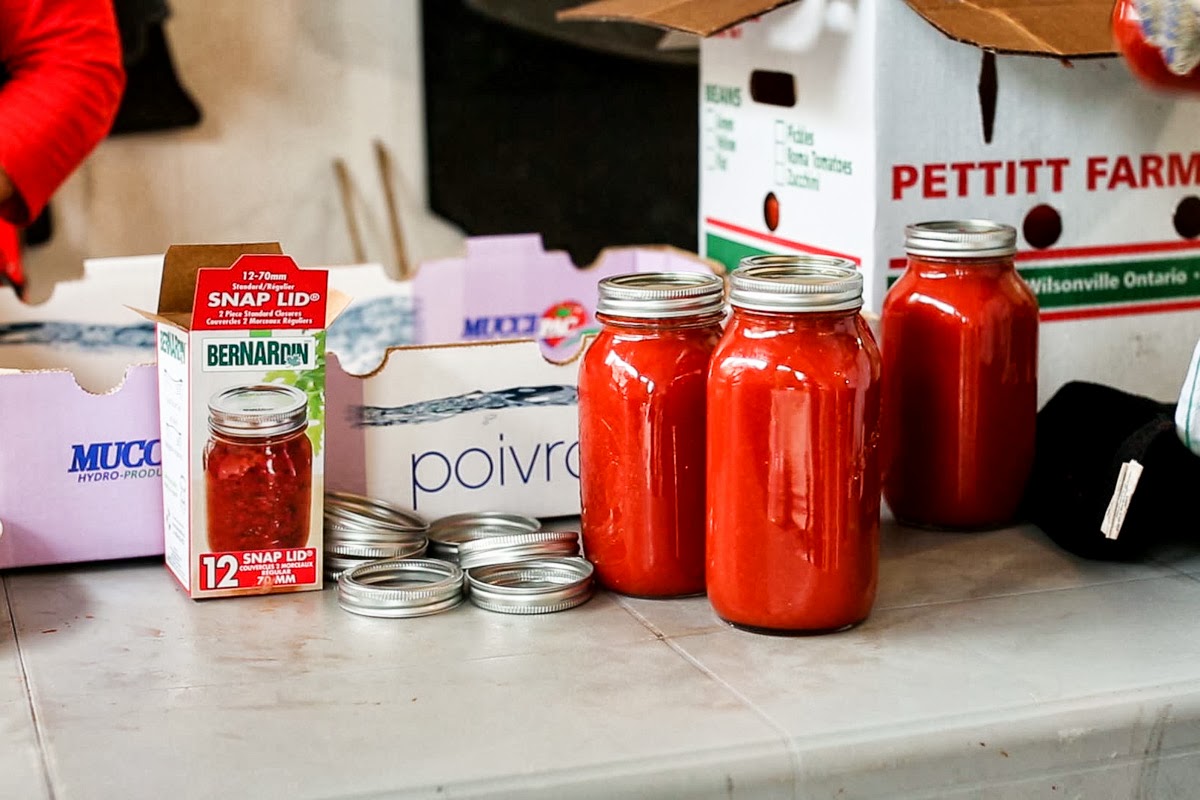
9.  Remove tomato squeezer machine from the workspace.  Wipe it down.  Make sure clean empty jars are placed on workspace.  Snap lids need to be heated (sterilized) so place them in a medium pot and immerse in boiling water and heat for a few minutes.

10.  Once the tomato puree comes to a full boil it has to cook at that heat for 20-25 minutes, being stirred constantly. 

11.  Begin filling your jars.  This process takes about 3-5 people.  One person to continue stirring the puree on the heat.  One to fill the jars using a ladle.  One to place heated snap lids with rims and clean the jars if excess puree has spilled over.  One person to make sure the rims are securely tightened (make sure this person is wearing heat resistant gloves) and one to place the filled jars into boxes.

12.  You will hear a popping sound either immediately or throughout the cooling down period.  This sound ensures that the jars have been properly sealed. 

13.  Boxes of jars need to be stored in a dry dark place.  The sauce needs to cool down for 2-3 days.  It’s then ready to use.  The jars will keep for at least a year.

Please note:  Teresa tells me since they double boil their sauce they do not put the jars in a hot water bath process.  Nor do they add any lemon juice or citric acid to their tomato sauce.  However if you choose to do so for extra assurance against spoilage there are plenty of resources available to give you exact amounts on the lemon juice/citric acid addition and how long to immerse your jars in the hot water bath (depending on where you live).

I am so inspired to make and jar our own tomato sauce/puree.  With summer now long gone and fall in full swing (thankfully we had our first LA rainfall today) this gives me a few months to gather my supplies and recruit interested parties.  Wanna sign up? 

All photos in this story courtesy of Ramin Deravian copyright 2013


Uncategorized

JARRING TOMATOES – CALABRESE STYLE – PART 1

Some cultural traditions (habits?) are very hard to break.  Food as a souvenir is one that stands out in my family.  Whenever my parents come to visit from Vancouver they pack their suitcases with barbari bread (it came out of the oven this morning – I told the baker I was visiting my daughter and grandchildren so he threw in a few extra…) pistachios, toot (fresh mulberries), feta cheese, the saffron Mrs. So-And-So just brought back from Iran, cinnamon, tea, etc.  Keep in mind that I live in Los Angeles – aka Tehrangeles. All of these things are readily available here. But somehow – this food stowed away in those suitcases, and then eagerly pulled out by the girls in search of goodies for themselves – tastes better than anything I could purchase at my local Persian market. (Those suitcases don’t go back empty either – Trader Joe’s has yet to open in Canada.)


The very first time my lovely sister-in-law Teresa and my brother Ramin visited us  (she was his girlfriend at the time), I knew she was the perfect match for my brother and that she would fit in seamlessly in our family. Within minutes of arriving at our house she zipped open her suitcase and pulled out the most beautiful jar of homemade pure tomato sauce which had survived the trip from Toronto just fine.  It also helped that she could fit right in and not be baffled by our loud and passionate kitchen table conversations, comedic hand gesticulations, and of course our passion and love of food.  She is Italian after all – Calabrese – from Calabria to be precise.  Which also qualifies my Roman-born brother for some good-natured teasing!

Teresa and her family jar tomatoes annually in Toronto.  It is an event I have wanted to be a part of but have been unable to find the time.  They can’t say exactly when it will happen since they are at the mercy of the tomatoes.  Which makes purchasing a plane ticket difficult.  So this year I asked Teresa if she could virtually walk us through this amazing family tradition.  I also asked my professional photographer brother if he could take some pictures.  And in typical Ramin fashion he couldn’t just snap a few photos – he had to make a film instead.  But we’ll have to wait for the film as the maestro is busy with other non-pomodori-related projects.  In its place, we have some stills from the said film.  

Here is Part 1 of my conversation with Teresa:

How long ago did you start your tomato-jarring tradition?
As far back as I can remember, I think my parents and aunts and uncles brought the tradition over from Italy. 

How and why did it start?
As the tradition started from Italy, I believe that my parents’ generation wanted to maintain it.  Also, it was economical and time-saving to have enough sauce for an entire year (and sometimes longer).

Who gets involved?  How many people does it take?
Well, it definitely is a team project.  How many people you need will depend on how many bushels of tomatoes you have.  Usually we make for three or four families.  But at the very least you need 3-4 people on the day you actually set aside to make the sauce.

What kind of tomatoes do you use?  How many kilos of tomatoes do you use?
We use organic Roma tomatoes.  The amount of tomatoes varies per year.  This year we made for four families and bought 14 bushels which is about 336 kilos.

Do you buy from a certain grower or farm?  Do you change every year?
We have bought our tomatoes from an organic farmer for the past twenty years.  It is a local Ontario farmer.


Do you use the hot water bath canning process?
When I was really young I remember my mom and aunts using the hot water bath canning process but it has been a long time since we have done it that way.

How many jars do you produce?
This year we produced 165 1-litre jars.

What do you typically use the jarred tomatoes for?  
We make a tomato puree, so it is mainly used for anything you would use tomato sauce for.  Pizza, pasta etc.  You can make chopped tomato, but my family has not done that for at least 15 years.

Do you see the younger generation, your nieces and nephews, carrying on this tradition?
If you had asked that question a few years ago, I would have said no.  But in the past couple of years my niece and nephew who are in their twenties have participated at different times throughout the process, which surprised me and makes very proud that they want to help.

Anything else you would like to share?
This tradition has evolved and changed over the years but the basic elements are still there.  It is a wonderful way to pay homage to our parents.  You also have incredible tasting and completely natural and organic tomato sauce to feed your family; and for me it is a day spent with family and friends, working but having fun at the same time.  I am so glad we still choose to do it. 

I’ve been toying around with the idea of jarring/canning/putting up our own tomatoes for some time now.  I guess I need to start looking for and recruiting some like-minded tomato sauce consumers to join me.  What do you think?  Would you be up for it?  Join me and Teresa and her whole family for Part 2 where Teresa will walk us through the actual jarring process…And tell me, do you travel with suitcases full of food?

All photos in this story courtesy of Ramin Deravian copyright 2013


Side Dish Uncategorized

Pesto – A Birth and Book Club – Beautiful Ruins

♪ Music we’re cooking to ♪

My water broke at 7:30am.  By 8:00am we were busy putting away all the food Drew had planned to prepare that night for Book Club – The Life of Pi.

It was a bright, clear and sunny Sunday morning in 2006.  Los Angeles never looked more beautiful.  Massive, in-your-face billboards, boulevards vast and desolate, cracked sidewalks and all. The freeways were clear.  For once.  So many months we had run through this scenario, talked through it – talked through it some more,  rehearsed the drive to the hospital.  And now here it was. The arrival of our first born was imminent.

Luna – Luna – Luna.

On the way to the hospital we made all the appropriate phone calls to family members. Then we made all the appropriate phone calls to fellow Book Club members.  In one adrenaline-infused breath I revealed our news and apologized for having to cancel Book Club.  But we’ll reschedule as soon as possible!, I kept repeating on various voicemails.  Hey, what if we had Book Club at the hospital? –  I wondered out loud.  No really – I think it could work – I insisted to a very anxious father-to-be – Drew.

All this before the first nurse at the hospital stuck the happy – to sad – to very much in agony face chart in front of my face and asked me to point to the facial expression representing the time I would like drugs administered.  I pointed to the happiest face.  Seriously – why wait?

All this before the medical residents that looked like they had stepped right off of the set of Grey’s Anatomy kept checking down below to see how much I had dilated.

All this before they stuck the very large needle in my back and Drew had to look away and take deep breaths because he is prone to fainting spells. (At Soleil’s birth they had to get the paper bag out for him – as they were sticking the needle in MY back – all the nurses rushed to HIS aid to keep him from fainting.)

All this before my beloved Dr. K and Nurse “House” (affectionately nicknamed by us after the TV show Dr. because of her tough love approach) played good cop/bad cop to get me to work harder to get this new life out.  I always appreciated my Dr’s  clear, firm, realistic demeanor.  Works for me.

All this…before that-one-forever-life-altering-moment.  When the comets collide – when the world stops and simultaneously the earth spins faster than proven possible and your heart as you once knew it no longer beats just for you.  Your heart is no longer yours.  She holds your heart now in her shriveled – been through a heck of a journey – newborn hands. You look to your partner – the only other person that understands this arresting seige of the heart – and in unison you both say “whoa”.

Luna – Luna – Luna.

She arrives on Book Club Sunday.

We recetly celebrated 11 years of Book Club. There’s six of us total – girls and boys. The past 11 years of Book Club have seen us through 60 books, just as many delicious accompanying meals, marriages, births (we just recently welcomed a new addition to our Book Club family – Keith and Heather’s baby L.) loss of loved ones, professional successes and heartbreaks, politics, presidents, but most importantly friendship; life-long friendship.  And of course, a love of books and good food.  Our motto is “because we read” (most of the time). At this point the only way to get invited in is through blood or marriage (it’s hard enough to work around six schedules) or if you are the author of the book as was the case with The Drifts.  What a pleasure it was to have the amazing Thom Vernon at our BC dining table. We take turns picking a book. Whoever has picked the book hosts and makes a meal that relates to the book.  It could be a dish that is specifically mentioned in the book or it could be a dish inspired by the setting of the book.  Plenty of room to get creative.  And it is always fun to try and guess what will be served as you read the book.

It was my turn to host last Book Club – the magical and glorious Beautiful Ruins by Jess Walter.  It could not have been a better choice for a summer (or any other time of the year) Book Club gathering.  And it should be noted that we all highly recommend it.  One of the settings of the story takes place circa 1962 Italy.  Perfection.  Right up my alley.  The Cinque Terre – Italian Riviera – Liguria.  Pesto.

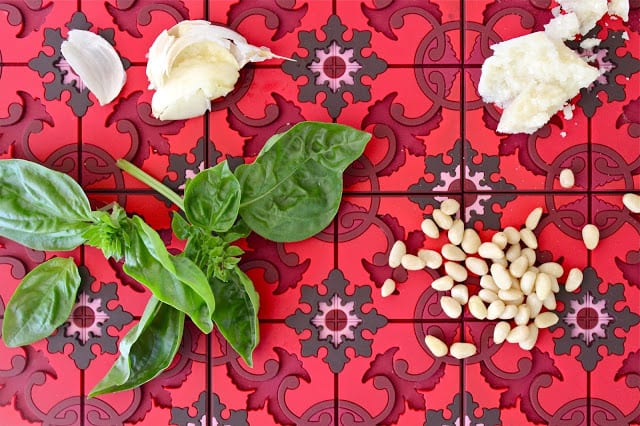
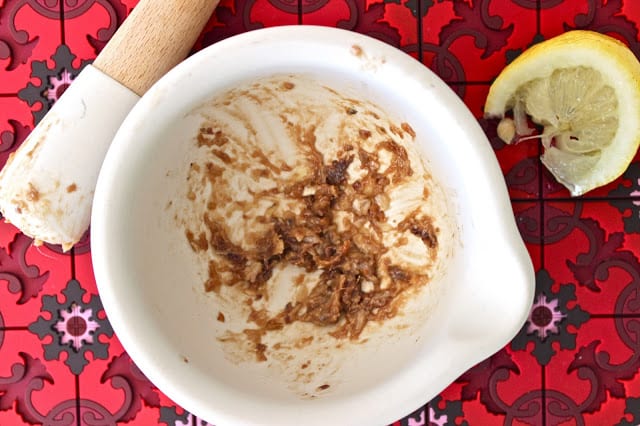
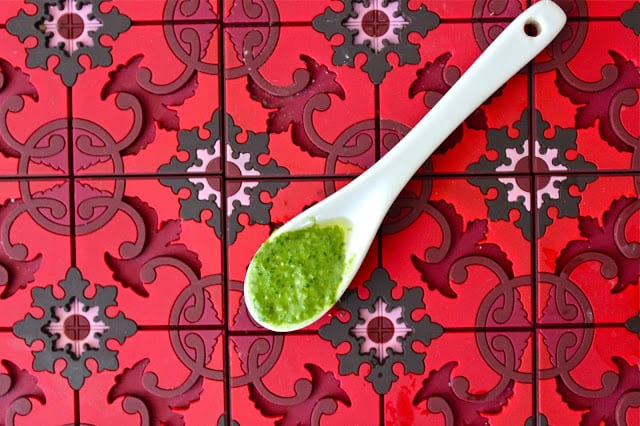
Pesto comes from Genoa, the capital city of the Liguria region of Italy  and is therefore referred to as Pesto Genoese.  It is a simple and delicious sauce made from a handful of fresh ingredients: fragrant and lush basil, garlic, a mix of Parmesan and pecorino romano cheese, pine nuts and olive oil.  Traditionally, pesto (which derives from the Italian word pestare – to pound or crush)  is made with a mortar and pestle.  Since my mortar and pestle is not big enough and I like to make my pesto in large batches (it freezes so well – makes a great last minute potluck dish), I turn to my modern-day mortar and pestle – the mighty food processor.  Depending on my mood and what I have available in my fridge and pantry, I might stick to the traditional basil and pine nut combination, or venture off and play around with other green herbs and nuts.  I encourage you to try out any combination of greens like parsley, cilantro, spinach, arugula, kale (with heartier greens like kale it is best to give it a quick hot water blanche and then squeeze out all the excess water so it blends up easier in your food processor) and nuts like almonds, walnuts etc.  Occasionally I  add some extra flavors like salty anchovies that I first pound to a paste with the garlic in my mortar pestle (don’t worry you won’t taste the anchovies), and a squeeze of a lemon to brighten up all the flavors. (Truth be told, I seem to add lemon to everything.) For a slightly creamier quality you can also try adding some goat cheese, butter or mascarpone cheese.  The one thing I will not compromise on when making pesto is the freshness and quality of ingredients.  Which is why I prefer to grate my own parmesan cheese.  It really does make a difference and it can be done quite simply by cutting off the rind and throwing chunks in the food processor. A few quick pulses later you have freshly-grated parmesan.  And remember, that rind can be frozen and used up later in a soup or stew.  Marcella Hazan dictates that “a well rounded pesto is  never  made with all Paremsan or all pecorino”.  I shamefully lower my head and admit that I do make my pesto with all Parmesan if I don’t have any pecorino on hand.

Pesto can be enjoyed over pasta, gnocchi or as a spread for a sandwich. It can be drizzled over soups as a garnish or spread on your favorite cut of grilled meat, chicken or fish.  When serving with pasta, remember to put aside a little bit of the pasta water before you drain the pasta to thin out your pesto to the desired consistency.  And please – for the love of everything that is delicious and good and right in the world  – SALT that pasta water.  This goes for anytime you are making pasta.  I don’t mean delicately shaking your salt shaker over the pot – I mean SALT it as if it’s SEA WATER.  Don’t question.  Just do it.

I still think we could have hosted Book Club at the hospital.  Friends and family gathered to celebrate a new book but more importantly a new lover of books.  Each of us taking turns holding her in that crook in our arm that seems to be especially made for this.

If you would like to virtually keep up with our Book Club – the book we are currently reading is The Curiosity by Stephen P. Kiernan.

Beautiful Ruins Book Club Menu:

Antipasti
Caprese salad, fresh figs, olives, marinated artichoke, prosciutto.

Primi
Pesto Genoese with spaghetti

Secondi
Fish soup was the only specific meal mentioned in this book so I made a Ciuppin.  Something similar to this.

Insalata
Shaved fennel and zucchini salad.

Dolci
Granita di Caffe con Panna inspired by this post.  Thank you Deb for bringing back all the wonderful memories of Rome.


PESTO GENOESE

Makes about 2 cups

Ingredients

2 tablespoons pine nuts, lightly toasted  (toasting is optional)
2 full bunches basil (roughly 4 oz), about 2 1/2 cups basil leaves tightly packed
2 anchovies (optional)
1 large garlic clove, peeled and crushed
3 tablespoons juice of a lemon
1/2 cup parmesan
1 – 2 tablespoons pecorino romano, if available
1 tablespoon goat cheese (optional)
1/2 teaspoon salt (hold off on the salt if using anchovies, once blended add salt as needed or to taste)
freshly ground pepper to taste
1/2 cup extra virgin olive oil plus more if needed

1- Lightly toast the pine nuts in a skillet on medium-low heat until they release their fragrance.  Set aside and cool.

2- If using anchovies pound them with the garlic in a mortar and pestle until you have a paste.  If not using anchovies you can add the garlic directly to the food processor.

3- Put all the ingredients except for the olive oil in the food processor.  Blend and with the machine running slowly drizzle in the olive oil until everything is blended.  Stop to scrape down the sides if necessary.

4- Adjust all seasoning to taste.  Add more olive oil if necessary.

Use immediately or portion off and store in containers in the fridge or freezer.  If placing in containers top off with a little olive oil to maintain freshness and green hue.  I use roughly 1 cup of pesto per 1 pound of pasta.  Do not heat up your pesto!  If frozen allow to thaw and then use.  Remember to thin out with pasta water if necessary.

Will keep in the fridge for up to 1 day and in the freezer for up to 3 months.
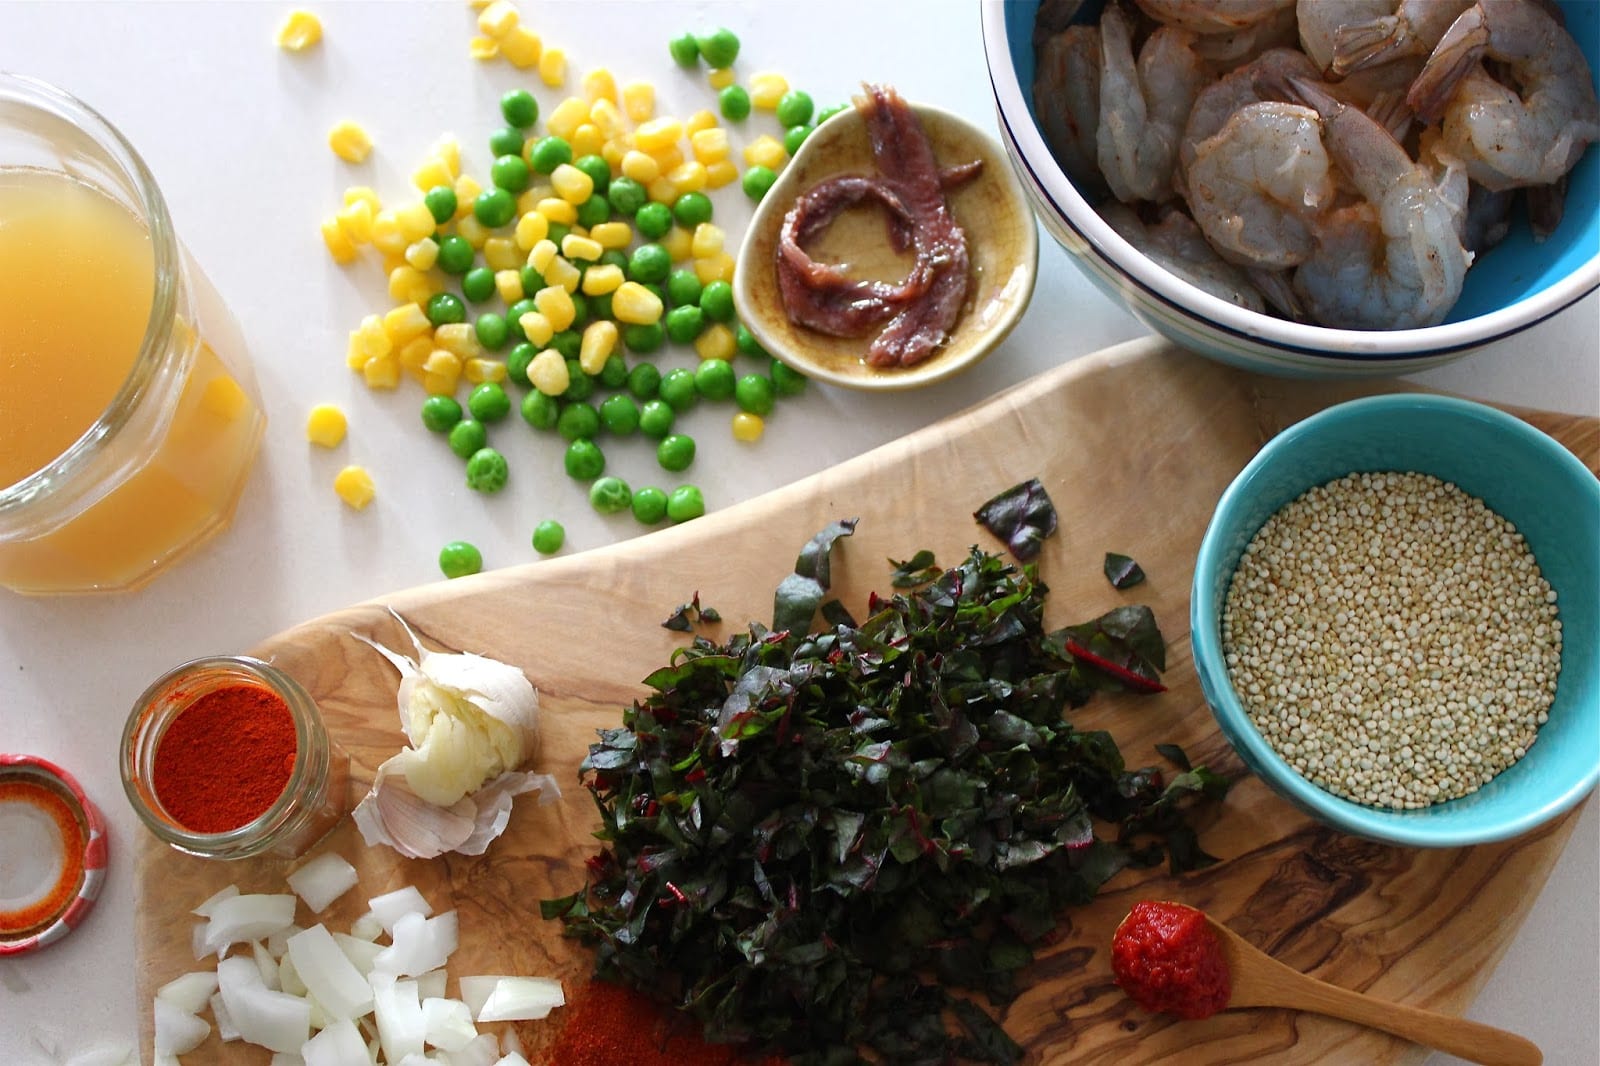
Enjoy!

Luncheon

A Platter of Fresh Herbs – A Balancing Act – Sabzi Khordana

 ♪ Music we’re cooking to ♪

Soleil, you take a little bite of the radish and at the same time take a bite of your rice and stew.  Then chew it all up together.  The radish won’t taste very spicy and will make everything else in your mouth taste awesome.  Got it? – Luna

Persian food.  It’s all about creating the perfect bite – loghmeh.  The balance of different flavors, textures and aromas working together – harmoniously – sometimes in an unexpected and surprising fashion – striking just the right notes on your taste buds and your senses.  A well-orchestrated and well-conducted symphony.  All this to achieve the perfect loghmeh.
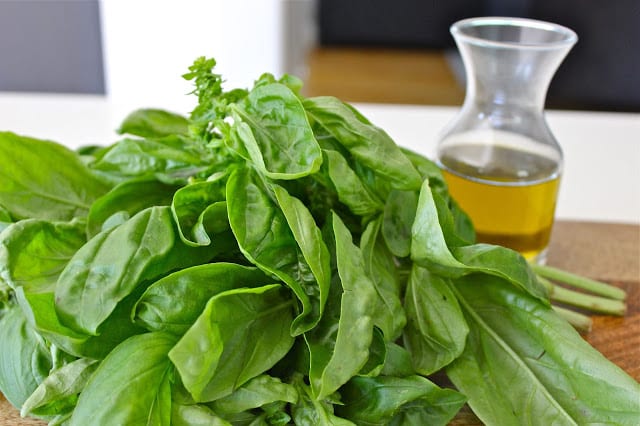
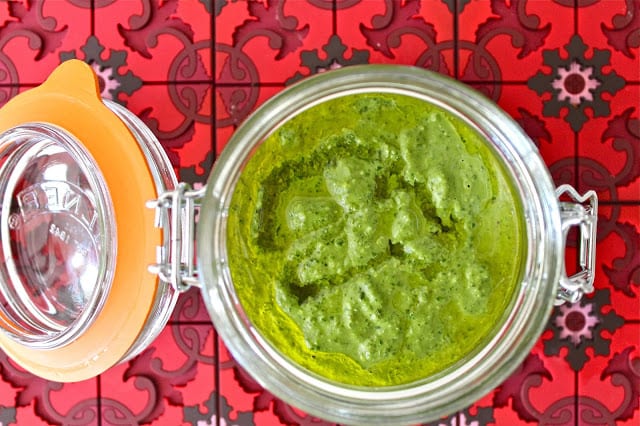
Now only if there was a way to achieve this much sought-after loghmeh in our everyday lives.

The girls started school this past week, even though summer is still officially in full swing ( it is STILL August after all!).  But, traditionally with the start of the school year comes the bitter sweet goodbye to my favorite time of year – summer. I find myself desperately clinging to every seductive, juicy bite of the last of the figs.  Every crunch of a grape.  Every last drop of evening light – slowly fading away, earlier and earlier.  How I cherish and miss those epic late night Vancouver sunsets.  But at the same time, I feel the pull of autumn.  The organization, scheduling, excitement of a new school year and all the new firsts that come with it.  Not to mention the first of the apples, pears, persimmons and pomegranates.  And somewhere between the goodbyes and hellos I think that this year – just maybe this year – I will be able to perfect the life loghmeh.  Find balance in it all.

Ha.

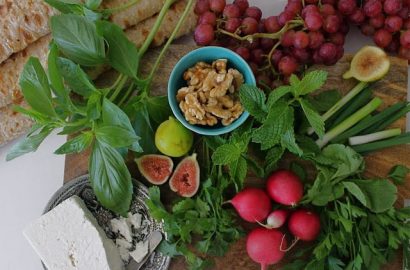
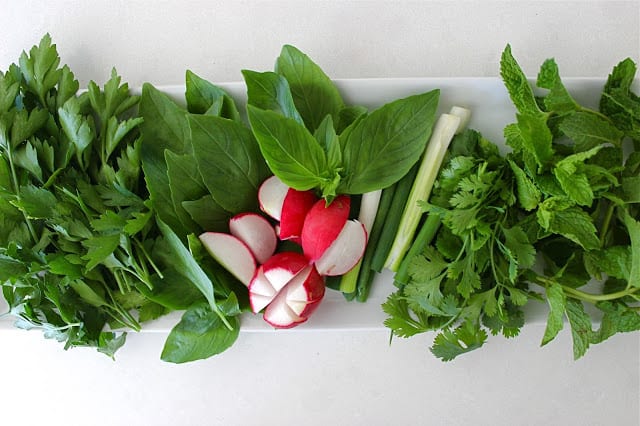
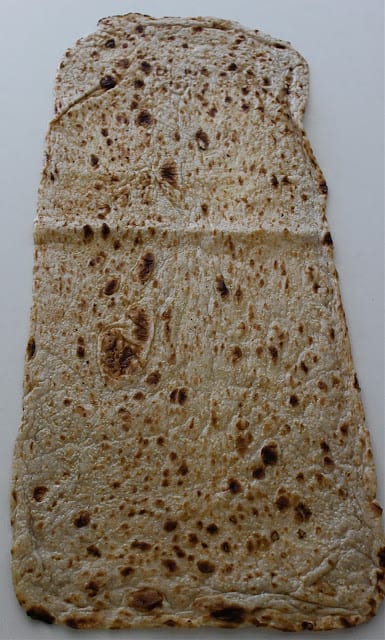
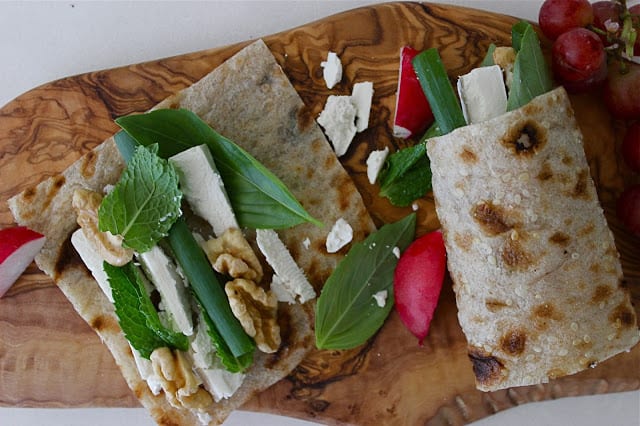
A heaping platter of Sabzi khordan – which literally means herbs for eating – is always present at the Persian table.  A constant companion to the other mainstay side dishes – yogurt (plain or mixed), sour pickles, bread, and cheese.  Sabzi khordan can be served as an appetizer with the addition of some soaked walnuts, feta cheese and fresh nan-bread- like lavash, sangak, barbari or even pita bread.  Most commonly it is served alongside the actual meal.  The fresh herbs can include any combination of basil, parsley, cilantro, mint, tarragon, chives, dill, radishes and scallions.  It’s this medley of fresh herbs, the crisp bite and spice from the radish and scallion that not only bring balance to the main dish but also heighten it.  But perhaps the most important function of a platter of fresh herbs is to aid in the digestion of the actual meal – very much like a salad.

The most tedious and time-consuming part of putting together a platter of sabzi khordan is the cleaning of the herbs.  Whether it is for making various stews, koo koos, or simply serving them up on a platter, we use and consume a lot of fresh herbs.  Which means bunches and bunches of herbs to clean.  I’ve found the easiest way to go about this is to clean your herbs as soon as possible – so they are readily available for use.  I trim the long stems (and save them to add to a broth), fill a clean kitchen sink or a big bowl with cold water and soak my herbs in the water.  After a couple of minutes of soaking I Iift the herbs out of the water without stirring up the water too much so all the dirt and grime settles at the bottom.  I might repeat this process again with fresh water or I’ll give them a quick rinse under running water and then put them through the salad spinner.  Then I’ll lay them flat on a kitchen towel and let them dry completely.  At this point they’re ready to be used or you can wrap them in a slightly damp paper towel or kitchen towel and store in a plastic bag in the fridge.  They will stay fresh for a couple of days.  I also don’t get too obsessive about separating the leaves from the stems.  Those stems are actually packed with flavor if you’re cooking with fresh herbs.  Trim off as much as you can and then just run your knife through the stems as well as the leaves for maximum flavor impact.

As for the perfect loghmeh – nothing can beat a bite of nan o paneer o gerdu o sabzi –  feta cheese, walnuts and a handful of fresh herbs wrapped in bread.  So often given to me as a kid to tide things over.  As for the perfect life loghmeh – maybe – just maybe – all things need not be in balance at all times. Sometimes it takes an unexpected turn of events – or actually not crossing everything off on your to do list, or an unexpected bite into a crisp, glorious red radish presented to you on a platter full of green herbs – to make everything feel awesome.

Got it?

Side Note:  I’ve started a new series on Kids Lunches on Facebook.  I’ll be sharing the girls’ school lunches as often as I can to hopefully inspire you when you get those school lunch making blues.   I’m inspired daily by fellow parents and bloggers like the always amazing Pamela Salzman ( I learn so much from her) and Amanda’s Kids Lunch over at  Food52 to name a few.


A PLATTER OF FRESH HERBS – SABZI KHORDAN

Ingredients:

As much as and any combination of the following you like:

Basil
Parsley
Cilantro
Mint
Tarragon
Chives
Dill
Radishes, ends trimmed
Scallions
Walnuts, soaked for at least 4 hours or overnight
Feta Cheese
Any kind of Middle Eastern style bread, lavash, sangak, barbari, pita, flatbread

Wash and trim all herbs.  Arrange on a platter and serve as an appetizer or alongside any kind of rice, stew, kabab, or enjoy rolled up in a piece of bread.

Uncategorized

HOMEMADE YOGURT AND STRAINED (GREEK STYLE) YOGURT – A RAINY PARISIAN AFTERNOON

♪ MUSIC WE’RE COOKING TO ♪

Mama, how about Dada and Soleil go to Spain or somewhere.

How come, Luna?  

Then you and I can go to Paris.  You know, Soleil will be all tired and grumpy and whiny and everything else a 3 and a 1/2 year old is like.

It’s supposed to rain the first time you visit Paris.

I read that somewhere – or someone said that – at some point – somewhere.

It was raining – well, more like a very light summer sprinkle – as my train pulled into Gare de Lyon.  The last two weeks of the obligatory European backpacking trip to be spent in the city of light.  My first time in Paris – but a return of sorts back to Europe.  My first two weeks were spent in a dream, walking the streets of Rome – as only a nineteen year old can. A few more Italian and French cities and towns thrown in between. With a backpack far too big and heavy for my not so large frame  (possible culprit to the chronic lower back pain that has plagued me all these years?!) – the bright red Canadian maple leaf sewn nice and tight onto its blue nylon – lest us quiet Canadians be mistaken for our slightly louder neighbors to the south.  With no ticket back home – having lost it somewhere between Venice and Nice – back in the days when you traveled with a paper ticket.  And without a care in the world.  I was in Paris – it was raining – and Billie Holiday was crooning on my walkman – welcoming me to this city we all dream of visiting one day.  All was right in this teenager’s world.

Cut to a few days ago – leaning one hip into the stove – giving that lower back a rest –  absentmindedly stirring the milk for our weekly batch of homemade yogurt – when this voice came crashing through the speakers, and instantly transported me back to that rainy afternoon in Paris.

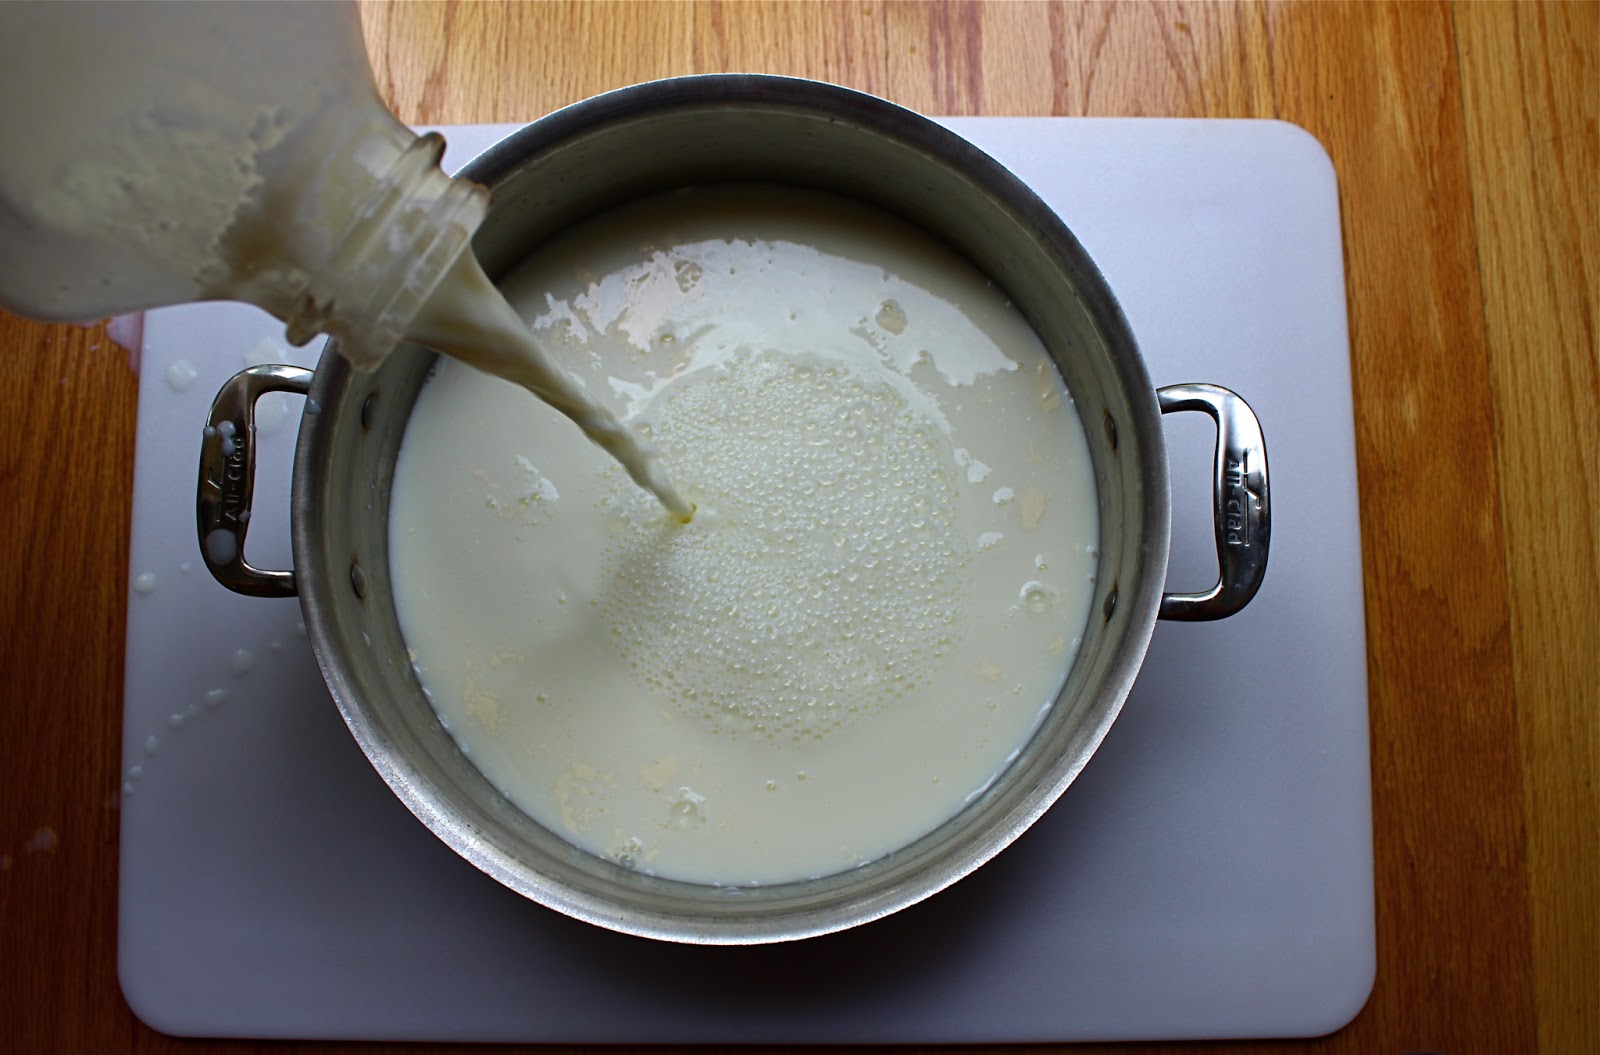
I wasn’t planning on writing about homemade yogurt – but after declaring my love and devotion to yogurt here – many friends have asked how they too could make their own yogurt.  We are a household that consumes a lot of yogurt on a weekly basis – so it only seemed like the next natural step for us to start making our own.  It is more economical (those Greek Style yogurts don’t come cheap) – we are doing our little bit to cut back on making more waste by not purchasing new plastic yogurt containers every week to only hope that the city will actually recycle them – we can be in control of exactly what we are consuming by choosing the highest quality milk we want to use – it is a step in the right direction of revisiting our cooking roots, as Michael Pollan is so convincingly urging us to do in his new book Cooked – and well – it is really easy to make homemade yogurt.

Only 2 ingredients are needed to make great homemade yogurt. 1- Good quality organic  whole milk yogurt (you cannot use fat free or 1% – it won’t work!) I use Straus Family Creamery milk.  Besides being of great quality, we like that you can return their glass milk bottles for a deposit back, AND they will re-use those bottles.  2- Culture – a small container of store bought yogurt,  good quality organic whole milk.  That’s it.  Then you just allow the natural biology of fermentation do its thing.

No special equipment necessary either – except for a non-reactive CLEAN (we’re fermenting here) heavy-bottomed stainless steel pot, CLEAN glass jars to store the yogurt, and a candy thermometer.  To this day my mom refuses to use a thermometer.  Instead relying on the time-tested pinky finger temperature control method: “bring the milk to just under a boil, cool milk down, you’ll know it’s at the right temperature by sticking your pinky finger in the milk and be able to hold it there for about 20 seconds.”  To spare you from scalding your pinky we will rely on the other trustworthy temperature reader: an actual thermometer.  

Sometimes an ordinary moment is transformed into an extraordinary one when you least expect it.  Like a typical afternoon spent making yogurt, and the next thing you know a single voice/song reaches so deep within you, grabs you by the waist and hurls you back to a rainy train station.  But this time as you relish the sweet memories of the past you don’t linger there too long.  You are busy planning your next Parisian trip.  And this time you can’t wait to experience the city of light through the eyes of your 6 and a 1/2 year old AND your 3 and a 1/2 year old.

Unless said 3 and a 1/2 year old really wants to go to Spain instead.

Was it raining the first time you visited Paris?

HOMEMADE YOGURT

Note: I use 1 gallon of milk which makes about 10-12 cups of yogurt – roughly about 2 to 3 32oz containers.  We use a lot of yogurt in our house.  Feel free to use as much milk as you like depending on your family’s needs.  Also, the consistency of homemade yogurt is slightly different from store bought yogurt.  It might be a little thinner.  There are many variables when making yogurt (fermenting) so every batch is a little different. 

Ingredients:

Makes about 6 cups of yogurt

1/2 gallon good quality organic whole milk yogurt
about 4 dollops (tablespoons) of good quality  organic store bought whole milk yogurt (this will be your culture)

1- Turn on your oven light.  DO NOT TURN ON THE OVEN ITSELF.

2- Pour milk in a large stainless steel pot, place thermometer in pot.  Heat milk over medium heat stirring occasionally so you don’t have any milk sticking to the bottom of the pot.  Heat milk to 180F degrees.

3- Turn off the heat and allow milk to cool down to 115F degrees. It usually takes my batch about 45 minutes to cool down.  Don’t forget about your milk!  Keep checking that thermometer.  Or give the pinky finger method a try.  Just remember how your yogurt turns out is temperature sensitive.  

4- Once milk has cooled down to 115F degrees drop in about 4 dollops of store bought yogurt in different corners of the pot.  You don’t need to stir.  Cover pot with a tight fitting lid.  Place pot in the oven with the oven light on.  Close oven door.  Leave pot in the oven (with oven light on) overnight or about 12 hours.

5- In the morning remove pot from the oven.  You should have delicious homemade yogurt.  Pour off excess yellowish liquid (whey).  Allow yogurt to come to room temperature.  Transfer to glass containers and place in fridge.  Will keep in fridge for up to 10 days.

STRAINED (GREEK STYLE) YOGURT

1- Place a fine mesh strainer over a tall container to catch liquid from the yogurt.  The bottom of the strainer should not come into contact with collected liquid (whey).

2- Line 2 overlapping paper towels or a cheese cloth over strainer.  Pour yogurt over paper towels or cheese cloth.  Fold over the corners of the paper towels or cheesecloth to completely cover the yogurt.  Place a small plate over the yogurt and put a heavy can over the plate for weight.  

3-  Place everything in the fridge and let stand any where between 1 hour to several hours depending on how thick you like your yogurt.  Allow liquid (whey) from the yogurt to drip into the bowl.  

  
4- Place strained yogurt in a glass container.  Will keep in the fridge for up to 10 days.

You may discard the whey that collects in the bowl.  But we like to keep it in a glass jar in the fridge.  We use a couple of spoonfuls of whey in smoothies, soups, sauces, or to soak our grains and oatmeal in overnight.  Whey is extremely beneficial and nutritious.  


Drinks

THE POETRY OF SUMMER – A HONEY AND VINEGAR SYRUP DRINK – SHARBATEH SEKANJEBIN


We had a deep, cushy, creamcolored loveseat in our living room.  Back in Iran.  That’s how I remember it.     

I was six years old.  Luna’s age.  And I was notorious for giving my parents a hard time with going to bed.  Somany late nights were spent curled up on that love seat, eyelids
heavy with sleep desperately trying to keep awake – not to miss a moment – and inevitably lulled into a sweet slumber by the entrancing sounds of the santur, tar, and violin and the magical rhymes and rhythms of poetry.  Always poetry.  My childhood lullaby.

My mother is a poet and lyricist.  Not of the “remember when we thought we were so cool, so bohemian, so hip, writing poetry and wearing all black” variety.  But as in this was and still is her vocation – well, as close as being a poet can be considered a vocation.  Of course for me and my brother she was and is, maman, who happens to be a poet.  Who walked around the house (and still does) murmuring to herself.  Filling notebooks with dreamlike verse.  Staying up until the sun starts to show its face to finish that one hook, that lone melody, that last stanza. And so it was very much the norm to have our house filled with musicians, singers, fellow poets, and lovers of all of the above.  There is a deep-seated love and respect for poetry and music amongst Persians.  Very formal dinner parties would inevitably end up with everyone sitting in the round.  Something of a jam session.  See where inspiration would take them.  Instruments tuned and voices warmed by the sweet, tangy honey and vinegar sharbat –  syrup –  sekanjebin.


Sekanjebin literally means vinegar and honey.  It is the ultimate summer drink.  The Persian version of lemonade.  The refreshing combination of sweet and sour.  It is a centuries old concoction – considered medicinal in its combination of honey, vinegar, mint and cucumber to hydrate, restore balance in the body, and aid with digestion.  If it’s summer – there’s sekanjebin.  It will cool your soul.  It will sweeten your tongue and quench your thirst.  It will bring you back to life.  Yes – this will cure you whispers abound. Like all sharbata concentrated syrup is prepared and then diluted with water to taste.  Sekanjebin can also be prepared with sugar but I much prefer the use of honey – as it was originally intended to be.  I recommend using the best quality honey and a good quality white wine vinegar.  Traditionally sekanjebin is served with grated cucumber.  But you can also use sliced cucumber.  Feel free to try out other refreshing summer fruits –  such as lemon or lime slices, watermelon pieces, cut strawberries – as a garnish as well.   In the summertime it is also very popular and refreshing to put out a bowl of the syrup and dip crisp Romaine leaves in it.  We recently hosted a Father’s Day brunch with a few dear friends where I served a pitcher of sekanjebin. It was an absolute hit with adults and children alike.

When we left Iran for Rome – our home away from home – with the future unknown – unaware that we would never set eyes on that land again – never get to say proper goodbyes to so many loved ones – unaware that very soon we would also bid adieu to our beloved Rome – we found comfort in the company of fellow expats.  Each family with their own story of loss and an unknown future.  Different and yet the same. I missed the familiar comfort of that big creamcolored loveseat.  Yet even in those most trying of days – laughter, togetherness and poetry still filled the air.  As everyone would inevitably end up gathering on the balconies.  Cushions and rugs spread on the floor.  Instruments pulled  out of their cases and tuned.  The haunting melodies of the santoor yearningly bouncing off the rooftops of the eternal cityThe Roman summer night in its full splendor.  And once again voices warmed and bodies cooled by sekanjebin.  And of course, there was poetry.  Always poetry.  That’s how I remember it.

Happy Summer.

VINEGAR AND HONEY SYRUP – SHARBATEH SEKANJEBIN

Ingredients:

Makes 1 cup syrup concentrate 

1 cup water, plus more to dilute and serve
1 cup honey, really goodquality 
2/3 cup plus 1 tablespoon good-quality white wine vinegar
2 sprigs mint, plus more for garnish
sliced cucumber for garnish

1- Bring honey and water to a boil in a medium saucepan to make a simple syrup.  Stir to dissolve. Reduce heat to medium-low and simmer for 10 minutes.

2- Add vinegar and bring back to boil.  Reduce heat to medium-low and simmer for 20 minutes.  

3- Remove from the heat, add mint sprigs and transfer to a glass bowl.  Allow to cool to room temperature.  Cover bowl and let mixture steep overnight in the refrigerator.

4- Remove mint sprigs.  You can keep the syrup concentrate in a glass container in the refrigerator for up to a week.    

To serve mix 1 part syrup concentrate to 3 parts water.  For an individual glass serving I mixed 1/4 cup syrup with 3/4 cups water.  Adjust to taste.  Serve over ice and garnish with sliced cucumber and mint.