Category / Side Dish

Side Dish

Taste – A Collard Greens Borani Collard Greens with Yogurt and Caramelized Red Onion Sumac

 ♪ MUSIC WE’RE COOKING TO ♪

Raw honey.

Like the jar from Trader Joe’s.

Dripping in gold, warmth, and sweetness.

My daughter’s eyes, Soleil’s eyes, the sun’s eyes, shimmer like raw honey.

Dripping in gold.

Showering us with warmth, sweetness, and unyielding love.

And occasionally stubbornness, and intense, deeply felt, unyielding five-year-old emotions.

Pure and raw.

These are the very same – stop you in your tracks, take hold of your heart and soul – eyes that stare back at me.

Piercing right through me with passion, vehemence, and absolute indignation at 4pm on New Year’s Eve.

We are both splayed out on the kitchen floor with me holding a spoon of blueberry sauce inches from her face.

The concoction slowly but purposefully working its way down the wooden spoon, onto my hand, circling my wrist, trailing my well-pronounced bluish purple veins, down my arm and delicately drip, drip, dripping on to the wood floor.

The blueberry sauce has brought us to our knees.

Literally.

Well, actually, even lower than our knees.

Onto our bellies.
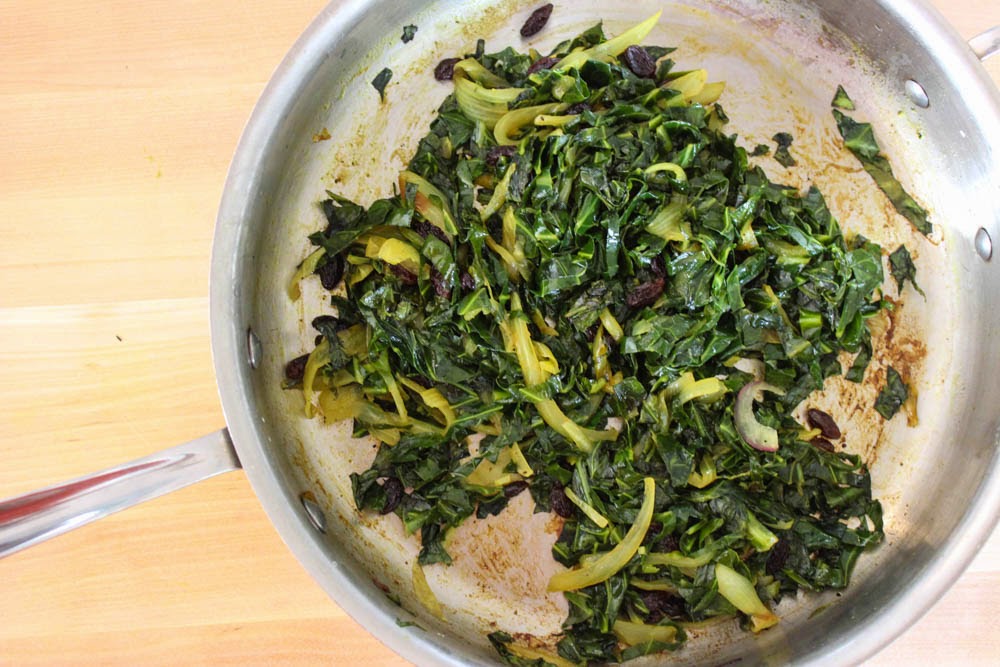
I have quite a fondness for all things bitter.  The bitter-sour in combination agree with my taste buds the most.  Especially bitter greens.  Arugula, frisee, escarole, radicchio, rapini, endive, dandelion greens, mustard greens…Maybe my exposure to Italian food as a child (bitter greens) and Persian food (all things sour) has had a hand in shaping and nurturing my taste buds.

But for the longest time there has been one bitter green that I just couldn’t come to embrace.  Collard greens.  Not that I would ever turn away collards, unless they’ve been boiled down to mush.  That goes for any vegetable boiled to oblivion.  But collards wouldn’t be my first choice of greens.  Again, perhaps my lack of exposure to these beloved greens of American Southern cuisine has something to do with it.

It also just so happens that this time of year our farm box and the farmer’s markets explode with such greens.  And so inevitably I can expect a bunch of collards in our farm box every week.  Normally, I treat collards as I do other greens.  Simply.  Saute in olive oil, sprinkle with salt, pepper, hit it with some sort of acid, add a little water (if needed), put a lid on it and give the rather tough leaves time to soften and tenderize.  But, recently I decided to treat my collards and my taste buds to a special treat.

To a most trusted and loyal friend.

“…my late night confidante, my consigliere…”

Yogurt.

A borani.
Her blood courses through mine.

As does mine through hers.

Her passion matches mine.

As does her flair for drama.

And much can be said about the paralyzing stubbornness that occasionally takes hold of our bodies and selfishly refuses to let go.

She stands her ground. (Well, more like the wood floor she is splayed across)

Unwavering and proud.

As do I.

Unwavering.

And proud.

But, Mama I don’t like blueberry sauce!

Soleil, I added maple syrup to it this time.  Just taste it.  It’s sweet!

Mama, you always tell me to listen to my body.  And my body is telling me I DON’T LIKE BLUEBERRY SAUCE!!!

Well, your body doesn’t know what it’s talking about right now.  I put MAPLE SYRUP in it!!!
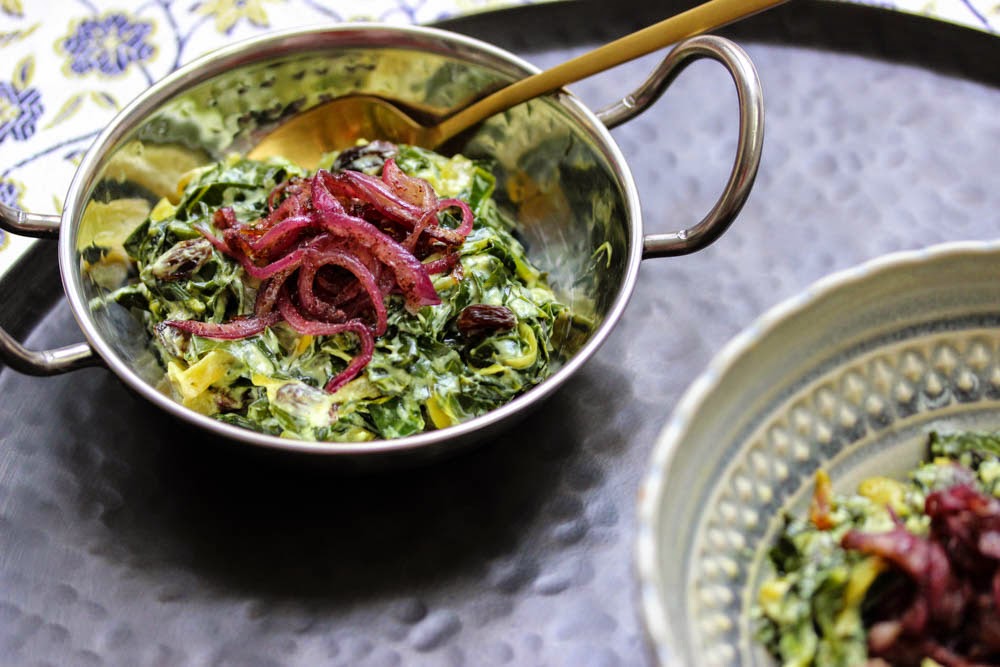
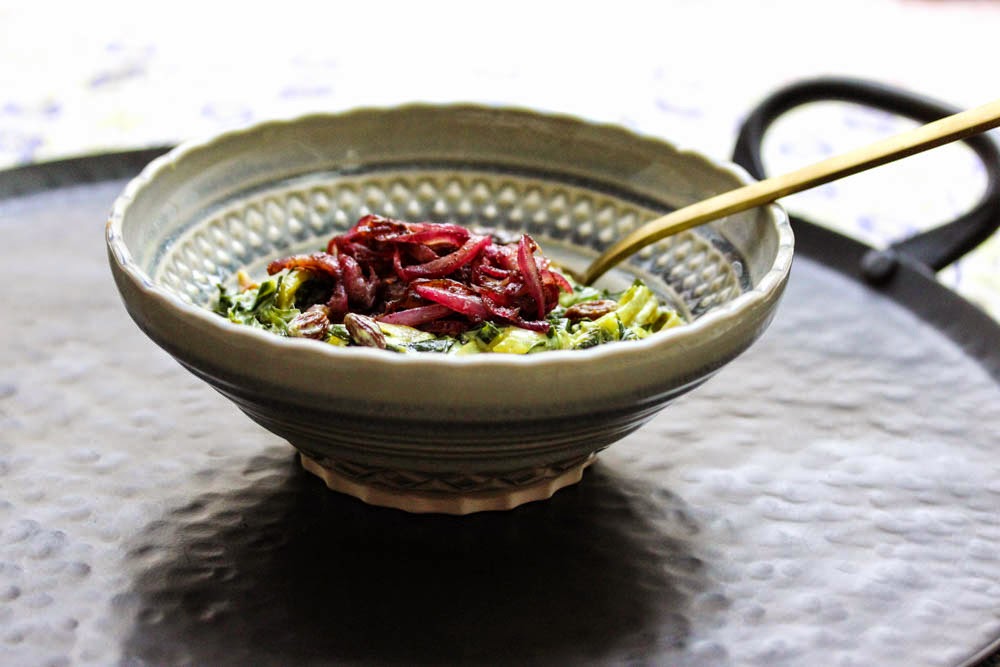
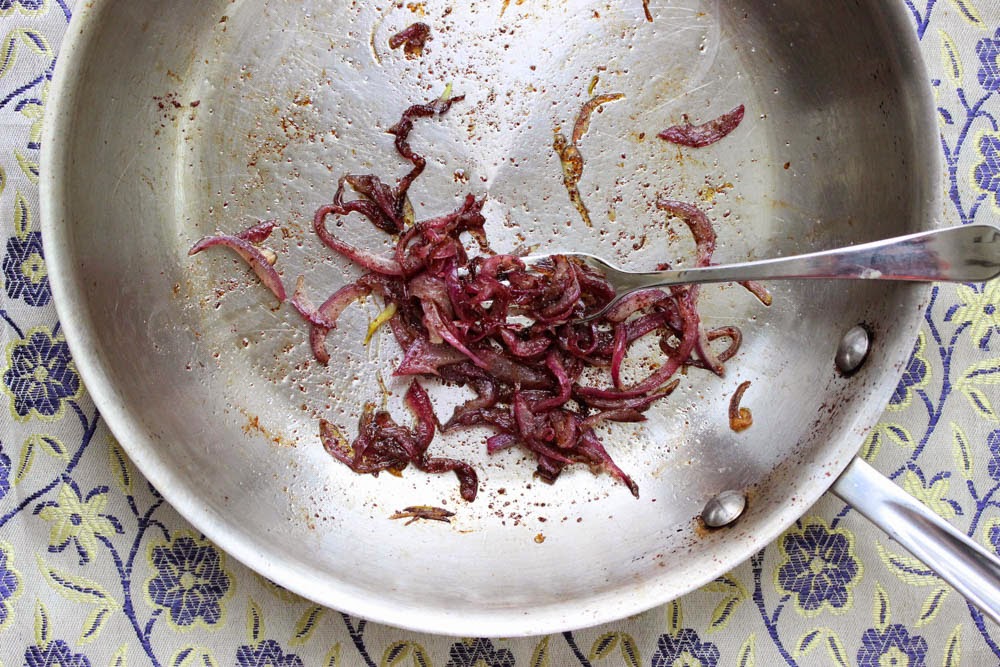
Borani is a side dish or dip made with thick, creamy yogurt and an array of vegetables or herbs.  It really speaks to the Persian (and my) love affair with yogurt.  My favorite borani as a child and perhaps the most well-known one is borani-e esfenaj.  In our house we simply call it mast o esfenaj – yogurt and spinach.  Also, a great way to get the little ones to eat their spinach.  Keeping with my theory that everything just tastes better with yogurt added to it, I decided to put this to the test with my troublesome greens – collard greens.  And the results are fantastic.  I first saute the greens with onion, garlic and turmeric.  Then add a splash of water to the pan and put the lid on it and give the greens time to slowly soften.  I cook the greens just long enough to tenderize but still maintain their rich color.  I have also added plump raisins to this dish for extra texture and a little something sweet to chew on. Once the collards cool slightly I mix in the yogurt and a splash of vinegar (you could also use lemon juice).  You can’t have bitter without sour. The vinegar also helps to balance out the sweetness of the raisins.  The borani can be served as it is at this point, you could even sprinkle the top with some walnuts.  But what makes this dish really sing is the caramelized red onion with sumac.  You need these onions in your life.  Be it topping this borani, or gracing a salad, burgers, meats.  Make a big batch and have on hand in the fridge – to use at all times.

This collard greens borani is great served as a dip with some warm flat bread to scoop up all the creamy goodness.  It also makes a great side dish alongside a roasted chicken or grilled fish.  Or, my occasional favorite 10 pm cuddle on the couch with the borani bowl nestled snugly in my lap and a bag of crunchy chips at my side (Trader Joe’s organic yellow corn tortilla chip rounds, if you care to know).  A meditative and quiet time (save for the crunching of the chips).  A time for self-reflection.  Where I get to acknowledge that sometimes my body doesn’t know what it’s talking about either when it comes to collard greens.  All I needed to do is give them another try with a dollop of yogurt.  And then just taste and marvel at the goodness of it all.
They stand above us – my husband and my first-born.

Luna.  My moon girl.

Representatives of peace, truth, justice and all things fair.

Embodying all that we wish the UN could really be.

They look down at us and the blueberry spoon with kindness and curiosity.

Ok you two – time to separate you.

Says my husband as he scoops up our second born off the floor and gently cradles her in his arms and carries her off for a game of Pretty, Pretty, Princess.

Luna bends her body just so, to get a better look at me and my situation.

I lift my head slightly and come face to face with those heart melting almond shaped, chestnut brown eyes.

Warm, deep and all encompassing.

Mama?  Can I lick that spoon?

A COLLARD GREENS BORANI – COLLARD GREENS WITH YOGURT & CARAMELIZED RED ONION SUMAC

Ingredients:

Serves 6-8 as a dip or side dish

3 tablespoons olive oil
1/2 yellow onion, thinly sliced
2 garlic cloves, finely chopped
1 bunch collard greens, off the stem and cut into ribbons
1/4 tsp turmeric
salt
pepper
1/4 cup water
2 heaping tablespoons raisins
1/2 cup strained Greek style yogurt, plus more if needed
1 tablespoon red wine vinegar
caramelized red onion sumac, as topping (recipe below)

1- Heat the oil in a large pan over medium heat.  Add the onions, sprinkle with a little salt and saute until soft and translucent, about 8-10minutes.  Add the garlic and saute for about 3 minutes, stirring often making sure the garlic doesn’t burn.  Add the collards, in batches if necessary, turmeric, raisins,  1/4 teaspoon salt, 1/4 teaspoon pepper.  Stir to combine. Add 1/4 cup water and cover immediately.  Turn down heat to medium-low or low.  Allow to cook until the collards soften and tenderize, about 20 minutes.  Check occasionally and add more water 1 tablespoon at a time if necessary.  Uncover and take off heat when done and allow to cool.

2- In a medium sized bowl combine the yogurt and vinegar.  Add the collards and combine.  Add more yogurt if you like it creamier. Season well with salt and pepper to taste.  Top with caramelized red onion sumac.

Serve with warm flat bread as a dip or as a side dish.  Will keep in the fridge for 1 or 2 days.

CARAMELIZED RED ONION SUMAC

Ingredients:
2 tablespoons olive oil
1/2 red onion, thinly sliced
1 teaspoon sumac
salt
pepper

1- Heat the oil in a medium sized pan over medium heat.  Add the onion, gently season with salt and pepper.  Turn down the heat and saute for about 20 minutes.  Until the onion nicely caramelizes.  Stir often and turn down the heat if necessary.  Add the sumac to the onion in the last 5 minutes of cooking.

Side Dish Uncategorized

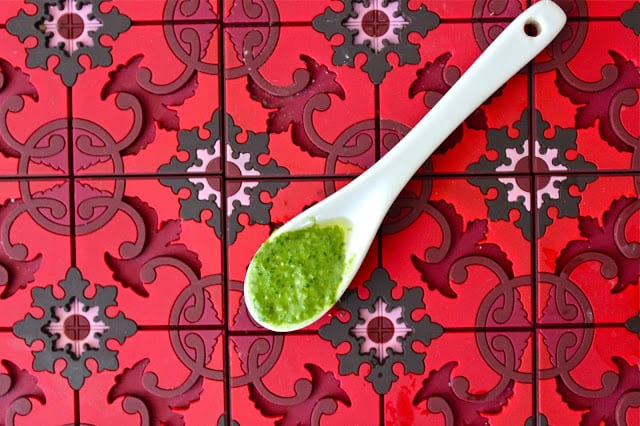
Pesto – A Birth and Book Club – Beautiful Ruins

♪ Music we’re cooking to ♪

My water broke at 7:30am.  By 8:00am we were busy putting away all the food Drew had planned to prepare that night for Book Club – The Life of Pi.

It was a bright, clear and sunny Sunday morning in 2006.  Los Angeles never looked more beautiful.  Massive, in-your-face billboards, boulevards vast and desolate, cracked sidewalks and all. The freeways were clear.  For once.  So many months we had run through this scenario, talked through it – talked through it some more,  rehearsed the drive to the hospital.  And now here it was. The arrival of our first born was imminent.

Luna – Luna – Luna.

On the way to the hospital we made all the appropriate phone calls to family members. Then we made all the appropriate phone calls to fellow Book Club members.  In one adrenaline-infused breath I revealed our news and apologized for having to cancel Book Club.  But we’ll reschedule as soon as possible!, I kept repeating on various voicemails.  Hey, what if we had Book Club at the hospital? –  I wondered out loud.  No really – I think it could work – I insisted to a very anxious father-to-be – Drew.

All this before the first nurse at the hospital stuck the happy – to sad – to very much in agony face chart in front of my face and asked me to point to the facial expression representing the time I would like drugs administered.  I pointed to the happiest face.  Seriously – why wait?

All this before the medical residents that looked like they had stepped right off of the set of Grey’s Anatomy kept checking down below to see how much I had dilated.

All this before they stuck the very large needle in my back and Drew had to look away and take deep breaths because he is prone to fainting spells. (At Soleil’s birth they had to get the paper bag out for him – as they were sticking the needle in MY back – all the nurses rushed to HIS aid to keep him from fainting.)

All this before my beloved Dr. K and Nurse “House” (affectionately nicknamed by us after the TV show Dr. because of her tough love approach) played good cop/bad cop to get me to work harder to get this new life out.  I always appreciated my Dr’s  clear, firm, realistic demeanor.  Works for me.

All this…before that-one-forever-life-altering-moment.  When the comets collide – when the world stops and simultaneously the earth spins faster than proven possible and your heart as you once knew it no longer beats just for you.  Your heart is no longer yours.  She holds your heart now in her shriveled – been through a heck of a journey – newborn hands. You look to your partner – the only other person that understands this arresting seige of the heart – and in unison you both say “whoa”.

Luna – Luna – Luna.

She arrives on Book Club Sunday.

We recetly celebrated 11 years of Book Club. There’s six of us total – girls and boys. The past 11 years of Book Club have seen us through 60 books, just as many delicious accompanying meals, marriages, births (we just recently welcomed a new addition to our Book Club family – Keith and Heather’s baby L.) loss of loved ones, professional successes and heartbreaks, politics, presidents, but most importantly friendship; life-long friendship.  And of course, a love of books and good food.  Our motto is “because we read” (most of the time). At this point the only way to get invited in is through blood or marriage (it’s hard enough to work around six schedules) or if you are the author of the book as was the case with The Drifts.  What a pleasure it was to have the amazing Thom Vernon at our BC dining table. We take turns picking a book. Whoever has picked the book hosts and makes a meal that relates to the book.  It could be a dish that is specifically mentioned in the book or it could be a dish inspired by the setting of the book.  Plenty of room to get creative.  And it is always fun to try and guess what will be served as you read the book.

It was my turn to host last Book Club – the magical and glorious Beautiful Ruins by Jess Walter.  It could not have been a better choice for a summer (or any other time of the year) Book Club gathering.  And it should be noted that we all highly recommend it.  One of the settings of the story takes place circa 1962 Italy.  Perfection.  Right up my alley.  The Cinque Terre – Italian Riviera – Liguria.  Pesto.

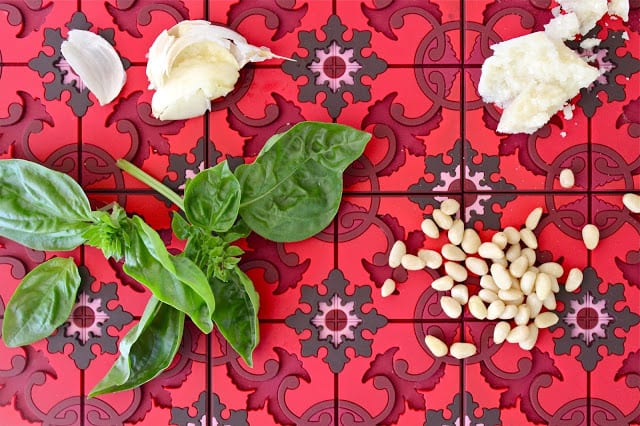
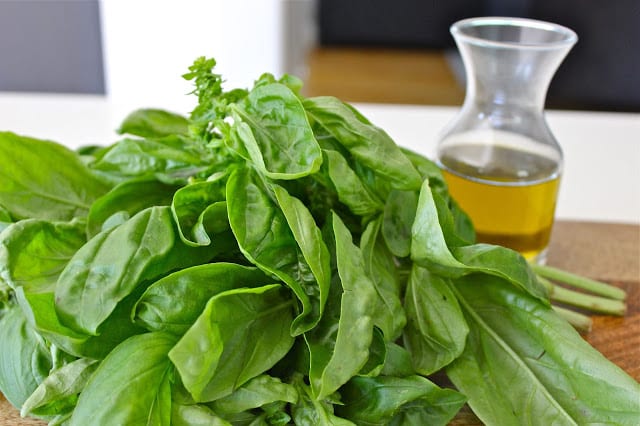
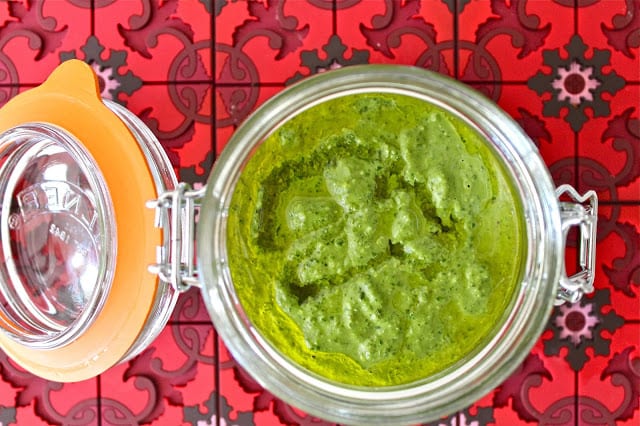
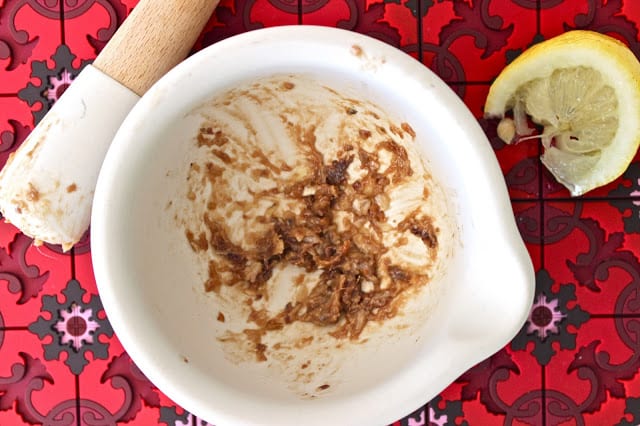
Pesto comes from Genoa, the capital city of the Liguria region of Italy  and is therefore referred to as Pesto Genoese.  It is a simple and delicious sauce made from a handful of fresh ingredients: fragrant and lush basil, garlic, a mix of Parmesan and pecorino romano cheese, pine nuts and olive oil.  Traditionally, pesto (which derives from the Italian word pestare – to pound or crush)  is made with a mortar and pestle.  Since my mortar and pestle is not big enough and I like to make my pesto in large batches (it freezes so well – makes a great last minute potluck dish), I turn to my modern-day mortar and pestle – the mighty food processor.  Depending on my mood and what I have available in my fridge and pantry, I might stick to the traditional basil and pine nut combination, or venture off and play around with other green herbs and nuts.  I encourage you to try out any combination of greens like parsley, cilantro, spinach, arugula, kale (with heartier greens like kale it is best to give it a quick hot water blanche and then squeeze out all the excess water so it blends up easier in your food processor) and nuts like almonds, walnuts etc.  Occasionally I  add some extra flavors like salty anchovies that I first pound to a paste with the garlic in my mortar pestle (don’t worry you won’t taste the anchovies), and a squeeze of a lemon to brighten up all the flavors. (Truth be told, I seem to add lemon to everything.) For a slightly creamier quality you can also try adding some goat cheese, butter or mascarpone cheese.  The one thing I will not compromise on when making pesto is the freshness and quality of ingredients.  Which is why I prefer to grate my own parmesan cheese.  It really does make a difference and it can be done quite simply by cutting off the rind and throwing chunks in the food processor. A few quick pulses later you have freshly-grated parmesan.  And remember, that rind can be frozen and used up later in a soup or stew.  Marcella Hazan dictates that “a well rounded pesto is  never  made with all Paremsan or all pecorino”.  I shamefully lower my head and admit that I do make my pesto with all Parmesan if I don’t have any pecorino on hand.

Pesto can be enjoyed over pasta, gnocchi or as a spread for a sandwich. It can be drizzled over soups as a garnish or spread on your favorite cut of grilled meat, chicken or fish.  When serving with pasta, remember to put aside a little bit of the pasta water before you drain the pasta to thin out your pesto to the desired consistency.  And please – for the love of everything that is delicious and good and right in the world  – SALT that pasta water.  This goes for anytime you are making pasta.  I don’t mean delicately shaking your salt shaker over the pot – I mean SALT it as if it’s SEA WATER.  Don’t question.  Just do it.

I still think we could have hosted Book Club at the hospital.  Friends and family gathered to celebrate a new book but more importantly a new lover of books.  Each of us taking turns holding her in that crook in our arm that seems to be especially made for this.

If you would like to virtually keep up with our Book Club – the book we are currently reading is The Curiosity by Stephen P. Kiernan.

Beautiful Ruins Book Club Menu:

Antipasti
Caprese salad, fresh figs, olives, marinated artichoke, prosciutto.

Primi
Pesto Genoese with spaghetti

Secondi
Fish soup was the only specific meal mentioned in this book so I made a Ciuppin.  Something similar to this.

Insalata
Shaved fennel and zucchini salad.

Dolci
Granita di Caffe con Panna inspired by this post.  Thank you Deb for bringing back all the wonderful memories of Rome.


PESTO GENOESE

Makes about 2 cups

Ingredients

2 tablespoons pine nuts, lightly toasted  (toasting is optional)
2 full bunches basil (roughly 4 oz), about 2 1/2 cups basil leaves tightly packed
2 anchovies (optional)
1 large garlic clove, peeled and crushed
3 tablespoons juice of a lemon
1/2 cup parmesan
1 – 2 tablespoons pecorino romano, if available
1 tablespoon goat cheese (optional)
1/2 teaspoon salt (hold off on the salt if using anchovies, once blended add salt as needed or to taste)
freshly ground pepper to taste
1/2 cup extra virgin olive oil plus more if needed

1- Lightly toast the pine nuts in a skillet on medium-low heat until they release their fragrance.  Set aside and cool.

2- If using anchovies pound them with the garlic in a mortar and pestle until you have a paste.  If not using anchovies you can add the garlic directly to the food processor.

3- Put all the ingredients except for the olive oil in the food processor.  Blend and with the machine running slowly drizzle in the olive oil until everything is blended.  Stop to scrape down the sides if necessary.

4- Adjust all seasoning to taste.  Add more olive oil if necessary.

Use immediately or portion off and store in containers in the fridge or freezer.  If placing in containers top off with a little olive oil to maintain freshness and green hue.  I use roughly 1 cup of pesto per 1 pound of pasta.  Do not heat up your pesto!  If frozen allow to thaw and then use.  Remember to thin out with pasta water if necessary.

Will keep in the fridge for up to 1 day and in the freezer for up to 3 months.

Enjoy!

Side Dish

Rice and the Art of Getting to the Bottom of the Pot – Chelo Ba Tahdig

They gather around me with bated breath.  The air is thick with anticipation and hope.If it all goes as planned, the fruits of my labor will be met with thunderous applause and joyous cheers.  High fives and high jumps and quasi-cartwheels all around.  Maybe even a little impromptu jig.

If it all falls apart (literally), shoulders will slump, and slight groans will replace the cheers.  Dissapointed little feet will shuffle back to the table.  And once they recover from this let-down, they will do their best to make me feel better.

It’s ok Mama.  Next time.

It’s not as great as usual Mama but it’s still ok…

These are the pressures I face.

They crowd in even closer.  My audience of two.  I place the serving dish over the pot.  Inhale.  Hold my breath.  Tighten up my abs.  Chant a little mantra.  Flip the pot over.

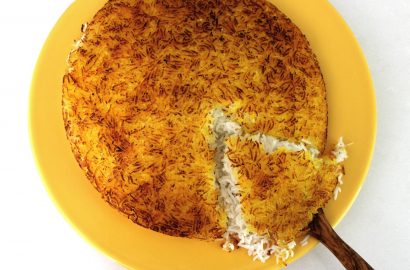
First it’s the triumphant sound of success, the swish sound of the release, as the rice drops from pot to dish.  I gently pull the pot up and away and there she is in all her glory – golden and regal  – TAHDIG.  Merrymaking ensues.  Exhale.  The Muse of Cooking decided to smile upon me  – this time.

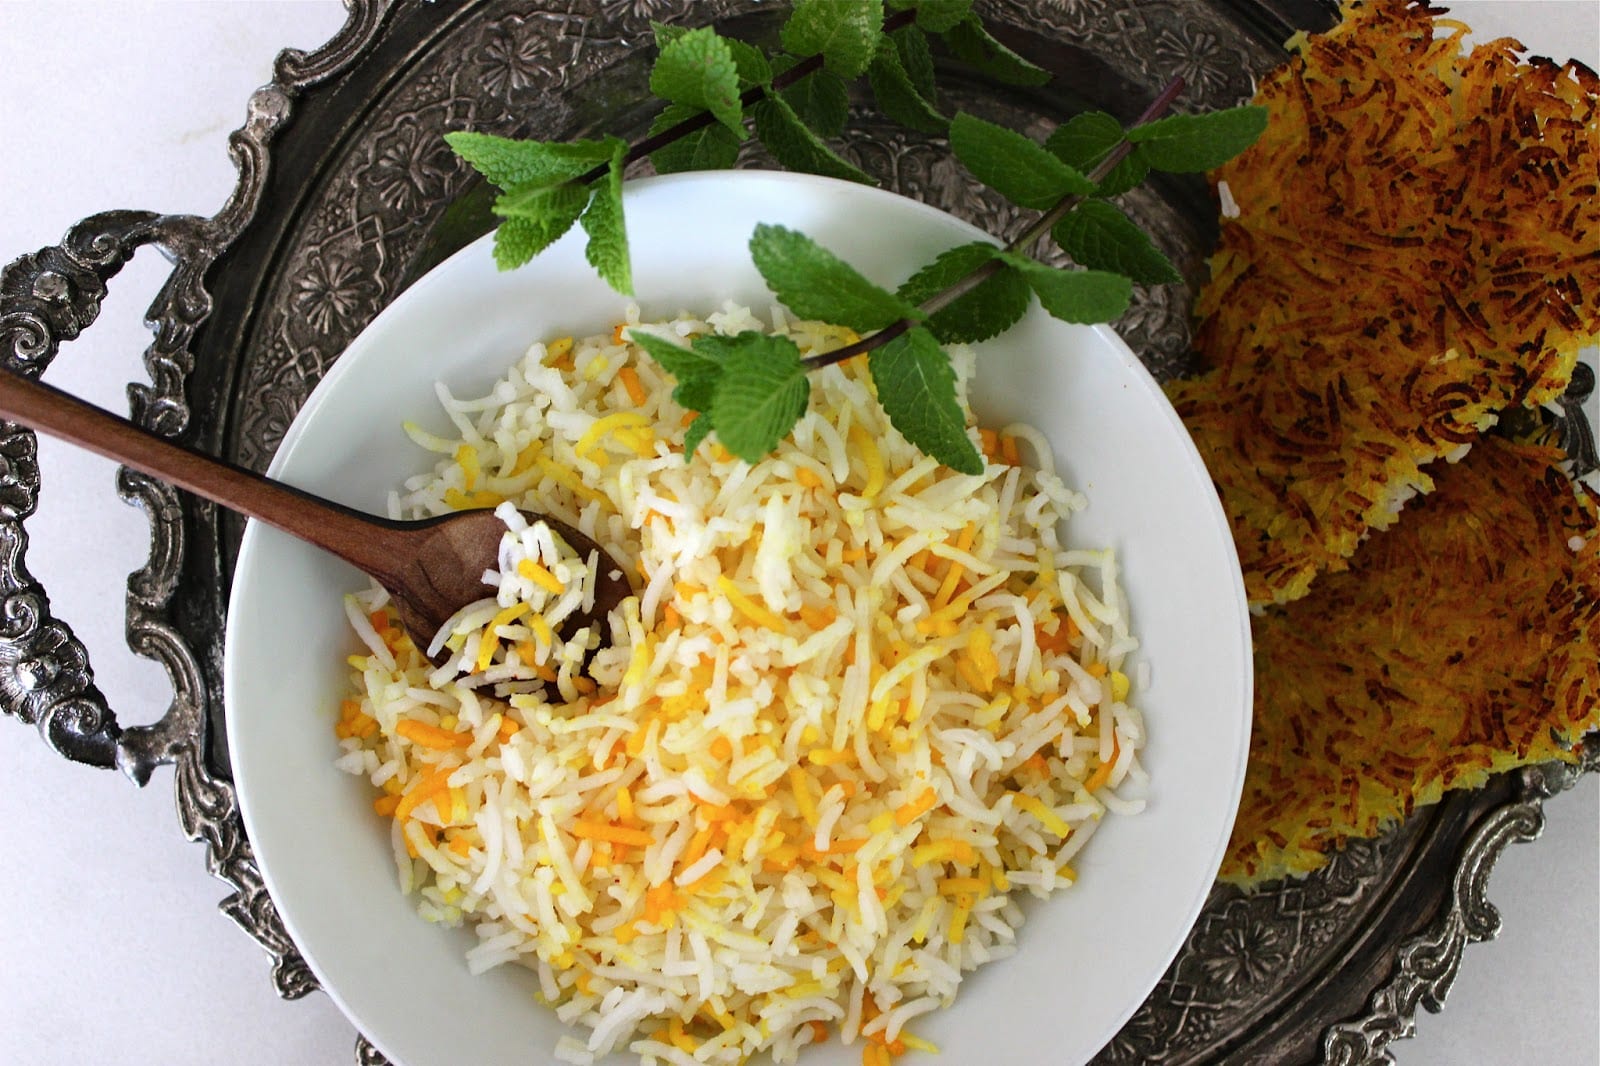
Rice is the crown jewel of Persian cuisine.  A platter of fragrant saffron-steamed rice is almost always present at the dining table.  The perfect companion to the many flavorful stews (like celery stew), koo koos and kababs.  As a child there was nothing more comforting and reassuring as a bowl of polo* ( cooked rice), crunchy tahdig, with mast o khiar and a few sprigs of fresh mint and parsley.

* Technically, plain saffron-steamed rice served alongside a stew is called chelo-khoresh.  Polo is steamed rice mixed with other ingredients like vegetables and meats.  But in our house we refer to all cooked rice as polo.

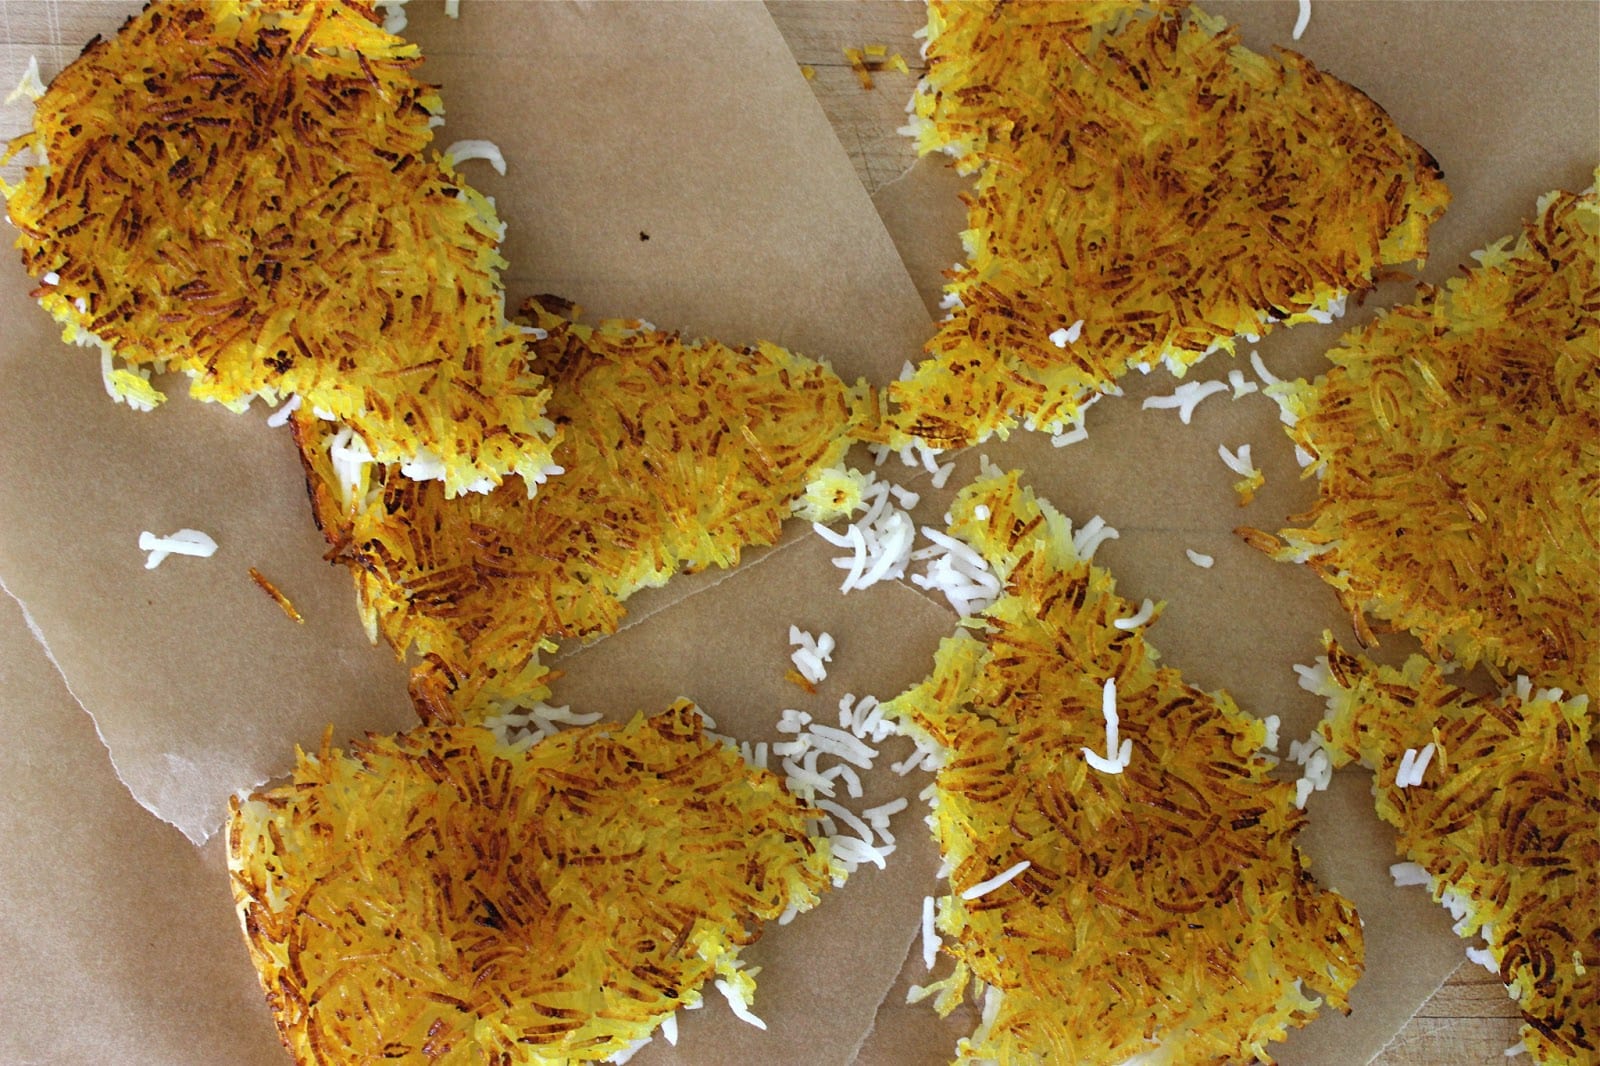
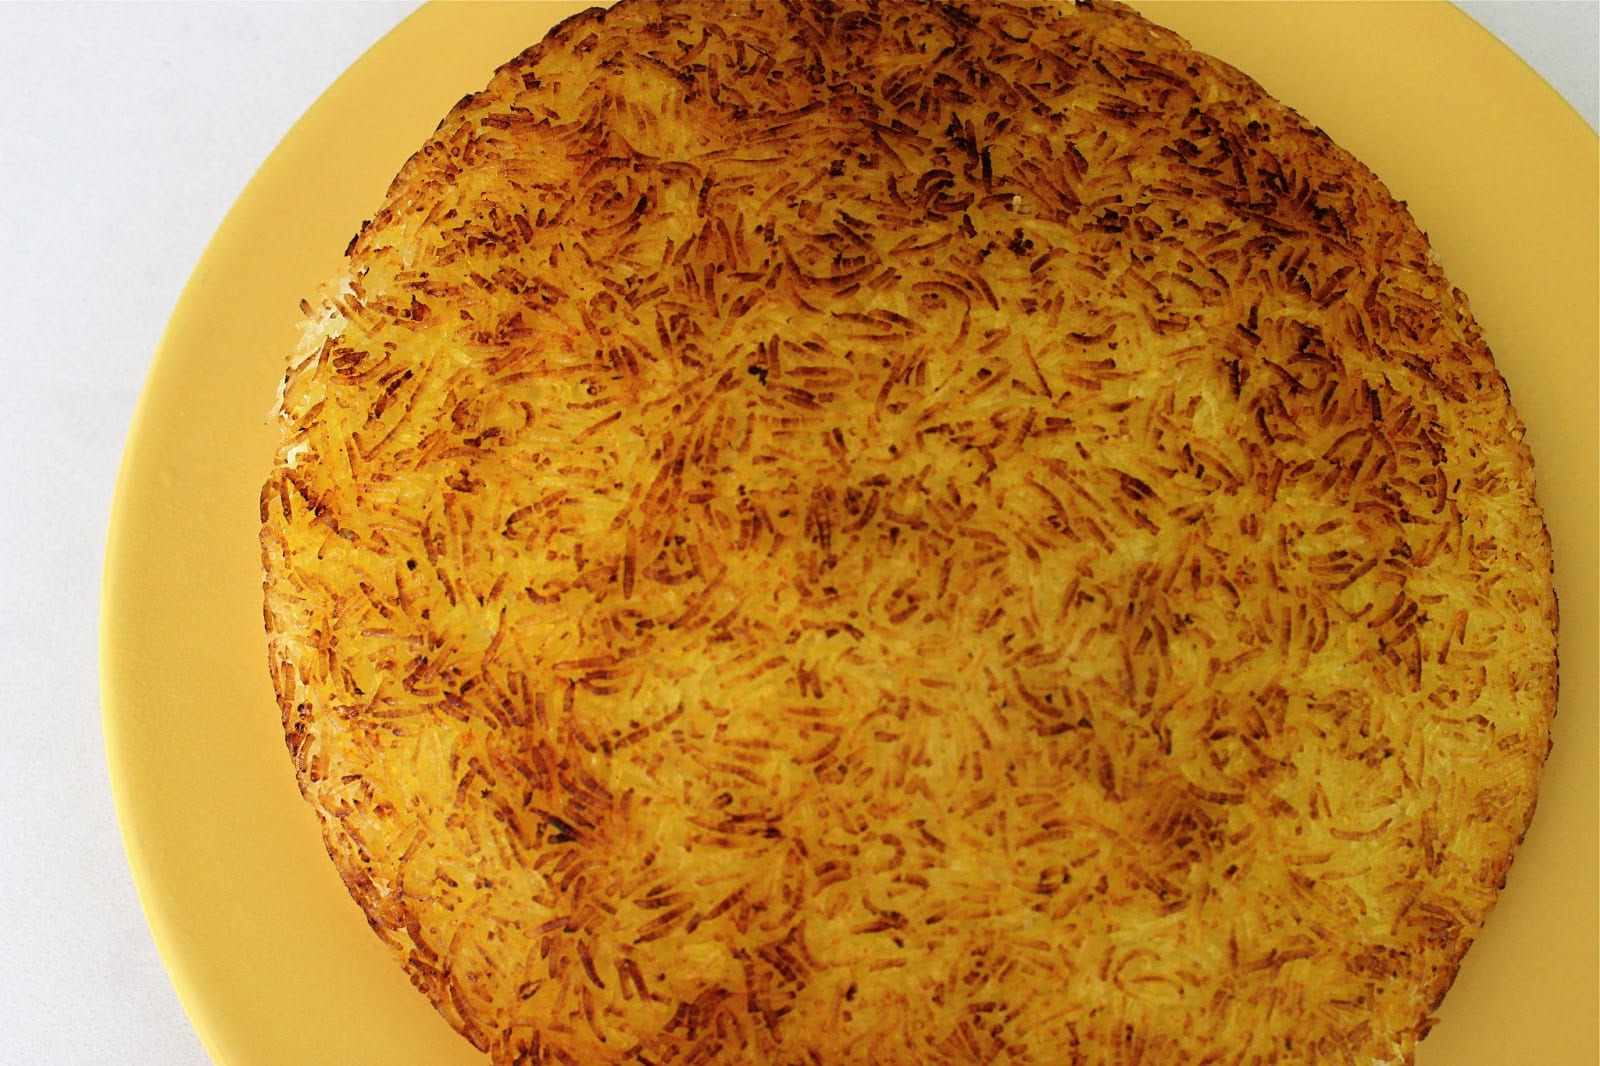
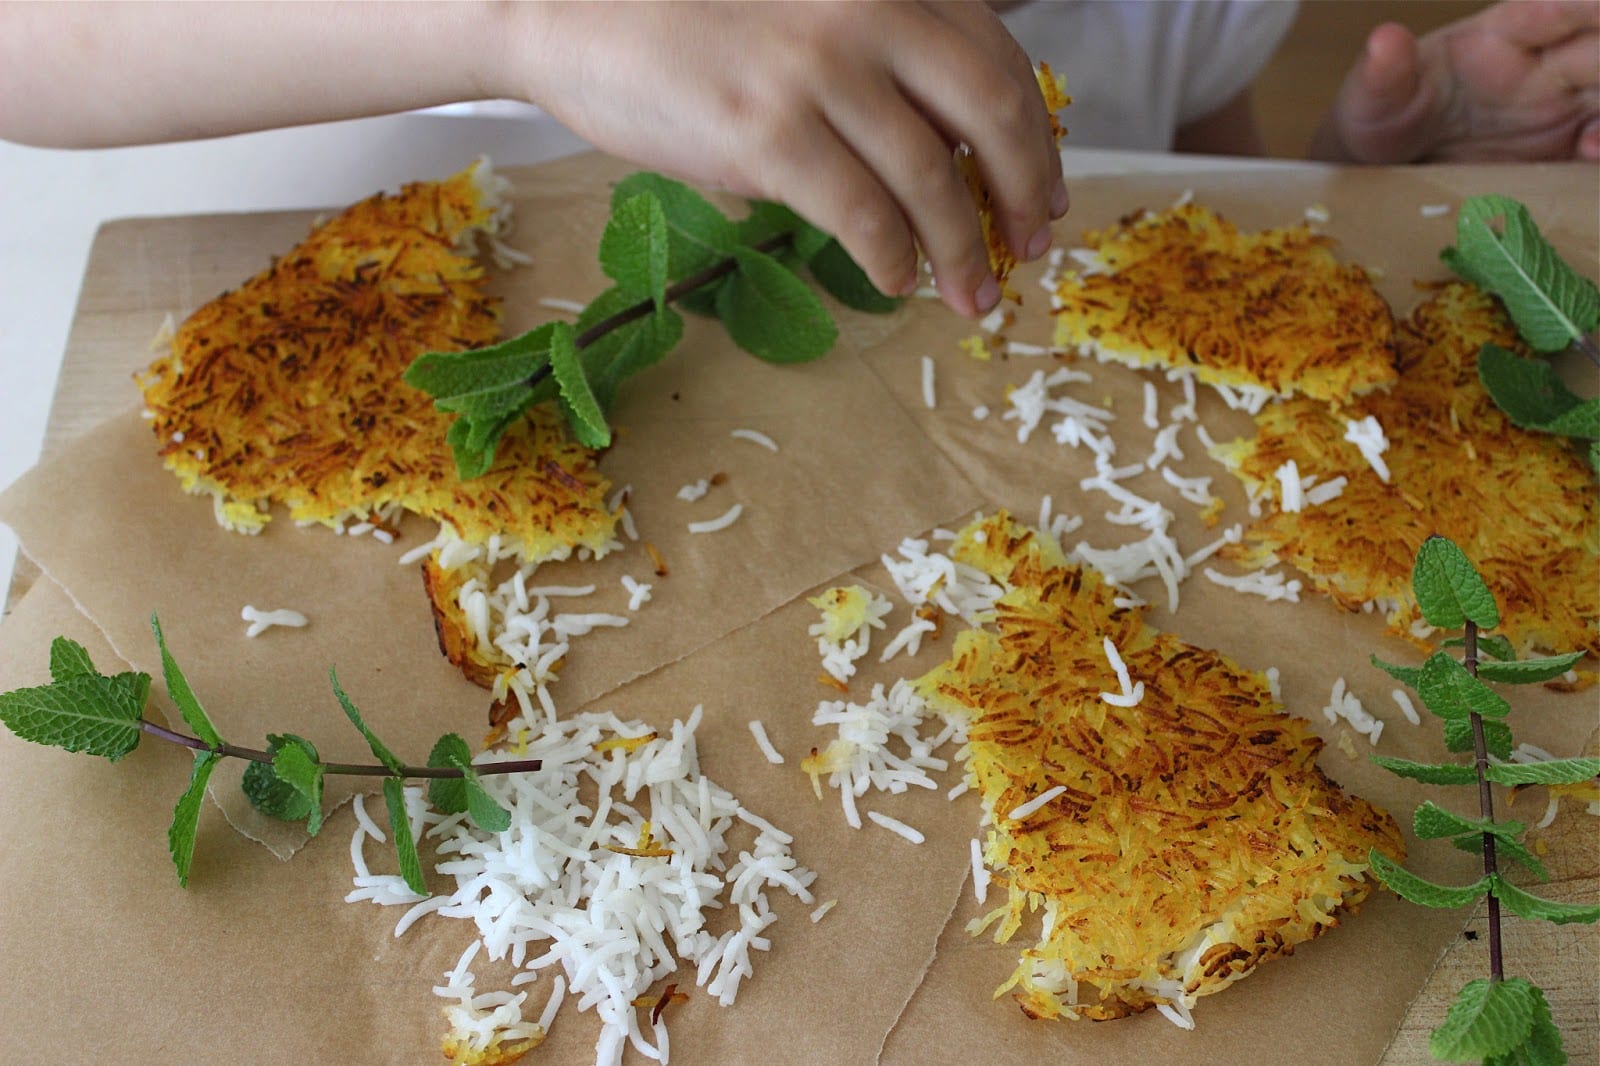
A Persian cook’s reputation rests first and foremost on his or her ability to turn out the perfect pot of fluffy rice and tahdig (pronounced “tah DEEG”).  Tahdig literally means the bottom of the pot.  The most common type of tahdig is made with rice (using bread or potatoes is popular as well).  The crispy, golden fried rice, nestled at the bottom of the pot – and the most coveted dish at the table.

Making Persian rice is truly a creative process.  No pot of rice ever turns out exactly the same and a perfect golden tahdig is never assured.  But even at it’s most imperfect, it’s as close as one can get to delicious perfection.  Really.

Every grain of rice should be separate, long, individual, fluffy – and shine on its own.  No clumps.  No sticking together.  Every grain is a jewel.

These are the words that echoed in our kitchen as my mom gently, methodically and artistically scattered the steamed rice – the jewels – on a platter.

There are a few key ingredients and techniques that you must follow to achieve this:

RICE
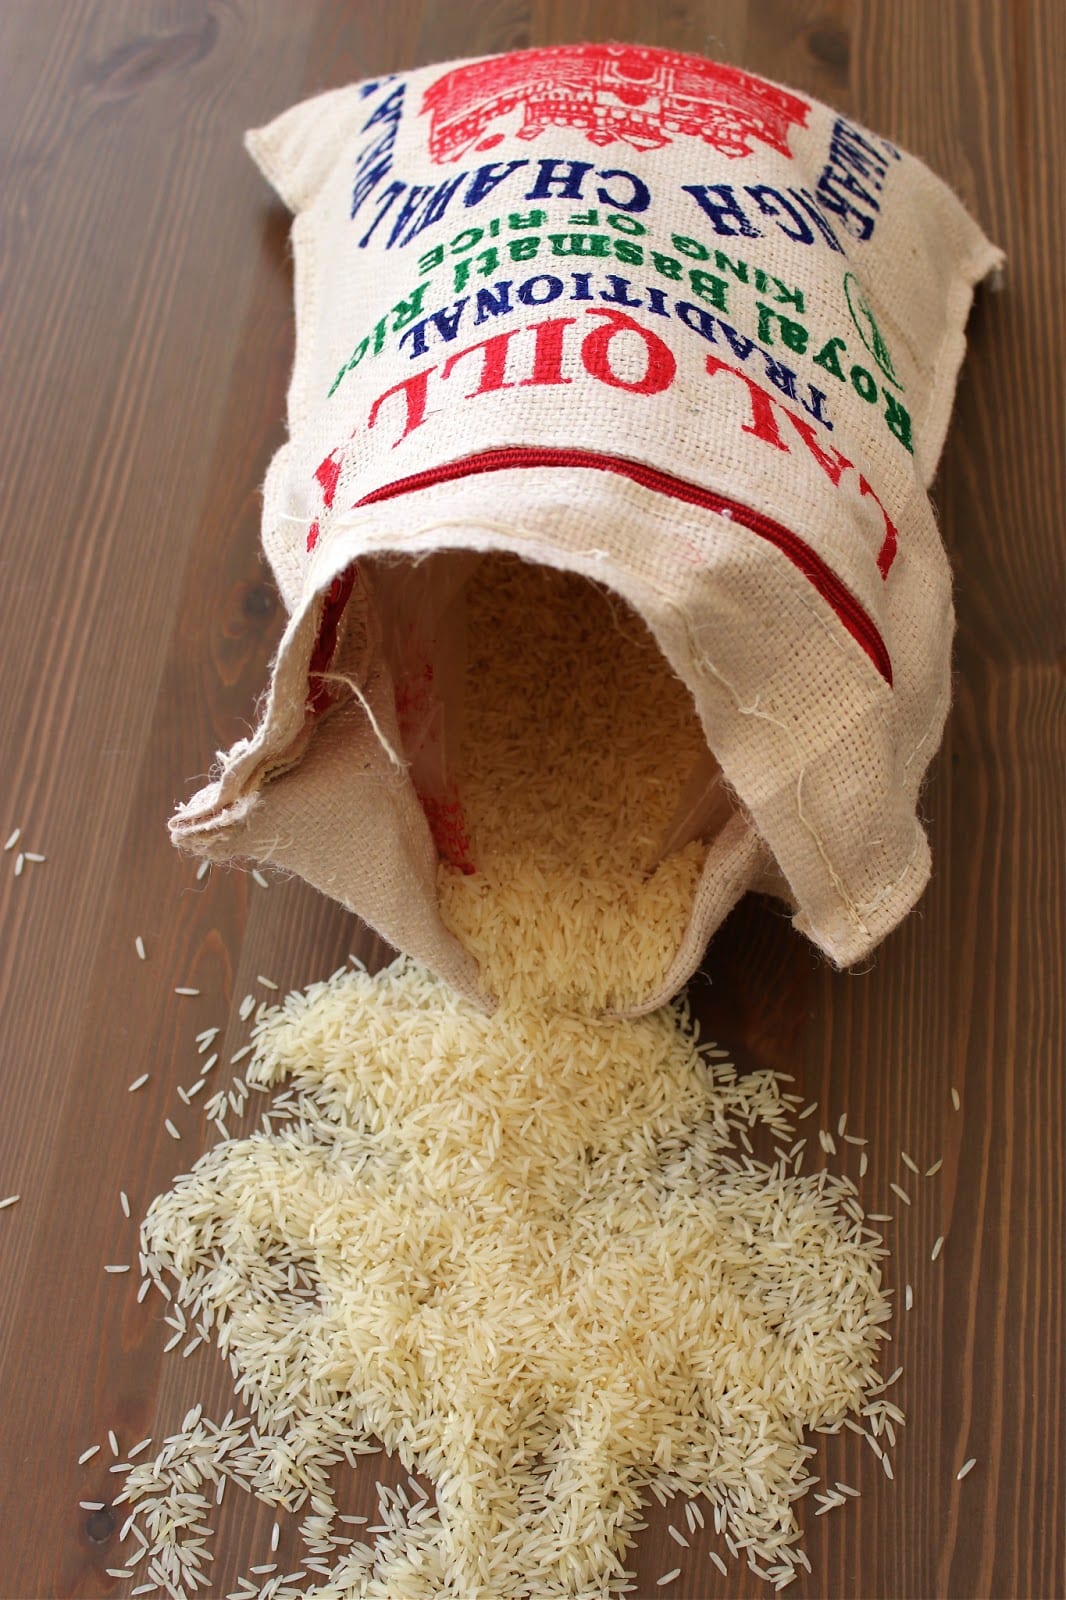
You have to start with a long grain rice.  Indian white basmati rice is very similar to the rice enjoyed in Iran.  On any given day if you go the Persian market you can overhear the ladies AND gentlemen passionately discussing the merits of one imported basmati brand over the other.  I use the Lal Qilla brand (which means committing to a 10lb sack).  I have also found the Trader Joe’s white basmati works quite well too.   Try a couple of different brands.  You’ll get a feel for which will turn out the fluffier rice.  Or visit a Persian market and ask.  But beware you might get a twenty minute thesis on rice!  We are very serious about our rice.

I should also mention that we made the switch to brown rice many years ago, for all the obvious nutritional, health conscious, waistline-minded reasons.  But there are times when nothing else will suffice but a dish of white saffron-steamed basmati rice.

POT,  PAN AND HEAT DIFFUSER
You have to use a non-stick pot or a deep non-stick pan.  A well-seasoned cast iron works too. DO NOT USE A STAINLESS STEEL POT.  To get the most tahdig, try to use a pot or pan with a flat bottom and one large enough that will give the rice plenty of room to expand.  If your pot or pan is too small the rice will clump together.  For this recipe I used a pot with a 10″ bottom.  If using a pan, make sure you have a lid that will tightly fit it.  The zeery – heat diffuser – is used to ensure the tahdig doesn’t burn.  If you don’t have one don’t worry about it.  It’s just extra insurance.

HEAT SOURCE
Heat temperatures differ on any given stove.  This is where you have to get a feel for your heat source and its relation to your rice.  It’s basically knowing when to go from a high heat to a low heat.

THE TWO STEP METHOD
Here comes the art.  You will first par-boil the rice (much like making pasta) so it is al-dente.  This also comes down to a feel for knowing when it’s al-dente and ready to drain.  It all depends on the quality of the rice you use and how long it has soaked.  You want the rice to be soft but still with a bite to it, not completely cooked through.  Boil it too long and you’ll end up with clumpy overdone rice; boil it not long enough and your rice will be slightly hard.

The second part is the steaming process.  There is a dichotomy at play here.  As you want to gently steam the rice up top you also want to crisp up the tahdig at the bottom of the pot without burning it.

SERVING
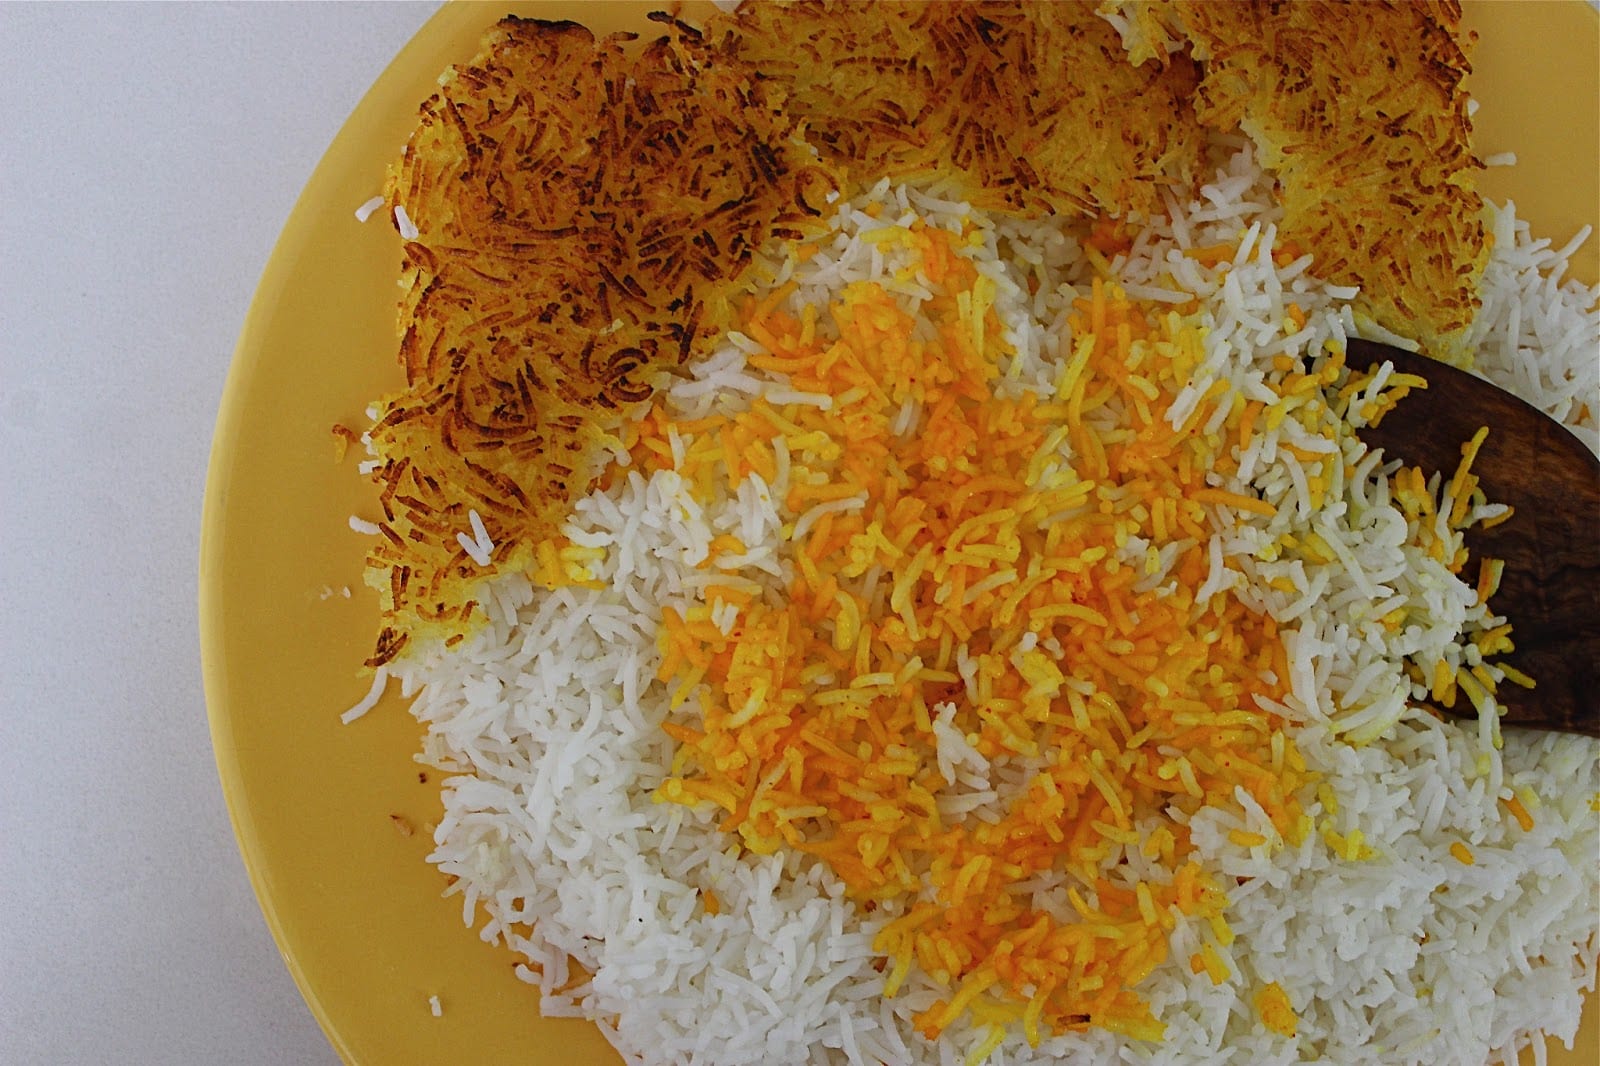
There are two options on how you can serve the rice.  First, with a spatula you can gently scatter the fluffy rice onto a serving dish.  (No dumping the rice out of the pot onto a dish in one fell swoop.  Remember, you are dealing with jewels!)  And then gently loosen and remove your tahdig from the bottom of the pot, divide in portions and serve separately.

Or, you can place a serving dish big enough to fit over the pot, and carefully but with purpose, flip the pot over.  Tahdig still intact.  Kind of like a cake.  This option has a great “tada” and “wow” appeal.

Think of Persian rice as a coy lover.  You have to treat her with respect.  You have to be patient.  You have to know when it’s appropriate to make a move and when to pull back, give her space.  You have to seduce her with a gentle touch, poetry and love.  And ultimately you have to dive in with complete and utter unbridled passion and abandon.  If she turns you down the first time – try, and try, and try again.  Because she’s worth it.  Really.

Please do share and let me know how your rice and tahdig turns out.  Were you good to your lover? Was your lover good to you?

SAFFRON STEAMED RICE – CHELO

Ingredients:

Serves 4-6

2 cups white basmati rice
5 tablespoons salt, divided
10 cups water, plus additional for soaking
2 1/2 tablespoons ghee or butter or oil of choice
1/8 teaspoon ground saffron steeped in 1 tablespoon hot water, plus a pinch for tahdig
2 tablespoons butter or ghee, melted,  divided for drizzling over rice (optional)

1- Place rice in a medium sized mixing bowl.  Fill with cold water.  Wash rice in water by gently swirling the rice around in the water.  Drain and repeat process about 5 times.  Until the water that is rinsed runs clear, not cloudy.  Soak washed rice in 2 cups cold water and 2 tablespoons salt for at least 1 hour.

2- In a large pot bring 10 cups water and remaining 3 tablespoons of salt to a boil.  Drain soaked rice.  Add the rice to the boiling water and bring back up to a boil.  Leave pot uncovered and don’t go anywhere!  The water can boil over very easily. With a spoon scoop off any foam that rises to the top. Watch your timer.  Start testing your rice after 4 minutes.  My rice was al-dente and ready to drain at 5 minutes.  It shouldn’t take longer than 6-8 minutes.  Once al-dente, drain in a colander and quickly rinse the rice under warm water.  Make sure your colander’s holes are small enough so you don’t lose any rice. When rinsing the rice under warm water make sure you don’t open a gushing amount of water on the rice.  If your faucet has a spray option use that.  If not place your hand under the tap and with fingers create a spray.  Gentle.  Let rice completely drain off any excess water.

3- In a non-stick pot or pan (if using the same pot you boiled the rice in make sure you wash and dry it first) melt 2 1/2 tablespoons ghee or butter over low heat.  If using oil heat the oil over low heat for a couple of minutes. The cooking oil should cover the entire surface of the bottom of the pot. (If your pot is bigger add more oil or butter accordingly) Add a pinch of saffron to the oil. Swirl around. (You want to work fairly quickly here, so the oil at the bottom of the pot doesn’t cool off too much)  With a spatula add enough rice to fully cover the bottom of the pot.  Using the back of the spatula or the back of a wooden spoon pack  down the rice firmly.

4- With a spatula gently scatter the rest of the rice into the pot in the shape of a pyramid.  This is to give the rice enough room to expand and lengthen.  With the handle of a wooden spoon poke a couple of holes in the rice to allow the steam to escape.   Don’t poke all the way down to the tahdig.  Drizzle half of the melted butter a 2 tablespoons hot water over the rice.  Cover and turn heat up to medium-high.  Cook for 10 minutes.

5- Turn the heat down to medium.  Lift lid without allowing any of the condensation collected on the lid to drip back in the rice.  Cover the lid with a clean kitchen towel or a couple of layers of paper towel. This is to catch the condensation.  Place lid firmly back on the pot.  Cook for 10 minutes.4- With a spatula gently scatter the rest of the rice into the pot in the shape of a pyramid.  This is to give the rice enough room to expand and lengthen.  With the handle of a wooden spoon poke a couple of holes in the rice to allow the steam to escape.   Don’t poke all the way down to the tahdig.  Drizzle half of the melted butter a 2 tablespoons hot water over the rice.  Cover and turn heat up to medium-high.  Cook for 10 minutes.

6- Turn heat down to low.  Place heat diffuser under pot.  Cook for 40 minutes.  7- Turn heat off.  Remove lid.  If serving like a cake, place serving dish over pot and flip.  Otherwise,  set aside a couple of spatula fulls of rice.  Scatter remaining rice on a platter and gently remove the tahdig.   In a small bowl mix the saffron water with the remaining melted butter.  Mix the reserved rice with the saffron water/butter mixture.  (if not using butter just mix the saffron water with the reserved rice) Scatter the saffron/rice mixture over the white rice.6- Turn heat down to low.  Place heat diffuser under pot.  Cook for 40 minutes.

Serve immediately.  Enjoy and do a cartwheel for a job well done!

The tahdig  should be eaten right away.  It does not keep.  And frankly I’ve never had any tahdig left over.  The rice will keep in the fridge for up to 3 days and can be frozen for up to 3 months.

Side Dish

Fresh Herb Koo Koo – Koo Koo Sabzi

Mmmm…what’s that smell, Mama?

It’s koo koo again.  Do you think you’ll want to have more, Luna?

With that smell all in the house, how can I ever say no!

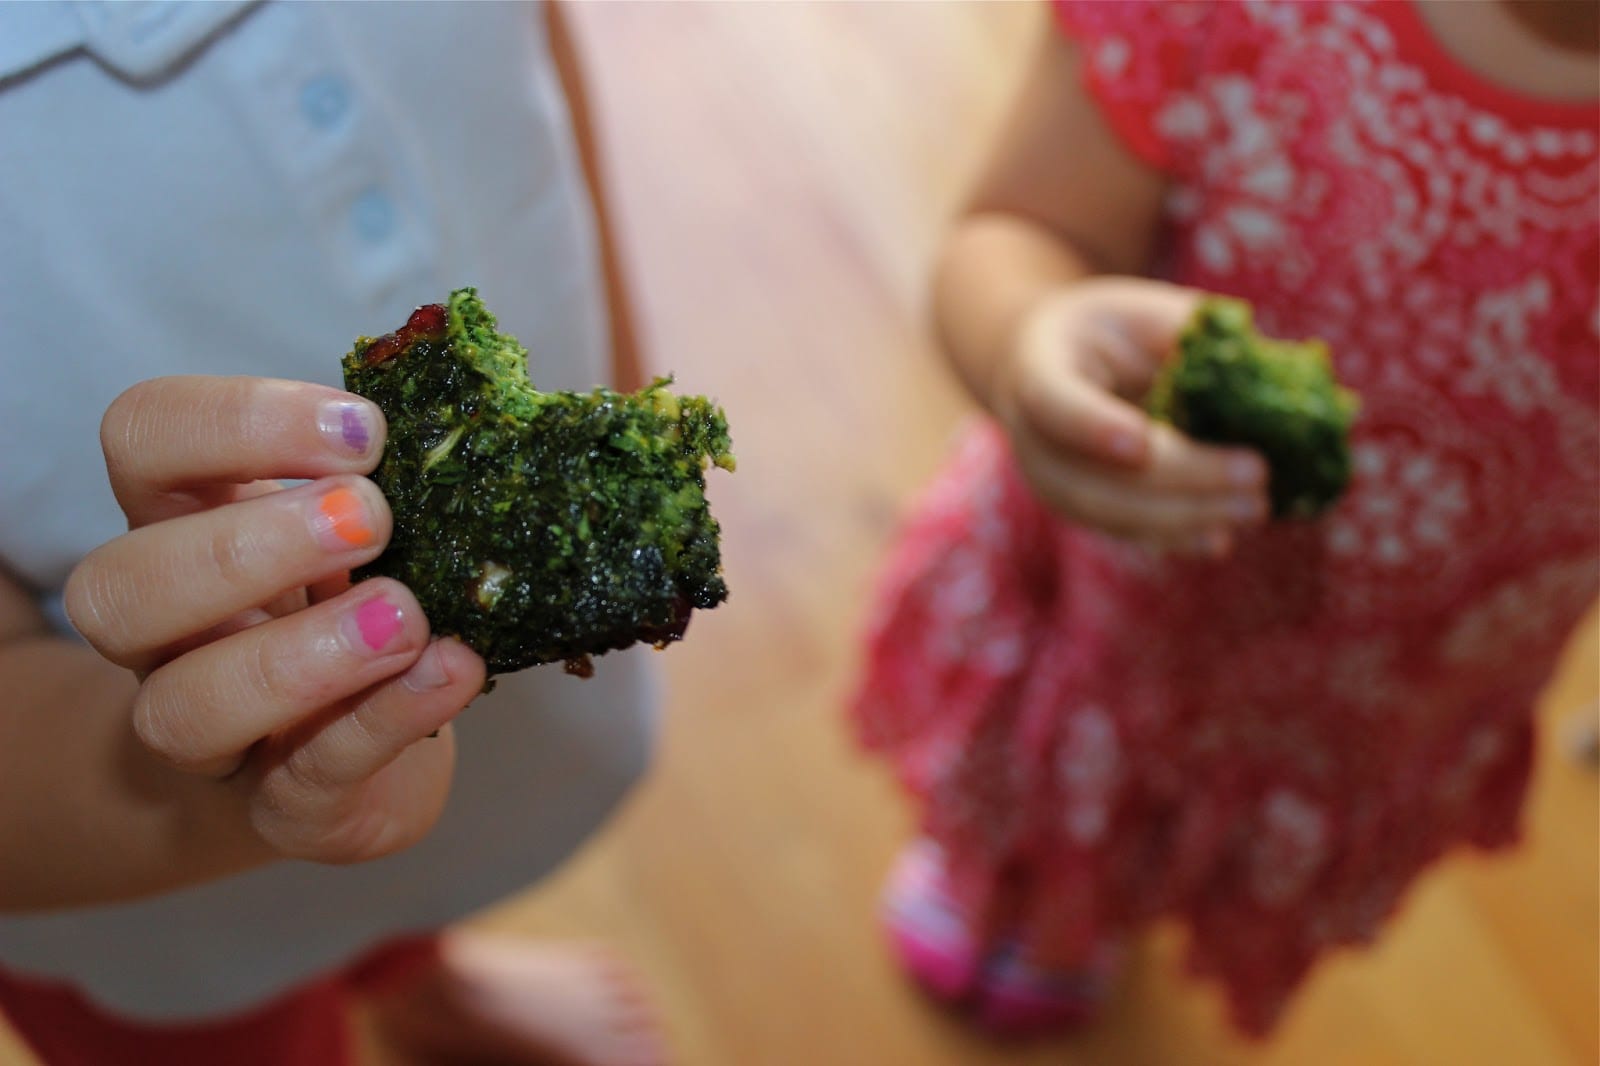
This was our third batch of herb koo koo in three weeks.  After days of koo koo for lunch, dinner, after-school snack; and having exhausted every cuckoo – koo koo joke, I was certain there would be no interest in yet another bite.  But once that smell takes over the house…how could we ever say no…

Koo koo is a dish somewhat similar to a quiche or a frittata. There are many different preparations for koo koo.  Fresh herb koo koo is one that is traditionally enjoyed as part of our new year – Nowruz – meal.

Nowruz is a celebration of Nature and Life.  We welcome the arrival of spring, by celebrating and honoring all that we are surrounded with.  The air that fills us with life; the fire that gives us warmth and light; the water that quenches our thirst; the flora that intoxicates us with their perfume and beauty; the fauna that reminds us that life extends beyond the human form; the eggs that represent new life and fertility; the book of poetry that lifts our spirits and fills us with hope for the future; the baked goods that sweeten our tongues and our hearts; and the green herbs and vegetables that nourish us and give us strength.

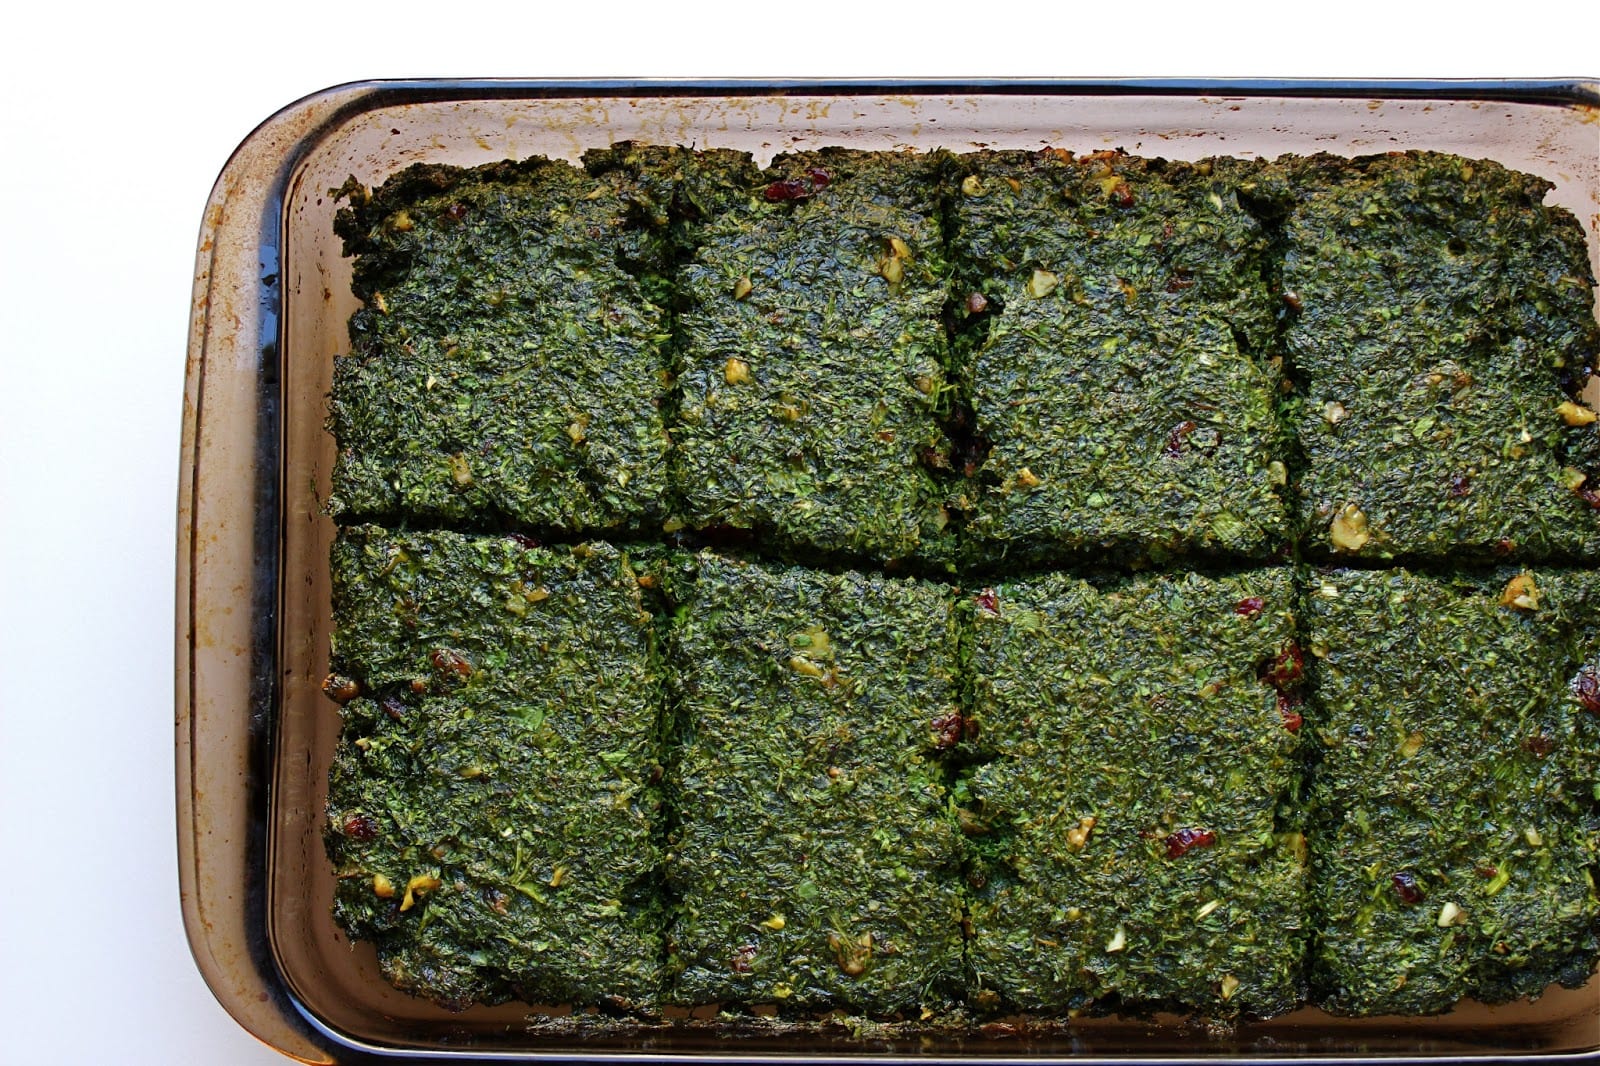
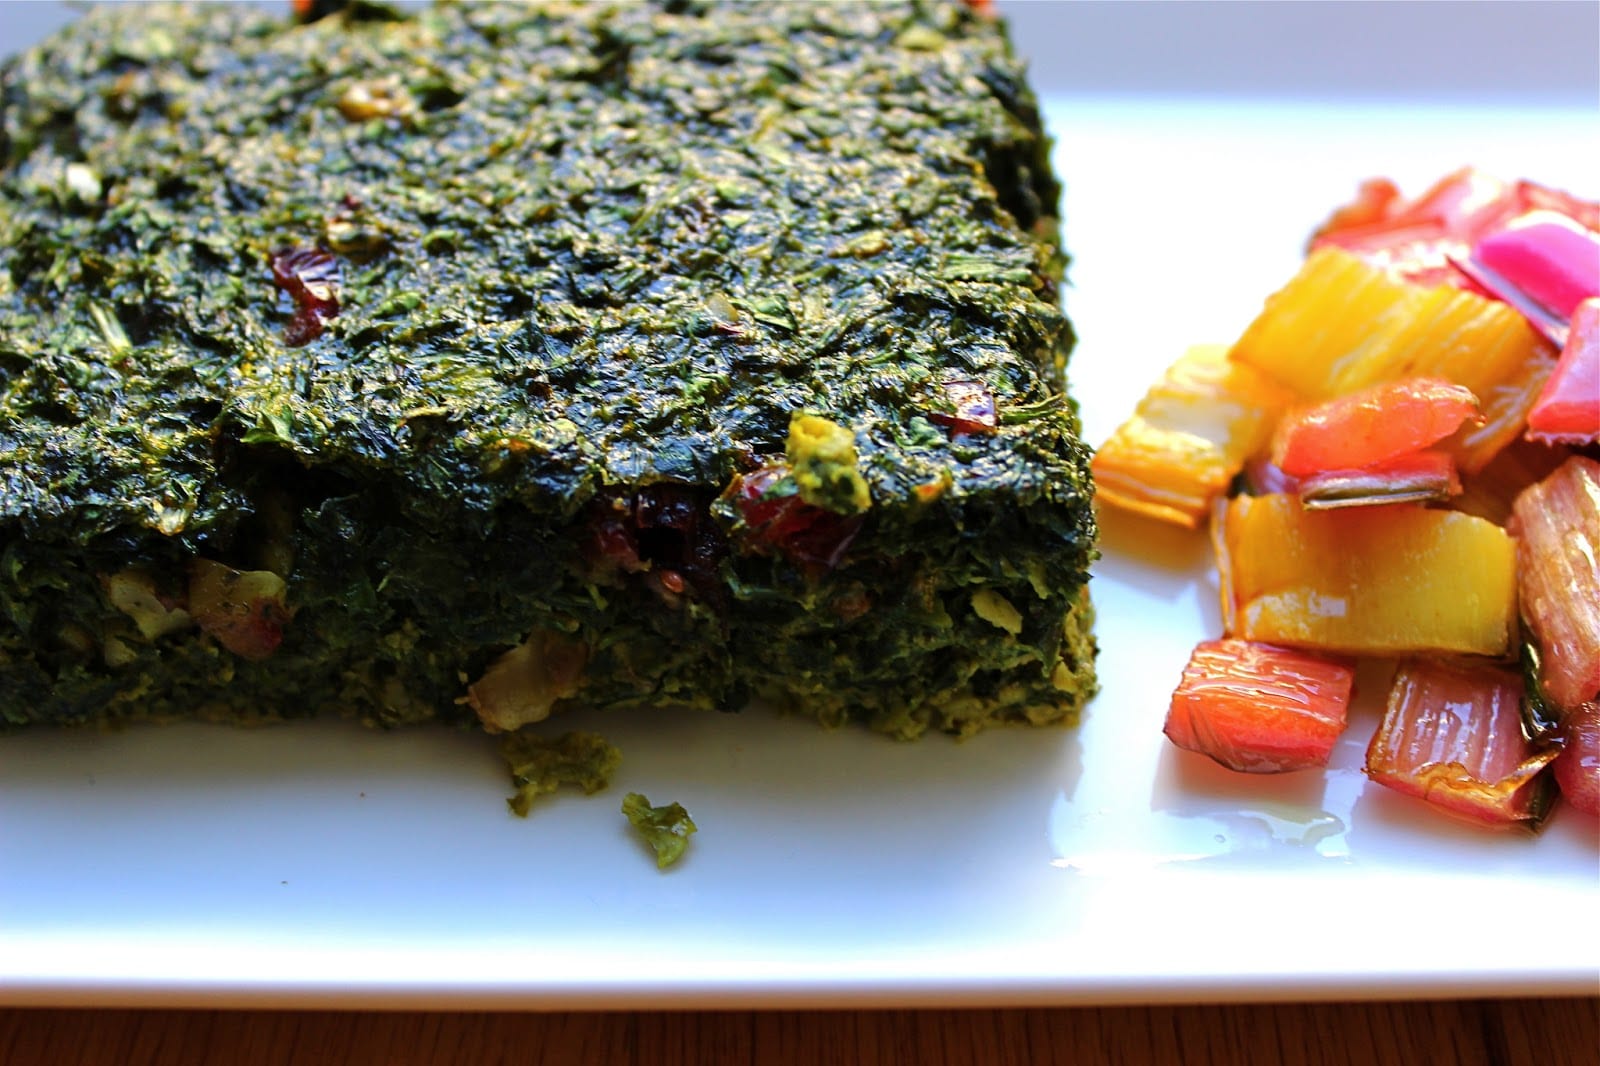
This koo koo was inspired by the overflow of greens in our farm box.  Swiss chard is not typically used in a koo koo but I thought it would work well alongside the spinach and abundance of fresh green herbs.  I also like to simply saute the rainbow-hued stems in a little olive oil, garlic, salt and fresh lemon juice, and serve it alongside the koo koo for a little added color.

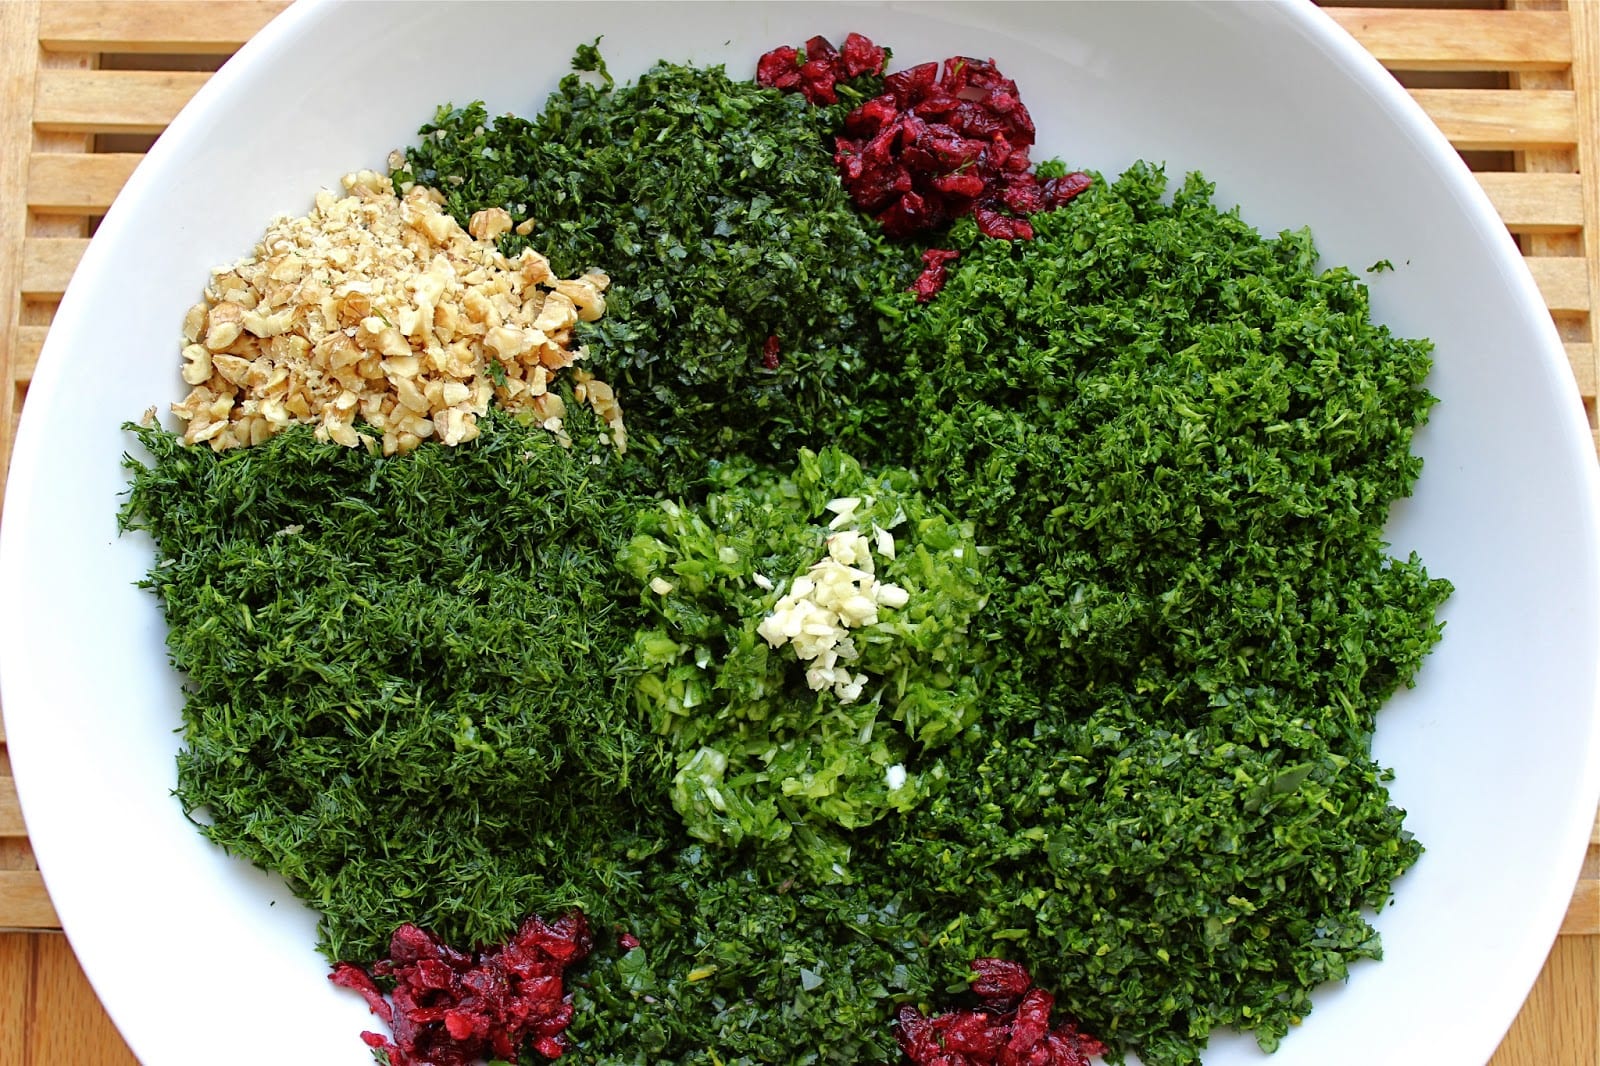
As for that smell – that would be the combination of the sabzi – the fresh green herbs.  Dill, cilantro, green onion, fenugreek, tarragon and parsley.  Curly parsley.  There I said it.  I, like you, have been programmed to to turn my nose up to the unsophisticated step-sister of the much cooler and popular Italian parsley.  For years my mom and I have been arguing the “chicness” of Italian parsley (me) vs  her preferred curly parsley.

It is juuuuicier.  It is more flavorful.  It is more fragrant.

I am here to admit (once again) that my mother was right.  When it comes to cooking Persian food, curly parsley – is just better.  But of course, if Italian parsley is what you have at hand then use that.  That will work too.

We enjoy fresh herb koo koo with a side of mast-o-khiar and a salad for lunch.  It is also fantastic as a sandwich with your favorite kind of bread – a typical school lunch for the girls these past three weeks.  It also makes for a simple and nourishing dinner served with rice.  Fresh herb koo koo would also be a great vegetarian addition for an Easter brunch.

Within the first few minutes of putting the koo koo in the oven – the kitchen fills with that smell.  The smell of spring.  A new year.  New possibilities.  Family.  Health.  Love.  Life.

Wishing you all a Happy Nowruz.

FRESH HERB KOO KOO -KOO KOO SABZI

Ingredients

Serves 6-8

1 bunch parsley
1 bunch cilantro
1 bunch dill
1/2 bunch spinach
1/2 bunch swiss chard, approximately 3 large leaves, stems off
6 green onion
1 clove garlic, chopped
1/3 cup cranberries, roughly chopped
1/2 cup walnuts, roughly chopped (optional)
3/4 teaspoon dried fenugreek  (optional but really adds to that smell)
1 teaspoon dried tarragon, or 1 1/2 teaspoon fresh tarragon, chopped (optional)
1/4 teaspoon cinammon
1/2 teaspoon turmeric
1/4 teaspoon ground saffron
1 teaspoon finely ground sea salt
1/4 teaspoon ground black pepper
1/4 teaspoon ground rose petals (optional)
6-8 large eggs, as needed
1/3 cup olive oil, plus 2 tablespoons

Heat oven at 350F degrees.

  1. Roughly run your knife through the first 5 ingredients.  Working in batches chop the first 5 ingredients in a food processor.  About 25-30 pulses for each ingredient.  Make sure you don’t over do it.  Or you can finely chop everything by hand with a sharp knife. Place everything in a large bowl.
  2. Run your knife through the green onion.  Place in food processor.  Chop.  About 15 pulses.  You want to make sure everything is finely chopped but not mushy.  Add to the bowl of herbs and greens.
  3. Add the next 11 ingredients to the bowl.
  4. Beat 6 eggs in a separate bowl.  Add to your mixture.  Stir and combine well.  You want the mixture to have the consistency of thick yogurt, or as my mom says “ice cream that is starting to melt”.  Crack in the other 2 eggs if necessary, and combine.
  5. Pour 1/3 cup olive oil in a baking dish.  I used a 15″x10″x2″ rectangular glass pyrex dish.  You don’t want your dish to be much deeper than 2″, otherwise baking time will vary.  Spread the olive oil along the bottom and sides of the dish.
  6. Pour in your mixture and spread evenly.
  7. Place in the middle rack of oven. Bake for 30 minutes.  Take out of oven.  It should have set.  Make one cut along the middle horizontally and three cuts vertically. Gently flip the pieces over. So the bottom is facing up now.  Drizzle in remaining 2 tablespoons of olive oil in between the cuts.
  8. Bake for another 15-20 minutes.
  9. Take out of oven.  Let cool for a few minutes.  Cut into squares or triangles and serve.  Can be made ahead of time and served at room temperature or warmed through.

Will keep in fridge for up to 3 days.  Will keep in freezer for up to 3 months.

Side Dish

Yogurt – A Love Story – Mast O Khiar

If we were playing that silly “what if you were stranded on a deserted island, what is the one food item you would take with you” game – my answer without hesitation would be  yogurt.

Plain, un-adulterated – nothing added – yogurt.

If I were a poet I would compose volumes of love sonnets declaring my eternal love and devotion to yogurt.   I would weave my words together with golden thread – describing it’s creamy, silky, smooth and nutritious goodness.

Yogurt is a staple in Persian homes – and in our home growing up the container of yogurt was always present at the table.  As it still is – a constant companion to pretty much any meal – rice, stews, soups, salads…

As a child, if I showed little interest in a particular dish, some yogurt would be added to side of my plate.  And miraculously, by adding a little yogurt to each bite the food was somehow transformed and made more enjoyable.  And since I had no taste for milk,  yogurt provided most of my calcium.  Cereal was not part of our breakfast routine, but for a time there was the Corn Flakes craze.  My five year old self could not think of anything less appetizing.  Cold milk poured over dry flakes – which then turned to mush – first thing in the morning.  But it had to be good; after all, that’s what everyone ate in America.  Was there something I was missing?  My solution: skip the milk and cover every single rooster-crowing flake with yogurt.  Still not great, but at least palatable.

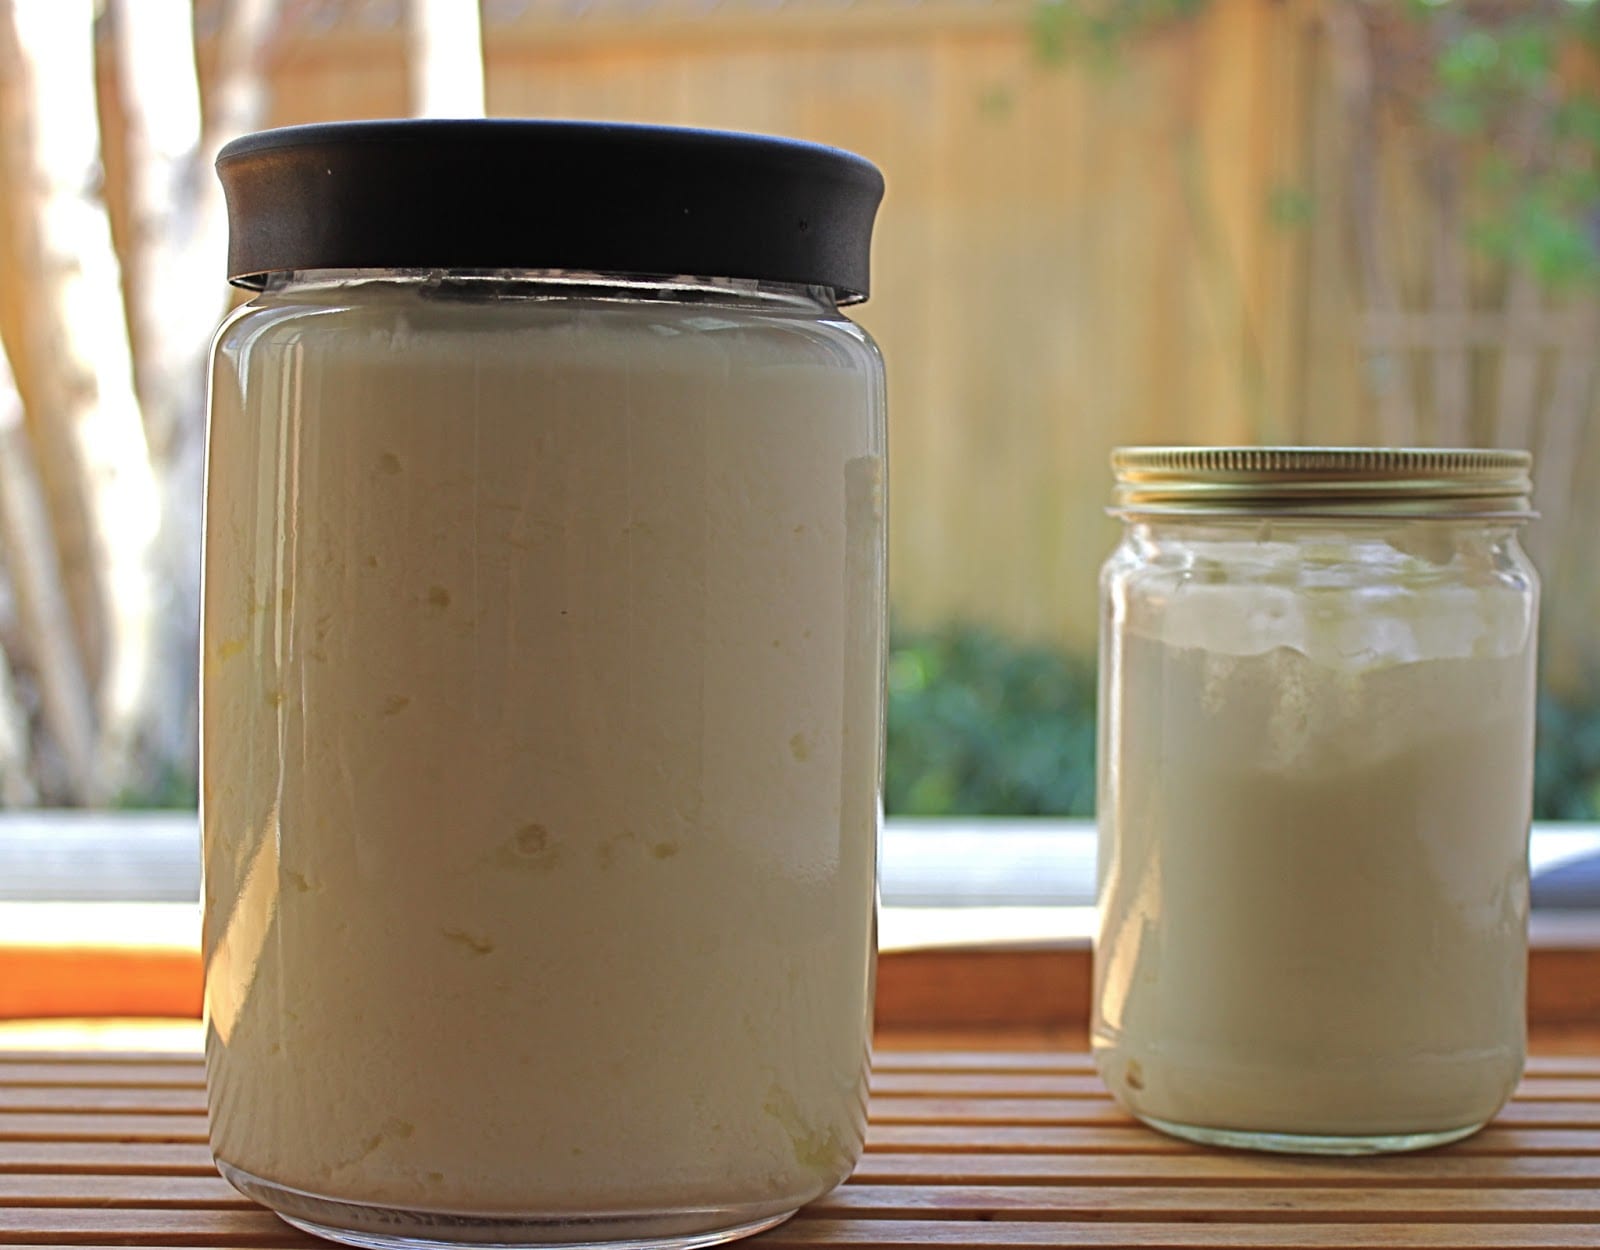
I suppose it was only inevitable that I would start making my own yogurt.  I am just surprised it took me so long to do so.  Strained (what’s referred to as Greek yogurt) or not – a lot of yogurt is consumed in our house on a daily basis.  The girls have also inherited my love for yogurt.  It’s one of those foods referred to only in Farsi – mast (sounds like cost). A typical after school snack: mast and honey.  And if it’s not the container of plain yogurt making itself right at home at the dinner table, then it’s mast o khiar.

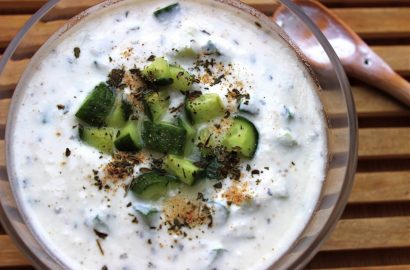
Mast o khiar literally means yogurt and cucumber.  Typically it is considered a dip or a side dish.  In our house it is consumed by the bowlful.  Drew routinely commits the cardinal sin of smothering his rice and stew dishes with it (but since over the years he has so lovingly and enthusiastically embraced so many of our idiosyncrasies, he gets a pass for this), Soleil and Luna like it on the side of their dish.  A little bit of rice, a little bit of stew and a little bit of mast o khiar – creating the perfect bite. Or it can be found right next to the hummus, and other similar dips, perfect for crudites, a cracker, warm bread or my favorite (and weakness) – a chip.  You will never find any left over either.  Just like it used to be in my childhood home – my brother Ramin and I keeping a close eye on the mast o khiar bowl, waiting to pounce, to see who would be the lucky person to get to eat the last remaining spoonfuls right out of the serving bowl.  And when no one was looking lick clean the inside of the bowl.  Nothing more comforting.

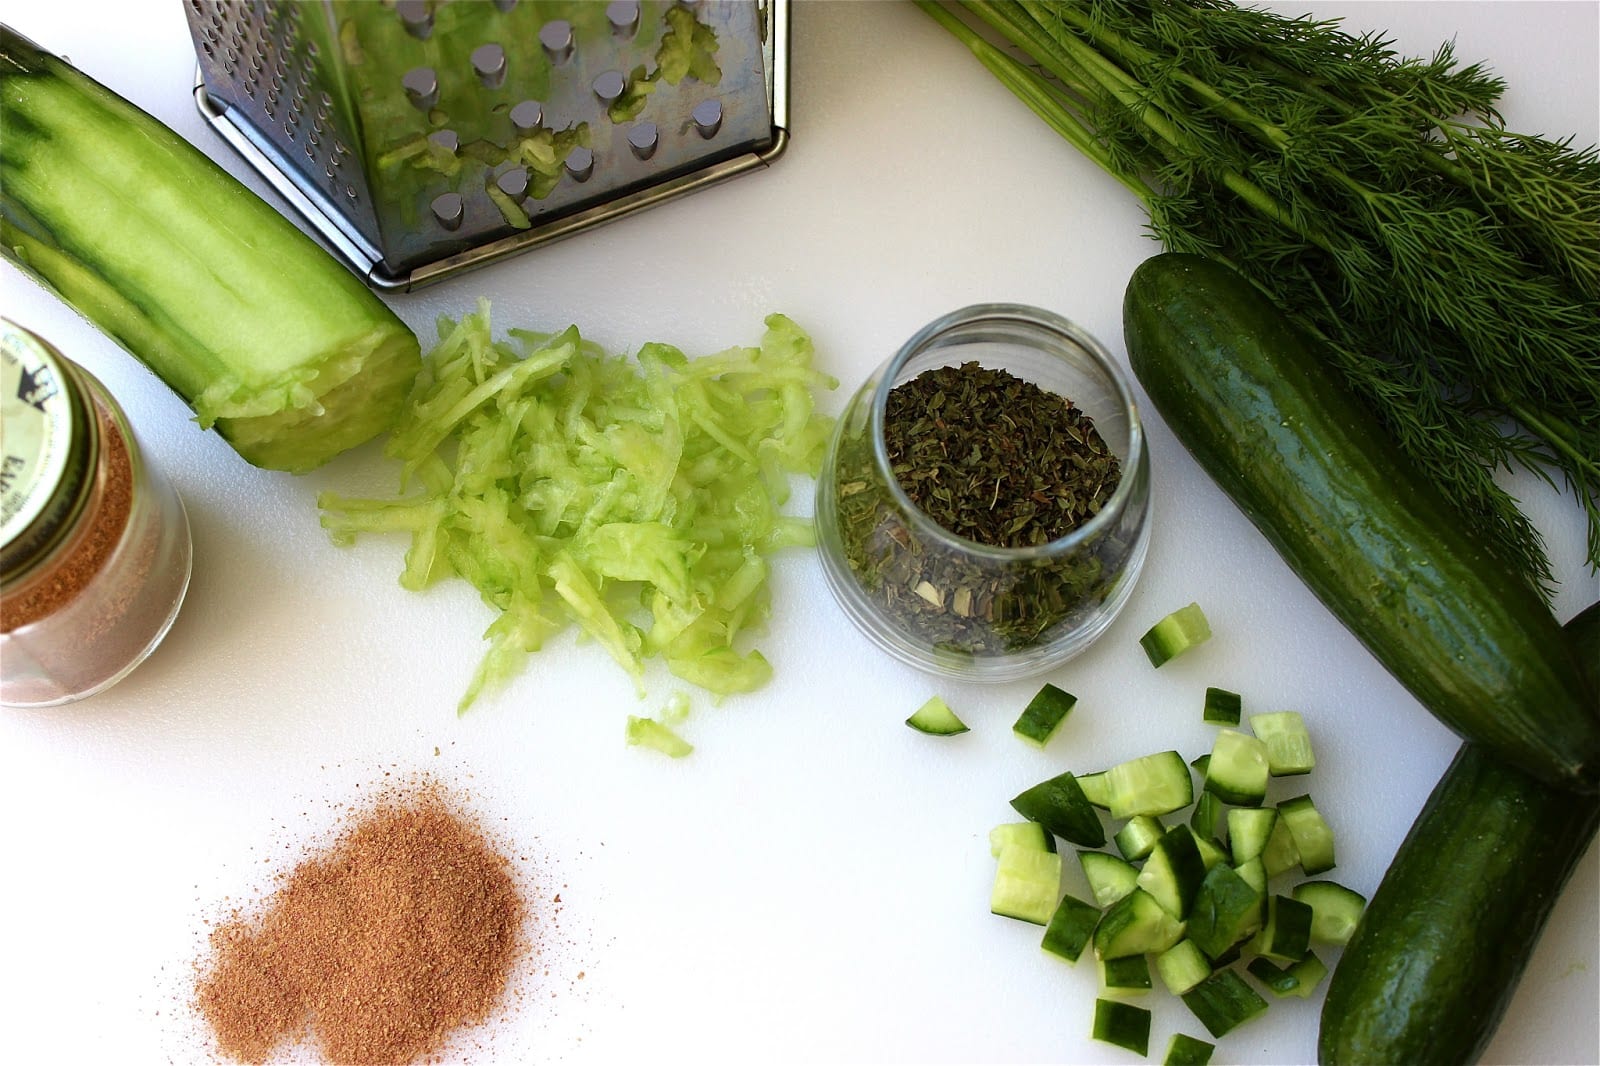
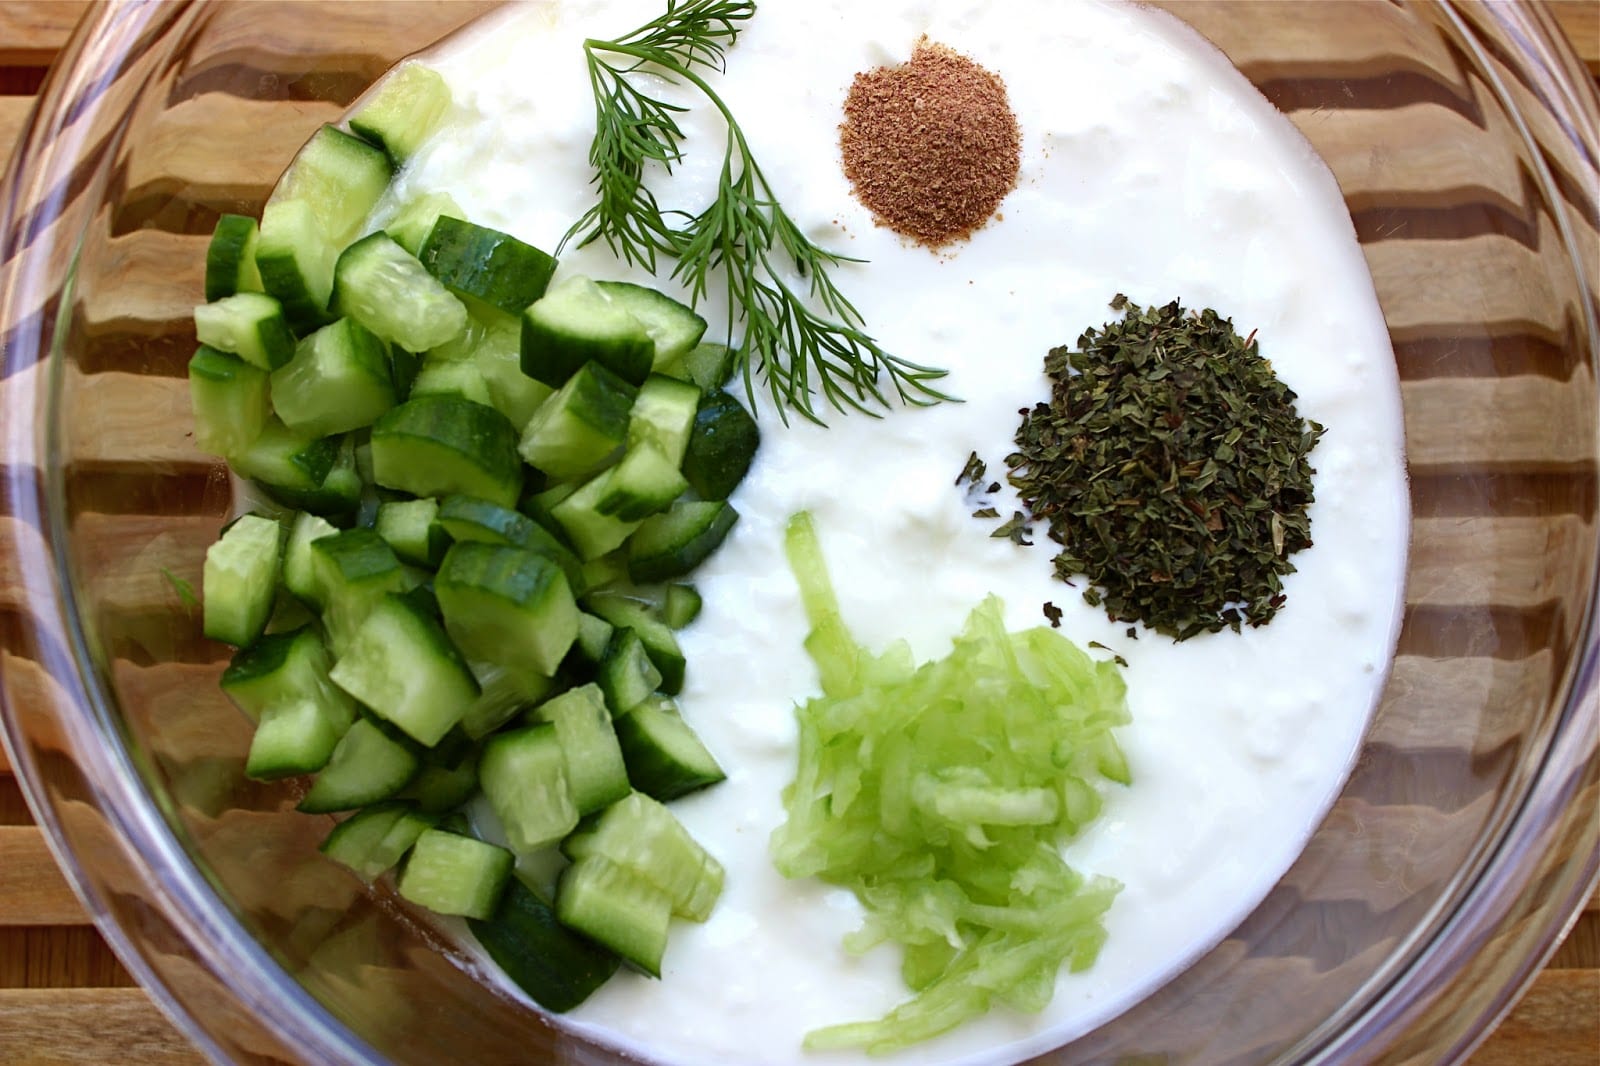
Mast o khiar comes in many different variations.  But its simplest preparation – and what you will find on most nights at our table: good quality organic plain yogurt, cucumber, and a pinch of salt.  From there, I build on this canvas depending on what’s in my fridge, spice cupboard, or just delivered in my farm box (like fresh dill or fresh mint!).  You can chop up your cucumber, or grate it.  If you grate your cucumber don’t get rid of the excess cucumber juice.  All the flavor is in that juice.  I am rather reluctant to give actual measurements of ingredients here.  This really is one of those dishes you can make to suit your taste.  Work with what you have.  Even if you don’t have a cucumber – the real hero here is the mast.

Yogurt – my late night confidant, my consigliere, always there to share in my triumphs and heartbreaks, in the mundane and the extraordinary, over three continents, consistent and unconditional.

MAST O KHIAR

Ingredients:

Serves 4

2 cups yogurt , strained (Greek) or regular, or a combination of
1 1/4 cups cucumber, chopped or grated, approximately 1/2 english cucumber or 3-4 Persian cucumbers *
1 teaspoon salt
1 tablespoon dried or fresh mint or fresh or dried dill and more for garnish
small pinch of black pepper
1/2 teaspoon ground dried rose petals and more for garnish (optional)

1- Mix all ingredients in a bowl.

2- Garnish top with ground dried rose petals, mint and/or dill.  Adjust all ingredients to taste and serve.

*I usually peel the cucumber except when using Persian cucumber.  In which case it is best to use organic.

Will keep in the fridge for up to 2 days.