Author / Naz

Chicken

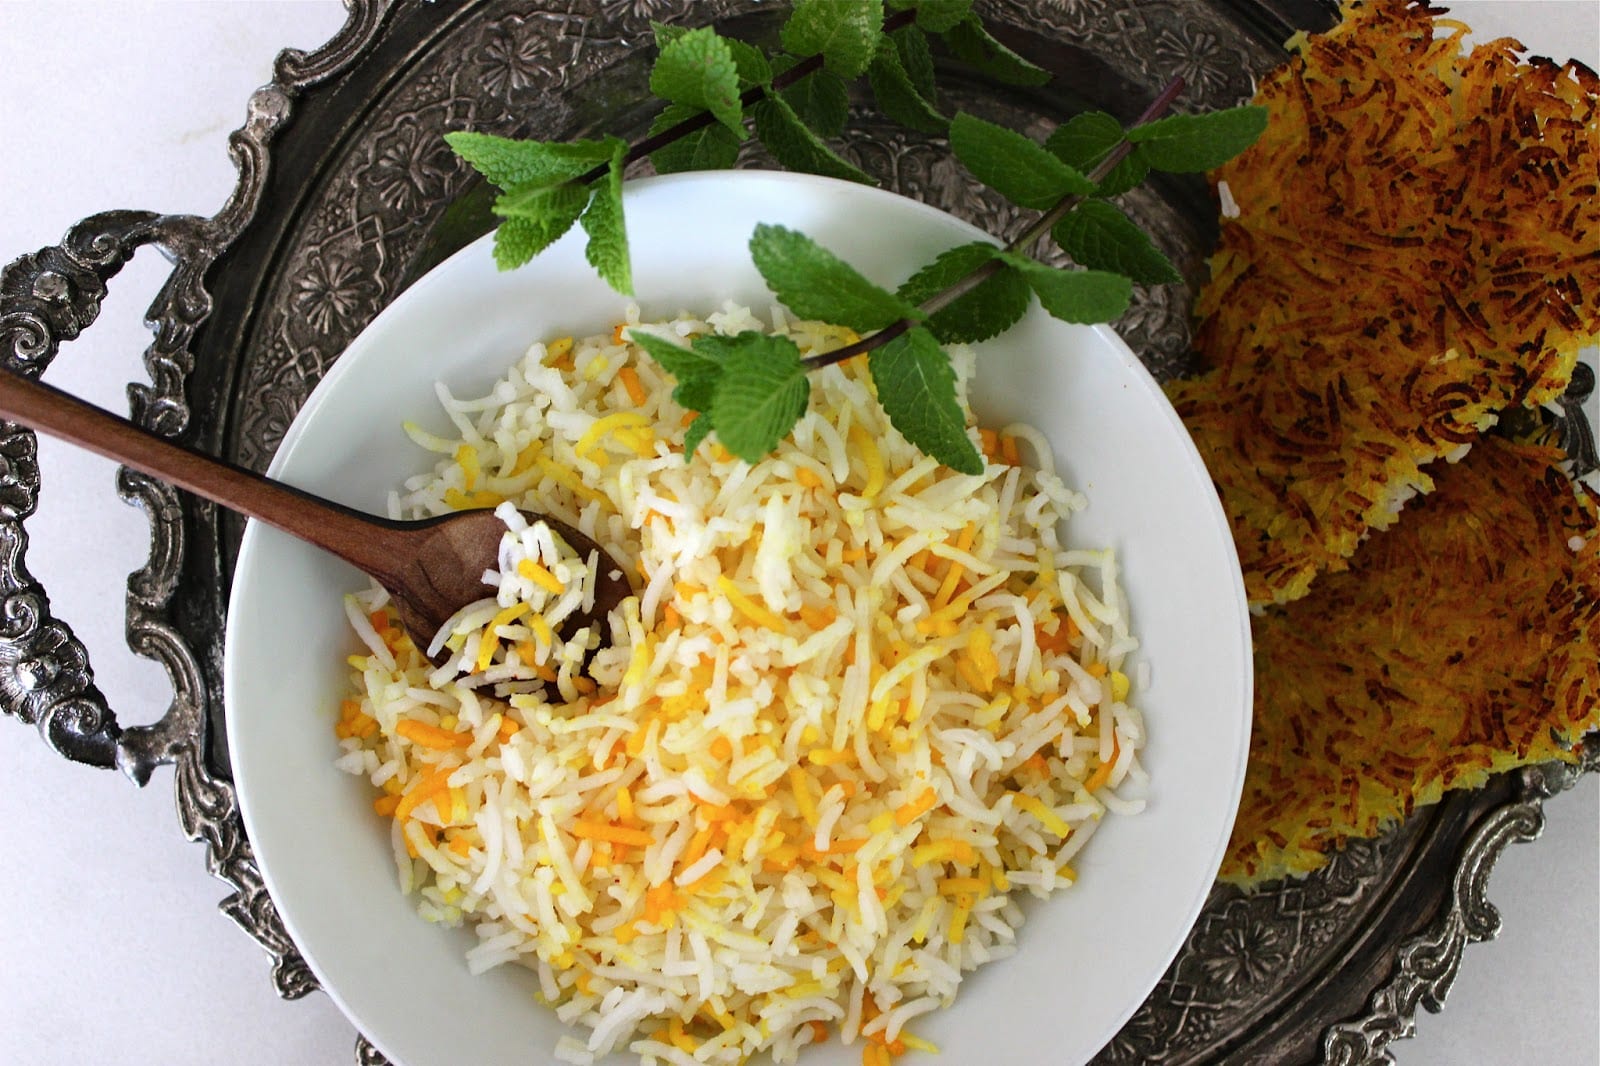
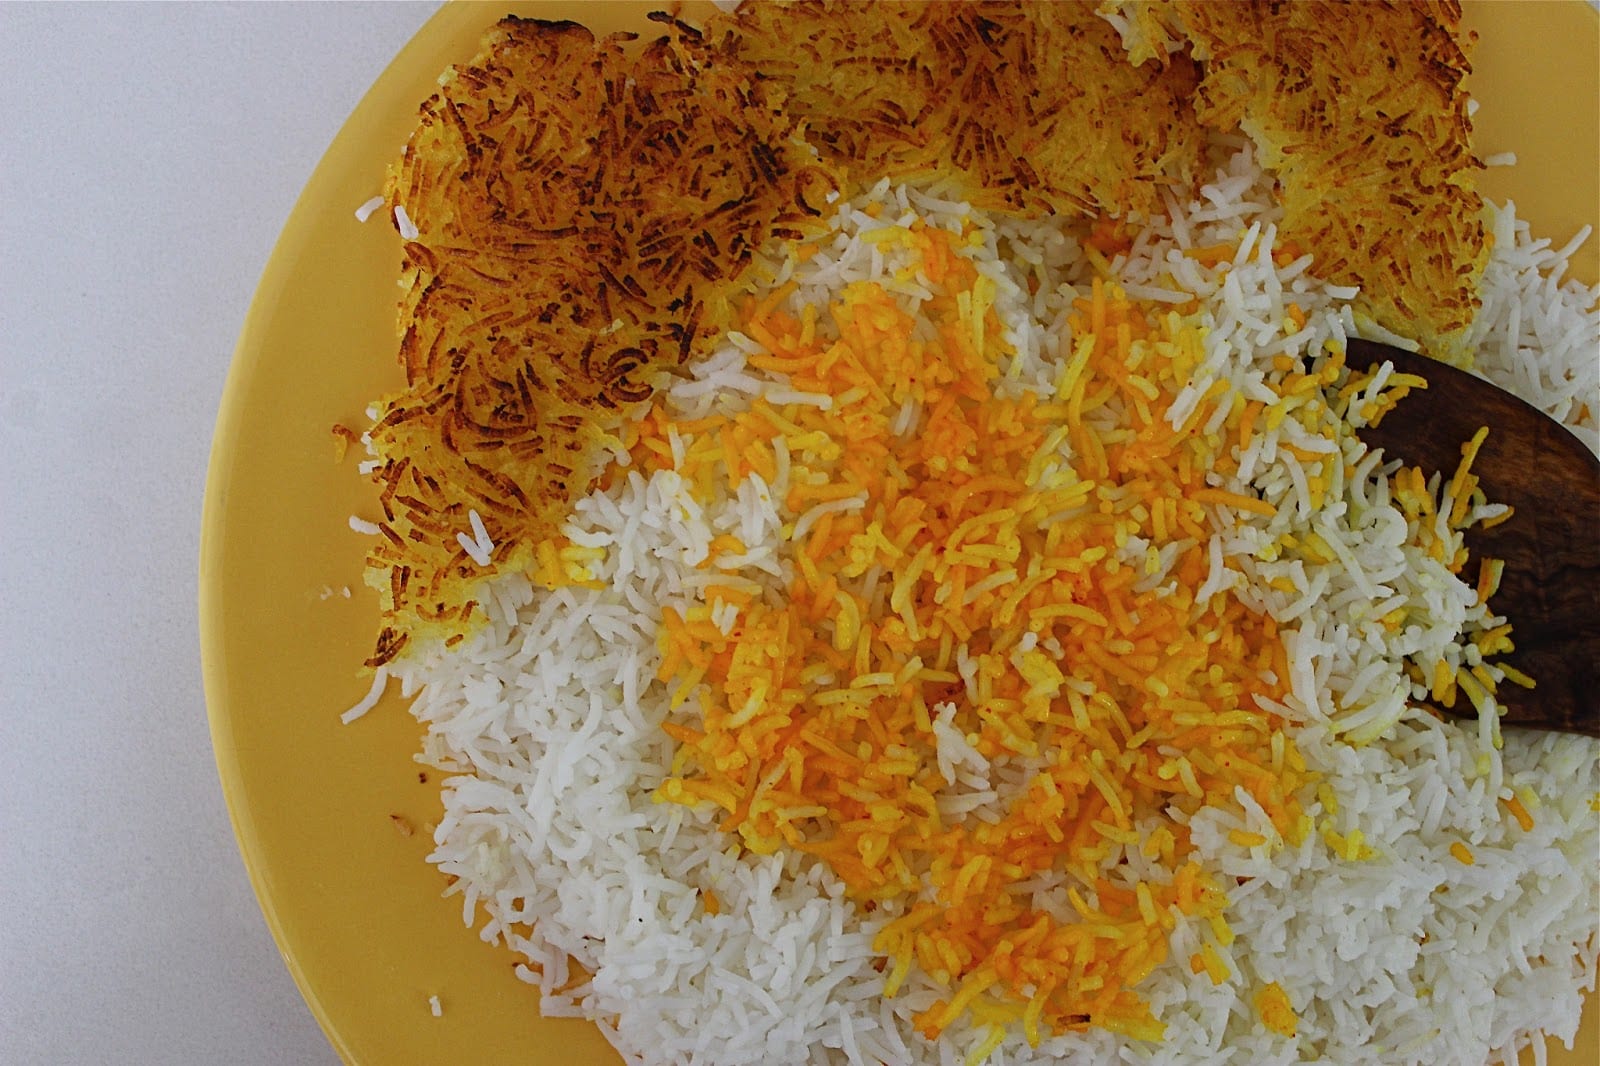
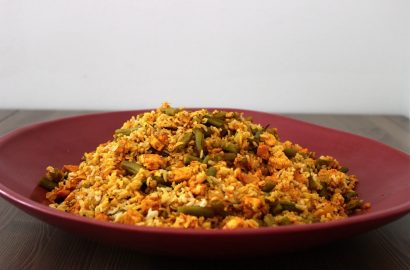
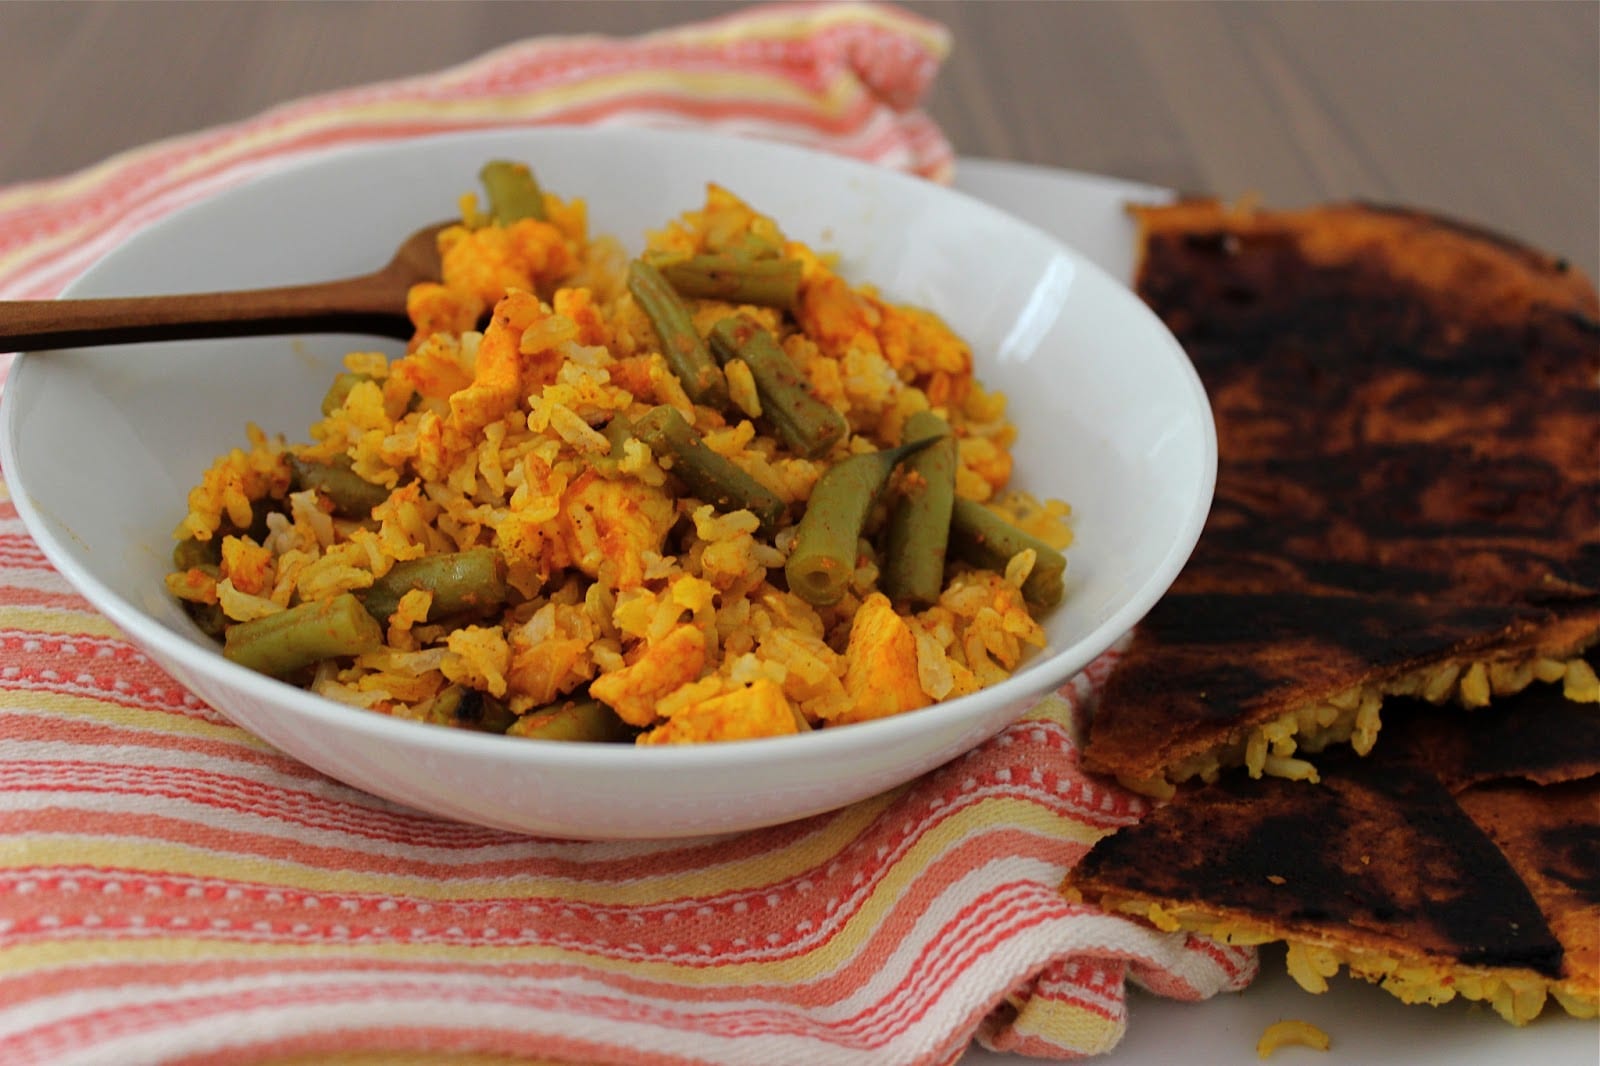
A Green Beans and Chicken Rice with Lavash Tahdig – A Friday Night Loobia Poloa

Occasionally I’ll be caught standing in front of the fridge or the pantry – a blank look on my face – desperately staring down the goods – hoping that this time, all the produce, legumes and grains have magically developed telepathic powers to convey to me how to prepare them in a mouth watering, nutritious fashion for the whole family to enjoy.  It is a losing battle.  As my six year old Luna is quick to remind me.

Vegetables and beans and rice can’t talk Mama.  They can’t even think.  Even though vegetables are alive they’re not like us because they don’t have hearts.  Except for artichokes.  Artichokes have hearts.

So just as I am about to give up – throw my hands up in the air – walk away from it all –  declare that my cooking days are done – that one song, that one beat, that one sound, that one voice echoes through the speakers.  And in an instant, inspiration fills the house, my knife comfortably cozies up to my hand ready to begin our duet.  And before the song has ended I have the night’s meal figured out.
What I listen to while I cook is much more critical than what we listen to while we eat.  It can make all the difference between an inspired meal and a tedious job that just needs to get done. My musical tastes and the songs that inspire me in the kitchen vary from day to day.  But there is one sound that is a constant companion in our house.  On at all times – providing the soundtrack to our daily lives.  This.

NPR is the sound that links us to the outside world, challenging our minds, provoking debate, but more importantly comforting and grounding us in our daily routine.  The meal equivalent of this comforting staple in our house is Loobia Polo – green beans and rice.  Loobia Polo is my husband Drew’s most loved Persian meal.  In fact, it could very well be his all-time favorite dish for dinner.  It’s the one meal that even the pickiest of little eaters will dig in for seconds.  It also makes a great thermos lunch for school the next day.

Where NPR challenges us, gets us thinking, and fills us with sensational-free information – Loobia Polo comforts and soothes our souls.  Every morning we wake and without a second thought put the kettle on and turn on the radio.  And every Friday we celebrate having made it through another week with an exultant Friday Night Loobia Polo.

Green beans are bursting at the farmers market and in our farm box right now. The green bean mixture is quite easy and quick to prepare.  The beans delicately soak up the  aromatic and flavorful blend of the spices: saffron, turmeric, cinnamon – with the addition of tomato paste to create a sauce, and of course freshly squeezed lemon juice for that slightly tangy sour taste that dictates most Persian stews.  When the end of the recipe asks that you adjust the seasoning to taste, this not only applies to the addition of salt and pepper but also to extra lemon juice if necessary.  What you also want to keep in mind is to maintain the texture of the green beans.  No mushy, out of the can style, green bean mess please.  The green bean mixture is traditionally served mixed in with rice – I typically use brown basmati rice, but you can serve it along side white rice or any grain you prefer.  The mixture can also be prepared ahead of time.  Fridays happen to be one of our busiest days, so I like to split up the preparation process.  I might prep the beans and chicken (prepping is the most time-consuming part) the night before, so all I would have to do the day of is cook the mixture and put on a pot of rice. Or if I can find the time I will cook the mixture a few days in advance. The green bean mixture can be made 2 days in advance and stored in the fridge.  It can also be made ahead of time and stored in the freezer for up to 3 months.  And if there is one dish that begs to be accompanied by mast o khiar, it’s Loobia Polo.

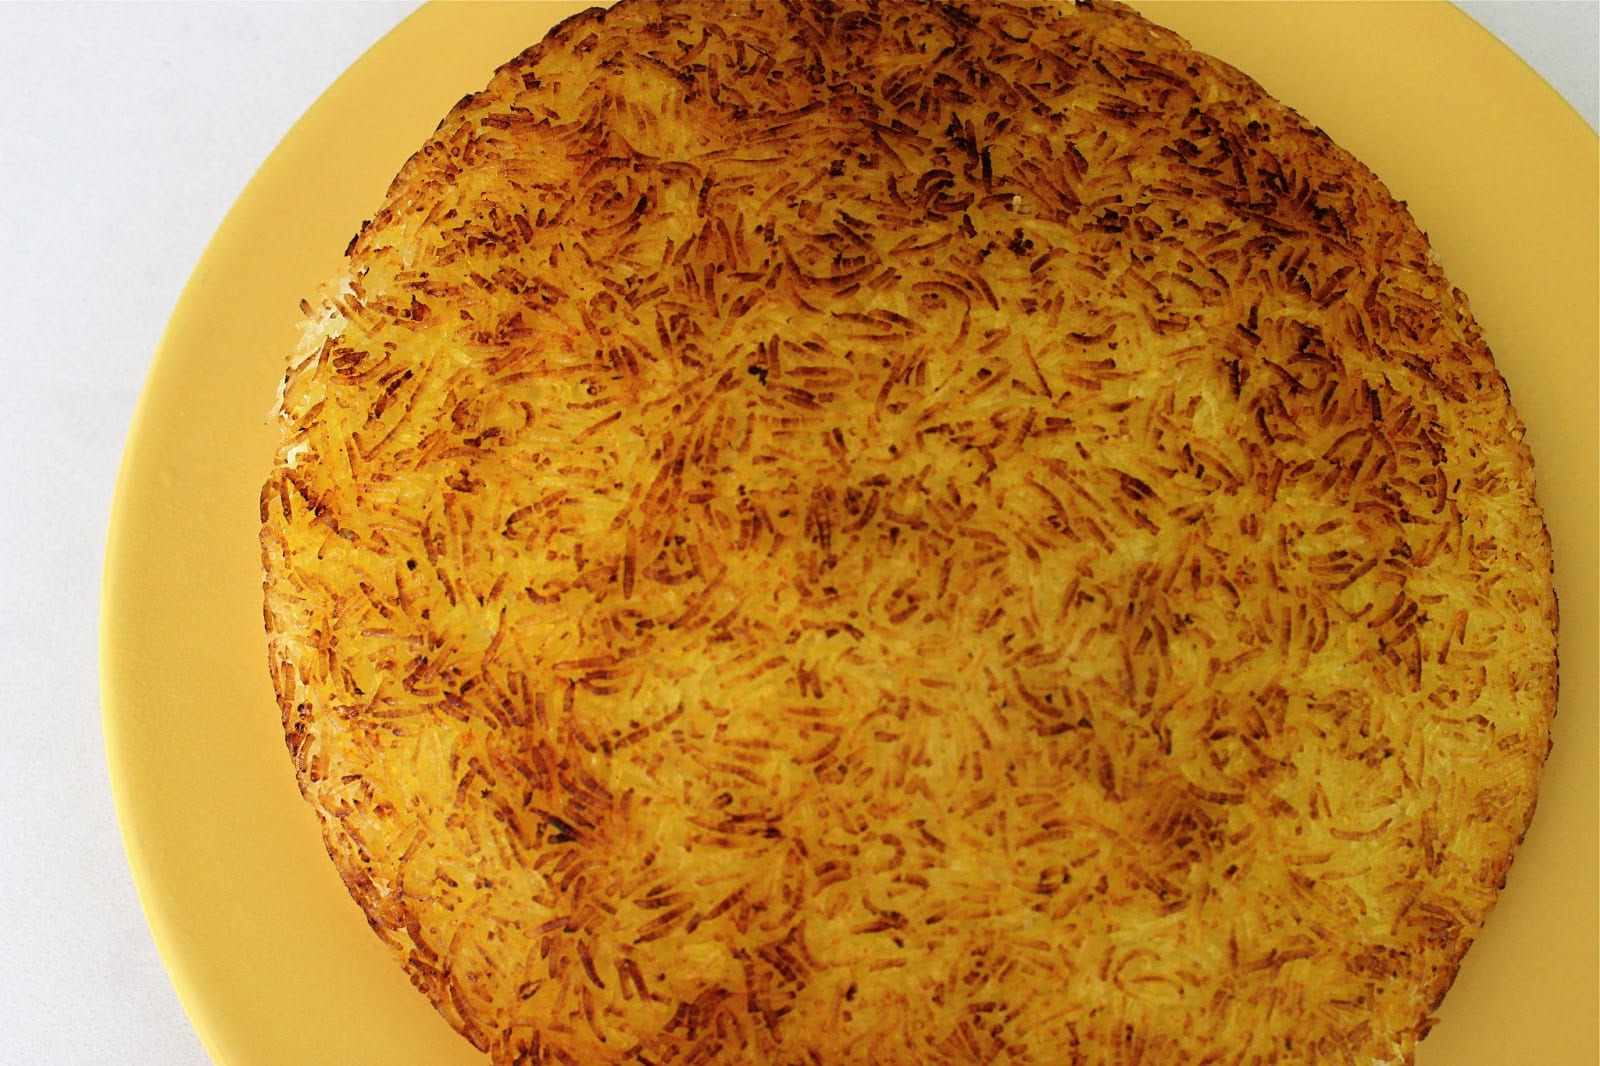
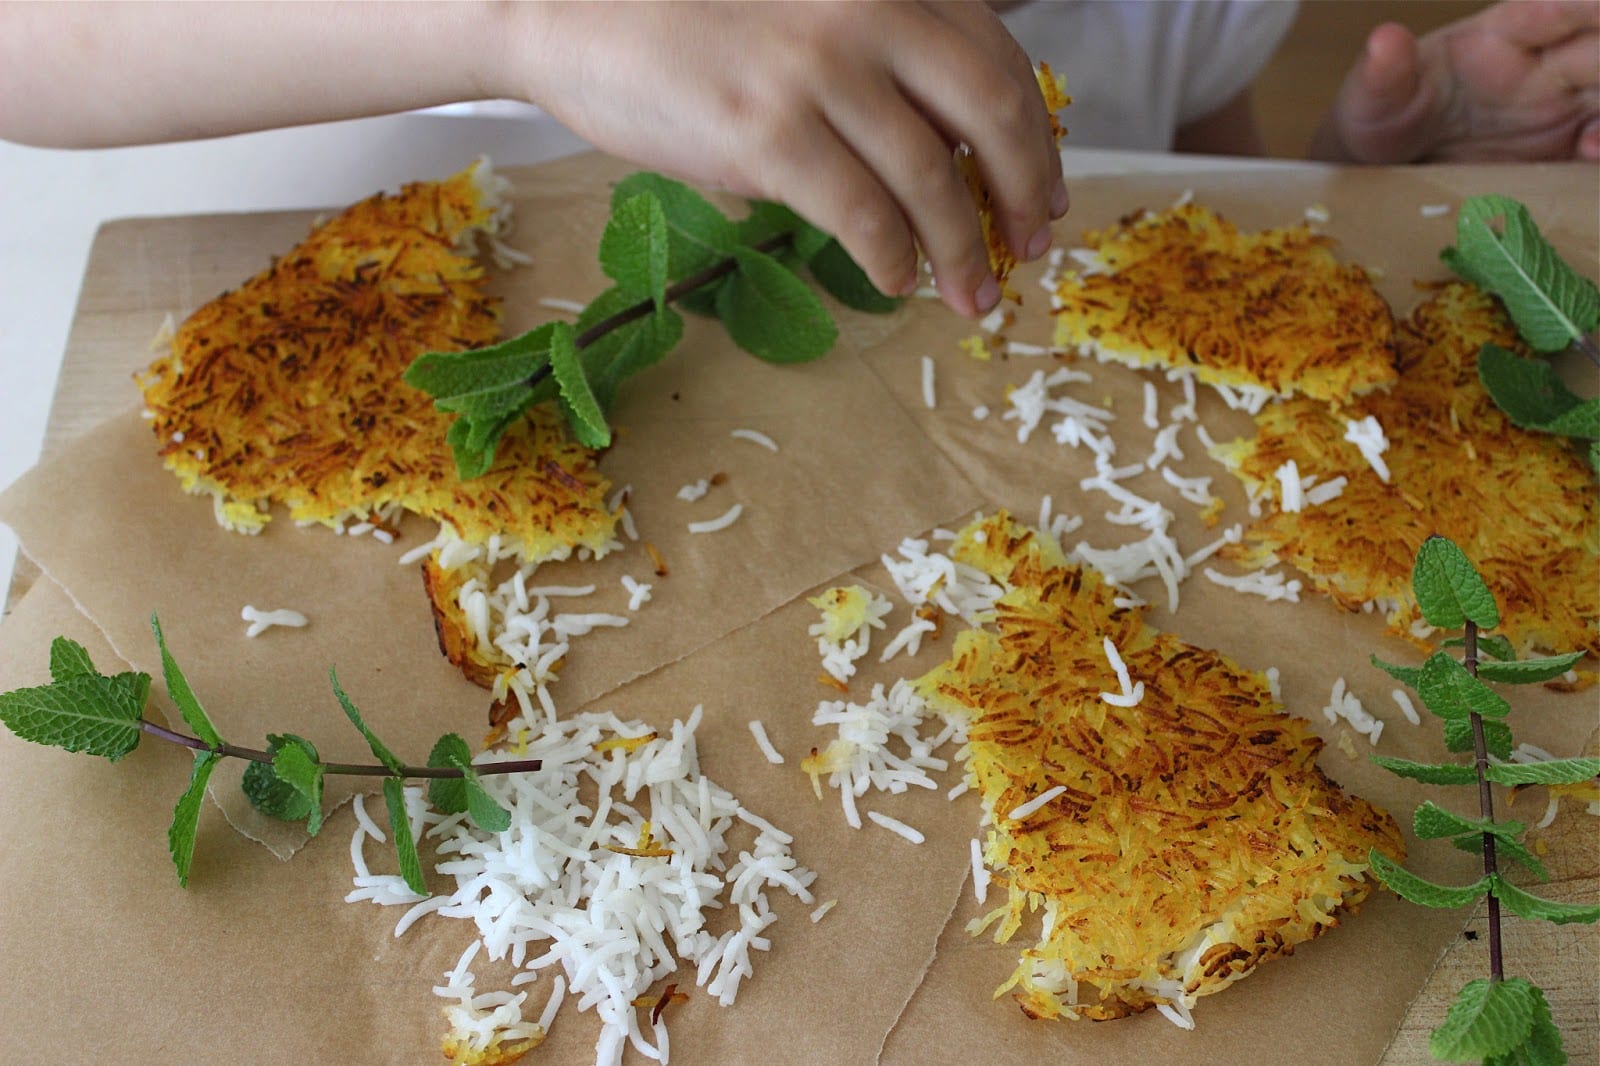
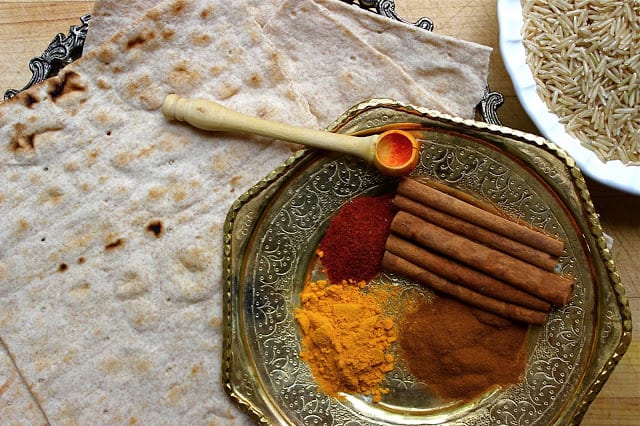
The preparation of the bread tahdig is very similar to that of a rice tahdig.  I used bread here for variety and because the girls happened to ask for it.  Some days Luna prefers bread tahdig and Soleil prefers rice tahdig.  The challenge is to get them to agree to the same kind of tahdig on the same day. Typically we use lavash bread – which is like a thin Middle Eastern style flat bread.  On this particular day I used a whole wheat lavash from Trader Joe’s.  I simply tear fairly large pieces and place them on the bottom of the pot. Then I patch up any open spaces with smaller pieces.  Make sure the sides of your pot are well-greased to avoid the bread sticking to the sides of the pot.  Bread tahdig can burn very quickly so really keep a nose on this one and use a heat diffuser for the rice steaming part to ensure no burning of the bread.  I use an old toaster oven metal rack insert as my heat diffuser.
So thank you Morning Edition’s Steve Inskeep, Renne Montagne, and David Greene for accompanying us through another school year of hurried and harried breakfasts and lunches.  Thank you Weekend Edition’s Scott Simon, Rachel Martin and puzzle master Will Shortz for your constant reminders that we are now parents, and that weekends and sleeping in are no longer synonymous.  And thank you to All Things Considered’s  Robert Siegel, Mellisa Block and Audie Cornish for being there with us through many weeknights of dinner prep – culminating with a satisfying Friday Night Loobia Polo.  And of course, my husband’s favorite: Lakshmi Singh.

Please do share – what do you like cook to?  Is there a particular tune that gets you going in the kitchen?

Green Beans And Chicken Rice With Lavash Tahdig – Loobia Polo

Notes: 

  • If you don’t want to make the tahdig you can simply make the mixture and serve it with any kind of rice or grain you like.  It is tastiest mixed in with your grain of choice.
  • The recipe below uses brown basmati rice.  If you would like to use white basmati rice keep in mind that white rice takes a shorter time to cook al dente at the par-boil stage.  8-10 minutes for white rice, 20-25 minutes for brown rice.
  • For a more detailed guide to cooking Persian rice please see this post.

Ingredients:

Serves 6-8

2 1/2 cups brown basmati rice
3 tablespoons olive oil
1 medium yellow onion, chopped
1 pound organic green beans, trimmed and cut into 1/2 inch pieces
2 boneless skinless organic chicken breasts, cut into 1/2 inch pieces
1 teaspoon turmeric
1/4 teaspoon ground saffron steeped in 2 tablespoons hot water
1 teaspoon ground cinnamon
2 to 4 tablespoons tomato paste dissolved in 6 tablespoons hot water*
4 tablespoons fresh lemon juice, roughly the juice of 2 lemons, plus more to taste
sea salt
fresh ground black pepper
3 tablespoons ghee or butter
lavash tahdig

*  I used bionaturae tomato paste.  I find it is slightly less concentrated in flavor than other tomato pastes. So I ended up using 4 tablespoons of paste.  You might want to start with 2 tablespoons and add and adjust amount to taste.

  1. Wash and soak brown basmati rice and 2 tablespoons salt for 1 hour.
  2. Heat 3 tablespoons olive oil in a large sauce pan over medium heat.  Add onion and a pinch of salt and saute for 5 minutes, stirring occasionally until onion softens.
  3. Add green beans and 1/2 teaspoon salt.  Saute for 5-8 minutes, stirring occasionally until green beans soften slightly.  Take care not to burn green beans.  Turn down heat if necessary.
  4. Add chicken, turmeric, cinnamon, 1 teaspoon salt, 1/4 teaspoon pepper.  Saute for 3-5 minutes.
  5. Add saffron water, tomato paste water, and lemon juice.  Stir to combine.  Turn heat down to medium low and simmer uncovered for 20 minutes, stirring occassionally until chicken has cooked through and green beans have softened, but not mushy.  Adjust seasoning and add more lemon juice if necessary.
  6. Meanwhile, bring 10 cups of water and 3 tablespoons of salt to a boil in a large non-stick pot.  Drain soaked rice and add rice to pot.  Bring back up to boil.  Scoop off any foam that rise to the top.  Start testing your rice at 20 minutes.  Once rice is al dente (takes 20-25 minutes) drain in a colander and quickly rinse under cold water.  Allow rice to completely drain off any excess water.
  7. Melt 3 tablespoons ghee or butter in the large non-stick pot over low heat.  Arrange the bread on the bottom of the pot.
  8. Place 2 spatulas full of rice on top of the bread.  Using the back of the spatula or the back of a wooden spoon pack down the rice firmly.  Add a layer of green bean mixture on top of the rice.  Repeat, alternating rice layer and green bean layer in the shape of a pyramid.  Your top layer should be a rice layer.  Using the handle of a wooden spoon poke a couple of holes in the rice to allow the steam to escape.  Cover and turn up heat to medium-high.  Cook for 10 minutes.
  9.  Turn the heat down to low.  Cover the lid with a clean kitchen towel or a couple of layers of paper towel.  Place heat diffuser under the pot.  Cook for 50 minutes.
  10. Remove lid.  Scatter the green beans rice mixture on a serving platter and gently remove the tahdig and serve on the side.  Serve immediately.  Remember to serve with a side of mast o khiar!

Will keep in the fridge for up to 3 days and in the freezer for up to 3 months.

Dinner

A Pomegranate Molasses BBQ Sauce and Park Ribs – Food Diplomacy 101

You never see the sun in the night, but once in an ice cream while, you see the moon in the daytime. – Luna

BBQ sauce and pork ribs are not exactly part of my everyday cooking vernacular.  I am not what you might call a BBQ sauce/ribs enthusiast – not even close.  I know there are cookbooks, TV shows and competitions dedicated to this mighty American tradition.  Somewhere along the line I’ve learned that there are distinctions and differences, and pride to boot, between Texas BBQ, Mephis BBQ, North Carolina, South Carolina, Kansas City…BBQ.  What those differences are – I’m not sure.  This is not that story.  It’s not a particularly Persian story either.  It’s more a mother’s everyday story to get dinner on the table, working with what she’s got in the pantry and fridge.  A simple story.  At least that’s how they all begin.

One of our quick, last minute, pre-made, go-to meals used to be the fully-cooked baby back pork ribs in smoky BBQ sauce from one of our local stores.  It was a hit with the girls.  All we had to do was heat it up in the oven or on the grill, roast some sweet potatoes, toss a salad and call it a night.  It was the meal we were about to enjoy the night Soleil fell and we thought she had broken her wrist (she hadn’t).  It was the meal we quickly had on the table the nights we had unexpected company.  The meal that required extra napkins and lots of finger licking.  That is – until the fateful night I read this.

Drew and I are both avid magazine lovers.  Consumer Reports is considered an exciting, cozy, bedtime read.  So when CR talks about “bugs in pigs” and “pigs on drugs,” that gets our attention.  This news was actually not all that shocking.  Whenever possible we try and buy all of our meats organic, grass fed, antibiotic-free, hormone-free, local, etc.  But this practice had not applied to our baby back pork ribs.  So it got me thinking.  How difficult would it be to make our own organic, antibiotic-free, pork ribs with a homemade BBQ sauce.

Down the internet vortex I went.  Once I came up for air I was armed with a little more knowledge.

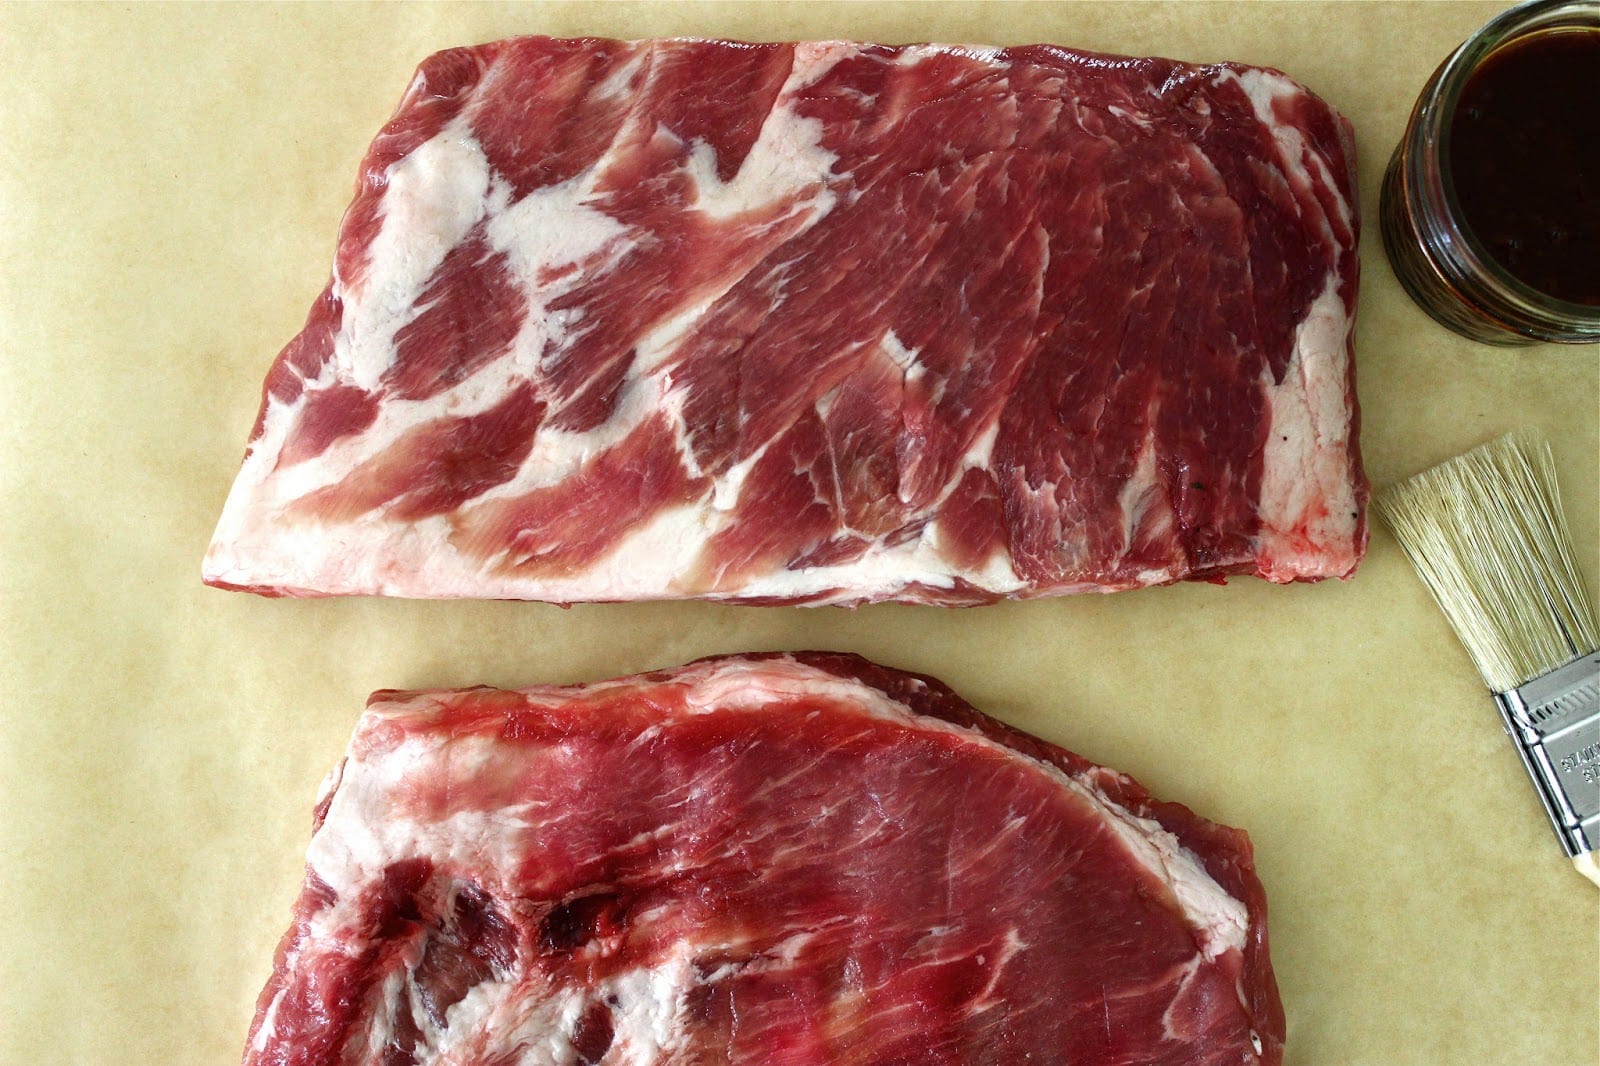
There are a few different cuts of pork ribs.  So far I have worked with the baby backs and the St Louis style.  I found the St. Louis style (pictured above) slightly meatier and fattier, and the baby backs slightly more tender.  Both have been a hit and turned out delicious.  But organic pork ribs don’t come cheap.  What I also learned is that when preparing the ribs you need to remove the membrane (the thin layer of skin on the back of the bones).  You can do this yourself or ask the butcher to do it for you.  I also like to trim most of the excess fat. Although the fat provides much of the flavor, none of us (especially the girls) like the chewy texture once cooked.

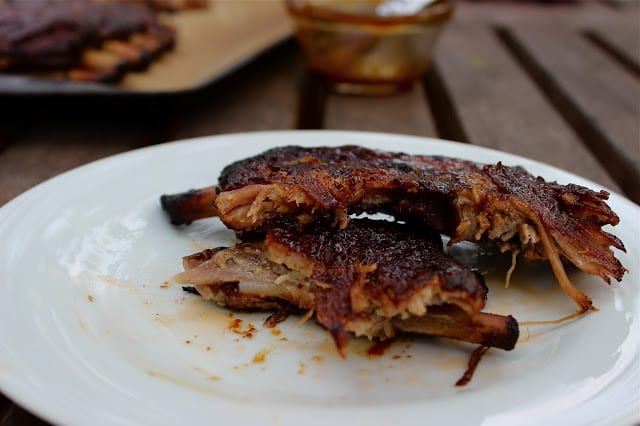
As for the cooking, I’ve learned low and slow is the key to tender, fall-off-the-bone meat. But since this was going to be a midweek meal, I certainly did not have the time or patience to babysit pork ribs cooking in the oven or on the grill for hours.  So I turned to my most trusted low and slow kitchen appliance – the slow cooker.  After 5 hours on high (or 8 hours on low), not only were the ribs fall-off-the-bone tender but the whole house smelled fabulous.  I finished off the ribs under the broiler for a couple of minutes to get that slightly crisp and grilled effect.

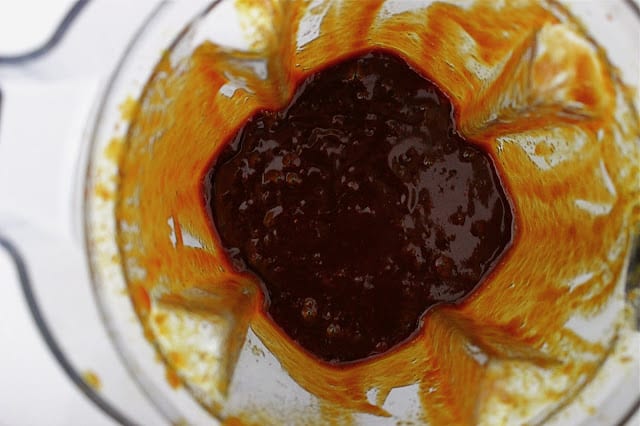
The preparation of the BBQ sauce is where my worlds started to collide.  After 3 failed attempts (read 3 separate trips to the store) to buy bottled BBQ sauce that would not be too spicy for the girls, and not loaded with a bunch of ingredients I did not recognize as food, I gave up and resolved to make that myself too.  It turns out I had most of the ingredients needed to make BBQ sauce, either in the pantry or in the refrigerator door.  And it was there, at the perpetually overstuffed fridge door that I was suddenly lifted out of my cooking malaise.  To reach the worcestershire sauce I had to move the pomegranate molasses out of the way.  And that is when I hit my cooking high.  The fog lifted.  I was filled with adrenalin as I poured the pomegranate molasses into the blender, along with ketchup (worlds collide!) and reached for other familiar spices that I usually use to compliment pomegranate molasses – cinnamon, turmeric, cumin.  The result was a tangy and slightly sweet – finger licking good – concoction; one most definitely approved of by the girls.  I happened to have a sour pomegranate molasses on hand, and I added 2 tablespoons of honey to the sauce to cut the tang a bit. If you use a sweeter pomegranate molasses, start off with one tablespoon of honey, try it and add more honey according to taste.  Pomegranate molasses is readily available now at most stores or at any Middle Eastern market.  The sauce also works great with chicken, lamb chops or Portobello mushrooms.  It also freezes really well.  So whatever you don’t use you can portion out and put in the freezer for another time.

Perhaps this is a story about when my American kitchen met my Iranian ingredients.  Something that happens on an everyday basis.  And I am here to testify that this encounter is quite harmonious, peaceful, and  delicious.  A little food diplomacy can go a long way.  And although we might not be indulging in pork ribs smothered in pomegranate molasses BBQ sauce all the time – we will be enjoying them once in an ice cream while.

Enjoy your Memorial Day weekend.


POMEGRANATE MOLASSES BBQ SAUCE

Adapted from theKitchn

Ingredients:

Makes about 2 cups

1/2 cup pomegranate molasses
1/2 cup organic ketchup
1 teaspoon unfiltered apple cider vinegar
1 teaspoon worcestershire sauce
1 tablespoon organic unsulphured molasses
1 – 2 tablespoons organic raw honey, according to taste
1 shallot, roughly chopped
1 clove garlic, roughly chopped
1/2 teaspoon cumin
1/4 teaspoon cinnamon
1/2 teaspoon turmeric
1/2 teaspoon salt
1/4 teaspoon fresh ground pepper

Put all ingredients in a blender.  Blend until smooth. The BBQ sauce can be kept in the fridge for up to 3 days and frozen for up to 3 months.

PORK RIBS PREPARED IN THE SLOW COOKER*

Ingredients:

Serves 4

1 rack baby back or St. Louis pork ribs, about 2 pounds, membrane removed, extra fat trimmed, cut in half to fit in the slow cooker
salt
fresh ground pepper
olive oil
pomegranate molasses BBQ sauce, about 1 cup

1-  Season both sides of ribs with salt and pepper.  Lightly brush both sides with pomegranate molasses BBQ sauce.  Oil the bottom of the slow cooker with olive oil.  Place ribs inside.  It’s ok if they overlap.  Cook on high for 4-6 hours (depending on slow cooker) or low for 8-10 hours (depending on slow cooker).  Mine were done on high after about
4 1/2  hours.

2- Brush ribs with more BBQ sauce (as much as you like) and place under broiler on High for 2-5 minutes.

Serve immediately with extra BBQ sauce on the side for dipping.

* The ribs can also be made in the oven or on the grill.

Drinks

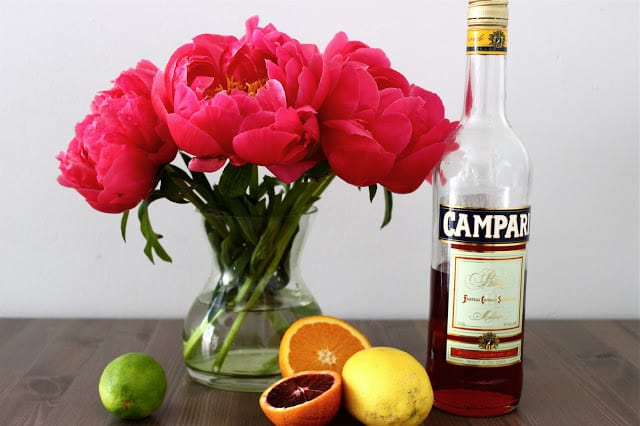
A Spring Fling – A Campari and Vodka Cocktail

What can I get you?

He leans across the bar.  Kindly looking into my bewildered eyes.  A simple question he has asked numerous times this evening.  He expects a simple and quick reply.

It’s 6:30pm on a week night and the place is already buzzing with after-work imbibing.  Hipsters and the like winding down the day – or maybe just getting started for the night.  It’s loud, the energy of the place palpable.  It’s a familiar scene from what feels like a distant past.  Before set routines, before children.  A time when meeting up for drinks at 6:30 pm didn’t require extensive planning.

Can I get you something to drink?

I look back at him, stunned.  I’ve lost the ability to order a drink for myself.  The vibrant energy of the place doesn’t match my scattered focus.  I can’t settle in.  I’ve spent the day picking up, dropping off, deciding what to make for lunch and breakfast and then making lunch and breakfast simultaneously, driving the lengths of Los Angeles freeways, cursing said freeways, worrying about being late for pick ups and drop offs,  deciding what’s for dinner for the six and under crowd, barely making it here…  I’m at a loss for words as to what I could possibly want to drink.  I cannot make another decision.

She’ll have a Campari and soda.

That’s it.  That’s what I want.  He knows.  This man with the warm and reassuring voice seated next to me.  He knows exactly what I want.

But why don’t we change it up a little.  Do you have any suggestions for a Campari cocktail?

And so they begin to conspire. These two men.  One a complete stranger – the bartender.  The other – my husband. They discuss my likes and dislikes, and they come up with a drink that would both satisfy and surprise my taste buds.  No decision-making on my part. Finally.

We were on our way to join some friends at an event.  On a whim we decided to meet up just the two of us for a quick drink beforehand.  We hardly do anything on a whim anymore.  It felt adventurous, secretive.  A stolen moment.

I’m not much of a drinker.  These days my preferred beverage of choice is often something that will energize, refresh, and see me through the day.  (A smoothie, my green tea, my black tea, simple and oh so enjoyable water, perhaps a spot of my husband’s lastest project of the month, kombucha.)  Alcohol often has the exact opposite effect on me.  But I do enjoy that one glass of something every now and then. Anything over one glass, and fatigue, headache and general irritability quickly set in.  So that one glass has to be a drink I thoroughly enjoy.  The glass of red wine – dry, aged and  full-bodied – to accompany dinner, that first and unmatched thirst quenching glass of beer enjoyed on a hot summer’s day,  the perfect martini – dirty with extra olives please – shared with friends; and my all time beloved aperitif – campari. I like my cocktails sour, a little bitter with a slight hint of sweet.  And this campari cocktail satisfies all these requirements.

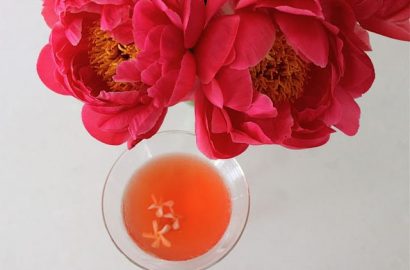
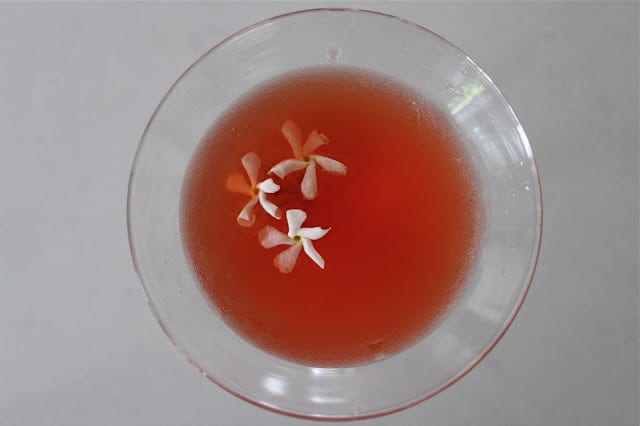
He carefully places the pink concoction in front of me.  It’s the color of those LA sunsets we marvel at every now and again.  Other-worldly, surreal, a magical light I can only associate to this expansive city of ours.

I feel both mens’ gazes intensely watching me as I take my first sip.  Conspirators – the stranger and my life partner.

It’s perfect.  I say.  Great, enjoy, says the bartender, and he casually moves on to tend to the needs (anxieties?) of others.  I turn to Drew and just like that I feel myself giving in.  My body shifts, I lean one arm on the bar, chin resting on hand,  the weight of the day is transformed and absorbed by the cool marble bar top.  I settle into the gaze of my husband, our conversation (mostly about the girls), this stolen moment, our little spring fling.

Happy Mother’s Day.

Spring Fling – Campari and Vodka

Ingredients

Serves 1

1 ounce Campari
1 ounce Vodka
1 ounce fresh squeezed orange or blood orange
1/2 ounce fresh lemon juice or lime juice
1/2 ounce simple syrup (optional)*

* I don’t like to add any syrup to my drink but go ahead and add if you like.

1- Fill your martini shaker halfway with crushed ice.  Add all ingredients and shake away.

Serve in a chilled martini glass or glass of choice.  Sit back and enjoy.


Stew

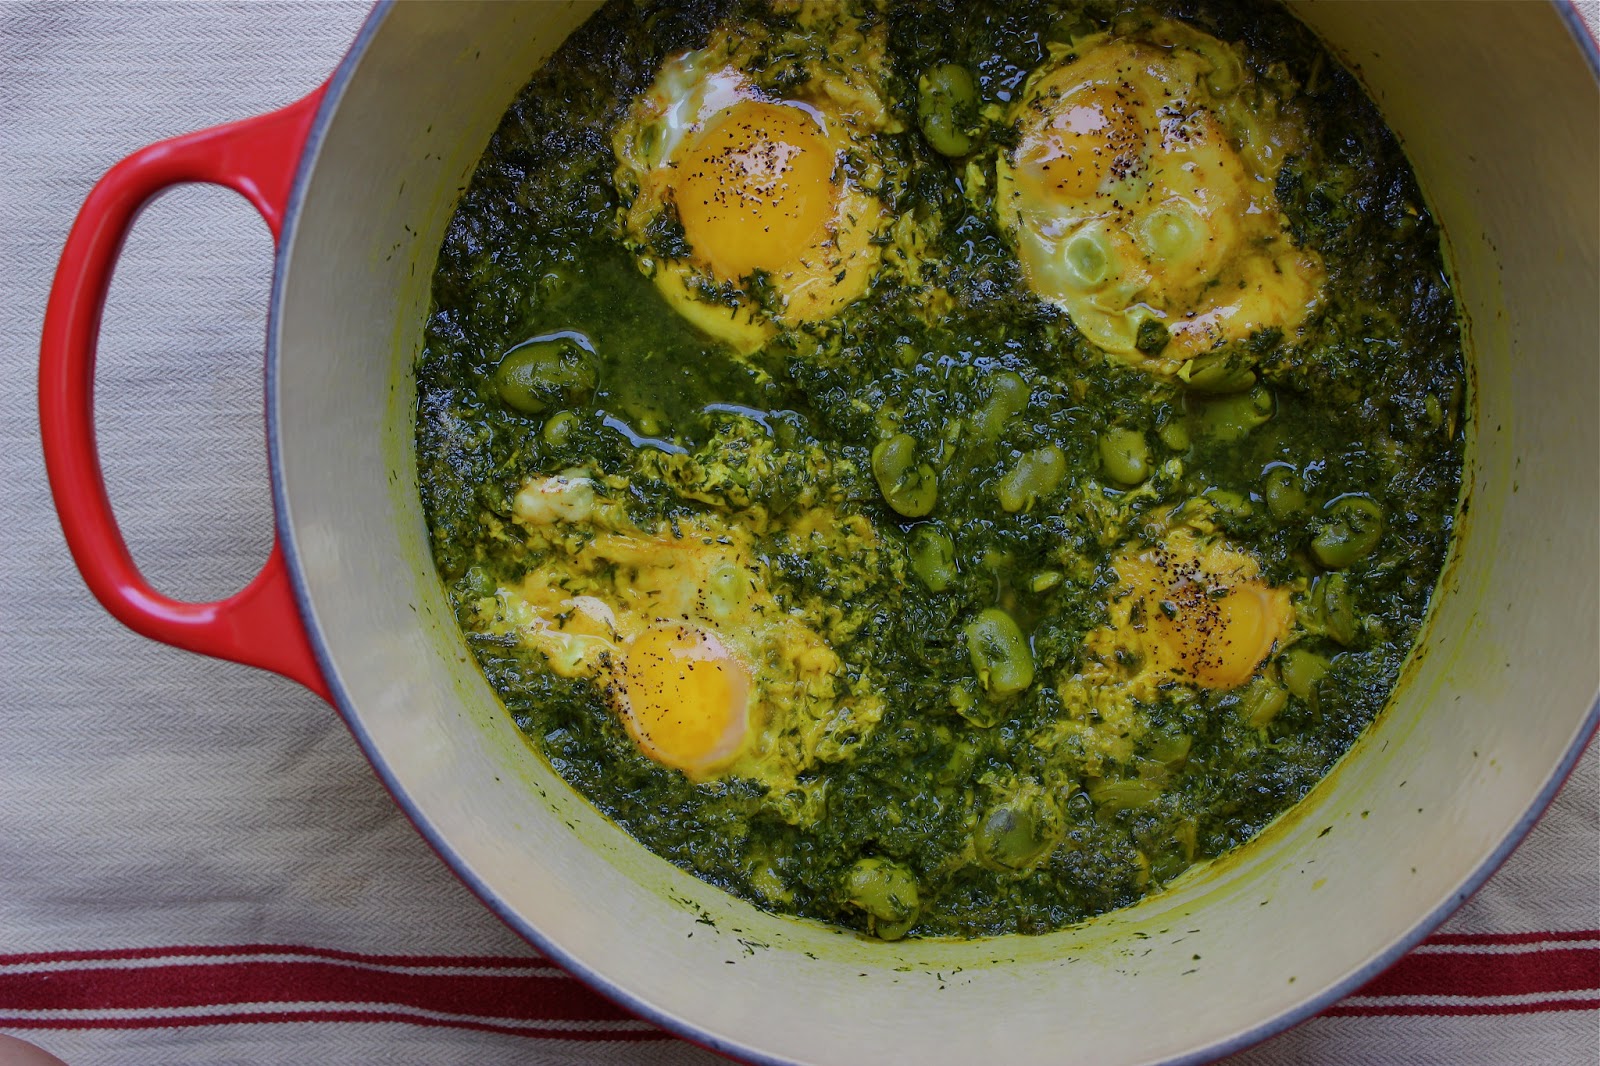
A SPRING FAVA BEAN, DILL AND EGG STEW – BAGHALI GHATOGH

The salty air.  The very salty sea.  A warm seaside breeze.  Hair tangled and knotted in the wind – sticking to very salty lips. 

These are my memories of Shomal – North.

Memories can be very elusive, hard to pin down.  They tease us with a hazy snap shot of what once was – a time long since passedA familiar scent, taste, the caress of a warm breeze.  Sometimes that’s all it takes to get wrapped up in the allconsuming embrace of nostalgia.

The Northern region of Iran bordering the Caspian sea is referred to as Shomal.  It is made up of three seaside provinces: Gilan, Mazandaran and Golestan.   

My father’s family hails from Gilan, a region well known for its rice paddies, lush green Alborz mountains, popular seaside destinations (for tourists and locals alike), its very distinct Gilaki dialect, and of course its cuisine.  Volumes could be written about the delicious food of Gilan –  khoresh fesenjan (pomegranate and walnut stew – a dish  particularly close to my heart), mirza ghasemi, kabab torsh, zeitoon parvardeh…and of course the abundance of fresh seafood and its much prized caviar.  But the one dish enjoyed most often is baghali ghatogh.

Baghala ghatogh (as it’s called in Gilaki) is traditionally made with a type of bean called pacha baghala – which literally translates to shortleg beans.  

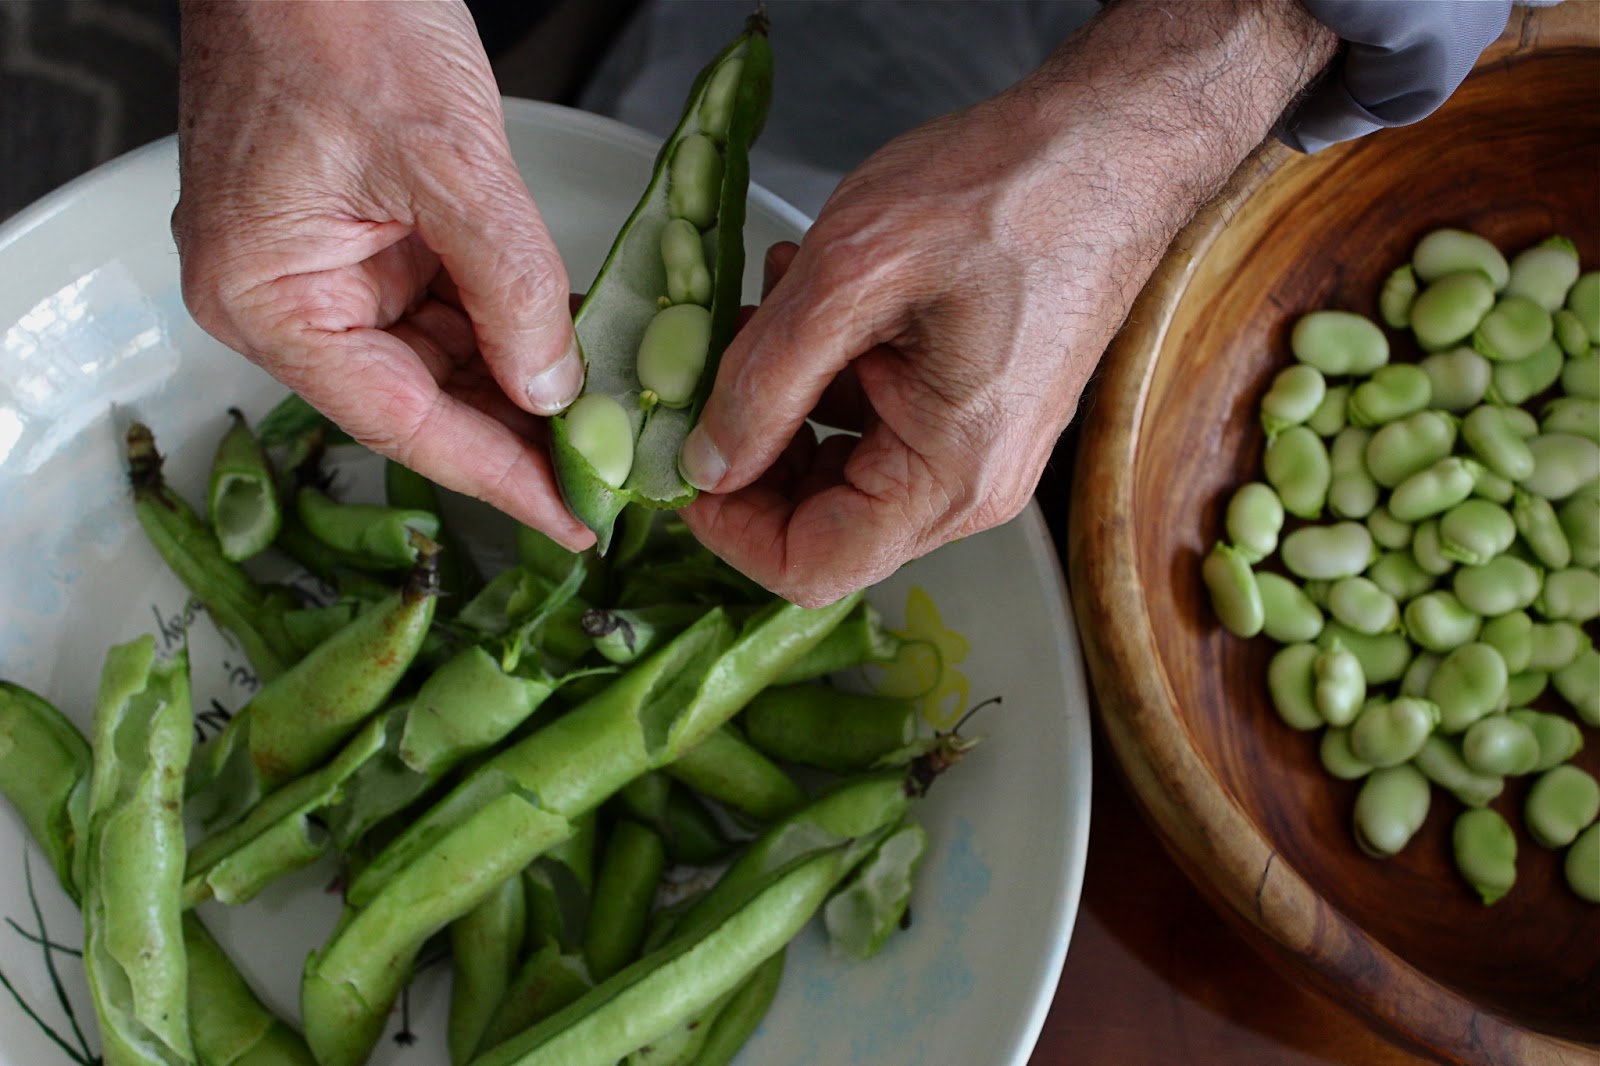
I was inspired to try my hand at baghali ghatogh after spotting the abundance of fresh fava beans popping up at the farmers market.  Fava beans (fresh or frozen) or lima beans (fresh or frozen) are often used as a substitute for pacha baghala – which is not readily available outside of Iran.  After a call to my cousin for a little direction I learned that canned white kidney beans (cannellini beans) are also a good and quick substitute.  So you have a few choices for the bean – but I had my sights set on those favas.

Call it cooking serendipity, chance – what you will – it was also right around this time that Baba –  my dadand step-mother Kumi decided to surprise us with a visit.  And after one glorious family outing to the farmers market I had Baba making his baghali ghatogh.  Fresh fava beans, fresh spring garlic, fresh dill, and eggs.  The makings of a perfect springtime meal.

This dish is very quick and easy to prepare.  Except for one thing – shelling and peeling the fresh fava beans.  I won’t sugarcoat this.  It takes some time – as in, it took 45 minutes to get through it.  And like you,  I really don’t have an extra 45 minutes to devote to shelling 4lbs of fava beans.  But I do it because fresh favas are here for a short period of time and they taste great – because of the ritual – the tradition – beacause I imagine my aunts, uncles and cousins having done the same.  And yes, also because I‘m inclined to get obsessive like that.  To make it a little less timeconsuming you can split up the bean shelling and peeling process.  You can shell the beans the night before while you catch up on your favorite tv show.  Then store the shelled beans in a plastic bag in the fridge.  All you have to do the next day is peel the outer skin.  Try not to split the bean in half when you do this.  Once the outer skin has been peeled you have to cook the beans right away.  Or even better, enlist the help of others. (Please note fava beans can cause a rare but serious allergic reaction in some people and children.  Make sure you or your little ones are not allergic before handling or eating favas.)

The afternoon we got back from the farmers market with our 4lb bag of favas quickly turned from a we’ll just make a simple baghali ghatogh dinner to an epic food odyssey.  As it often does.  Seduced and inspired by the goods at the farmers market, we decided last minute to throw together a fresh herb koo koo (Kumi’s request), steam some artichokes (the girls’ absolute favorite), put some rice on and quickly saute some fish (the way Baba likes his baghali ghatogh served).  As for Drew he had no requests – he just loves and consumes it all, in high quantities.  

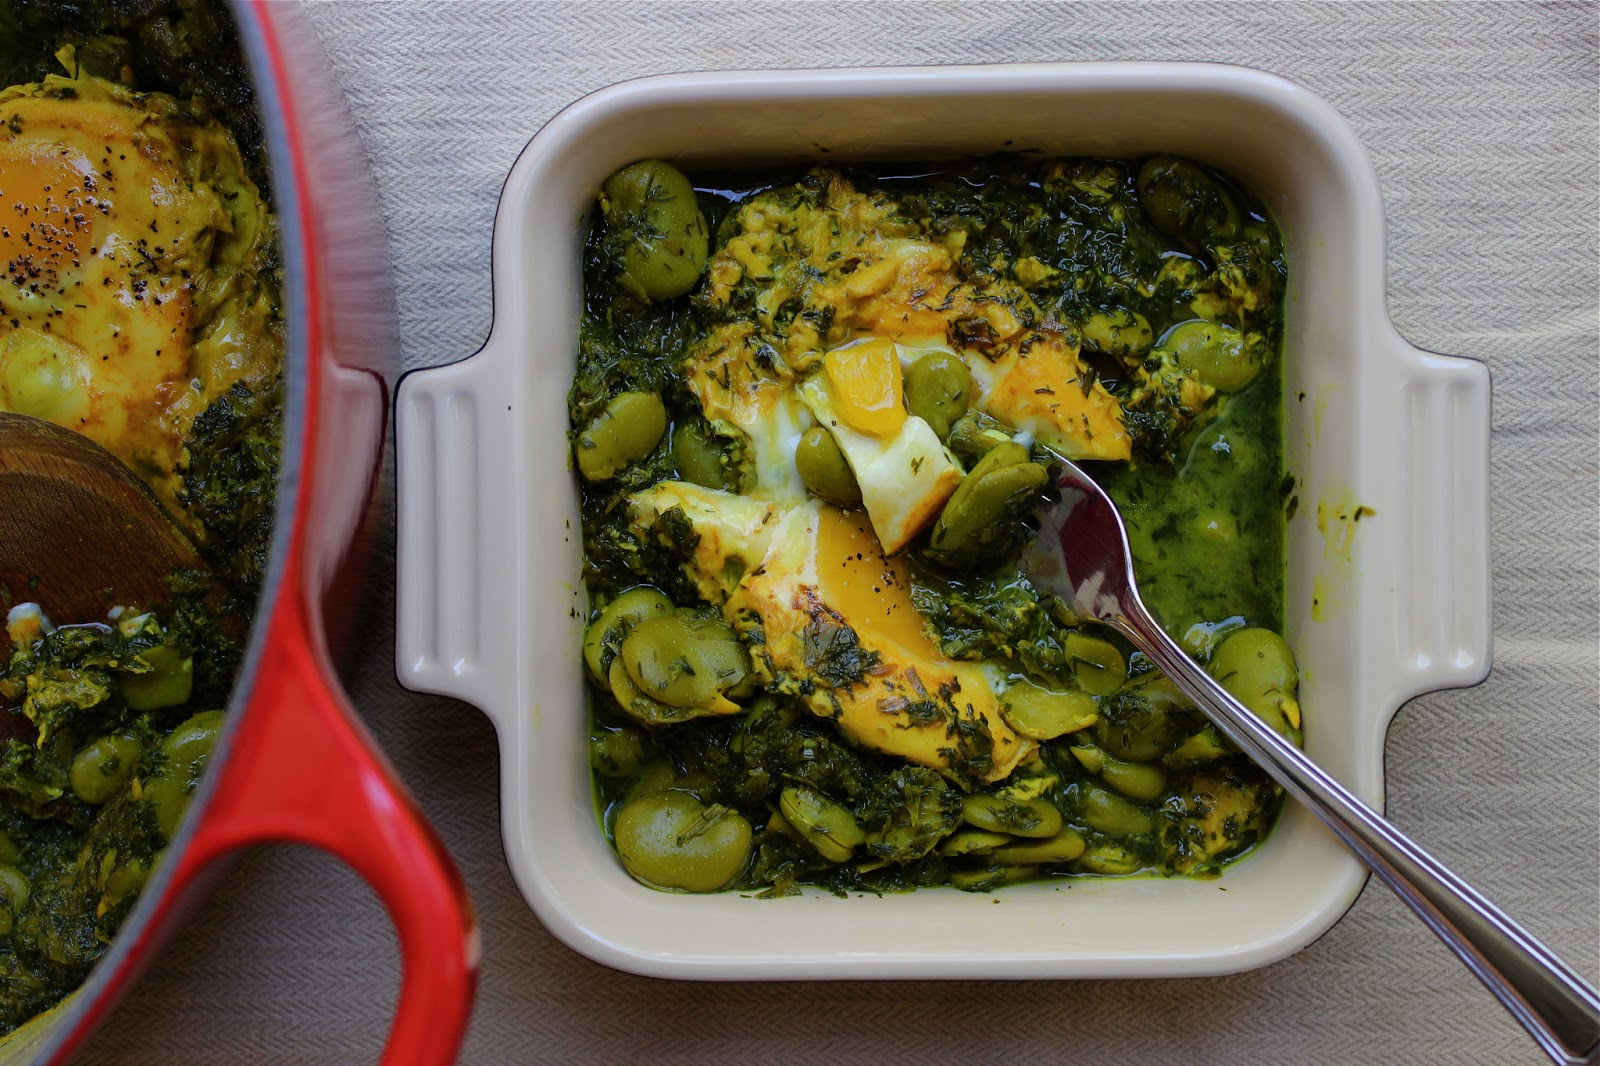
Baghali ghatogh is typically served over rice, with a side of smoked fish.  Or that caviar from Gilanif you can get your hands on some… I also like it served over some crusty bread to soak up all the delicious juices with some salty feta cheese (to mimic the salty smoked fish) crumbled on top. 

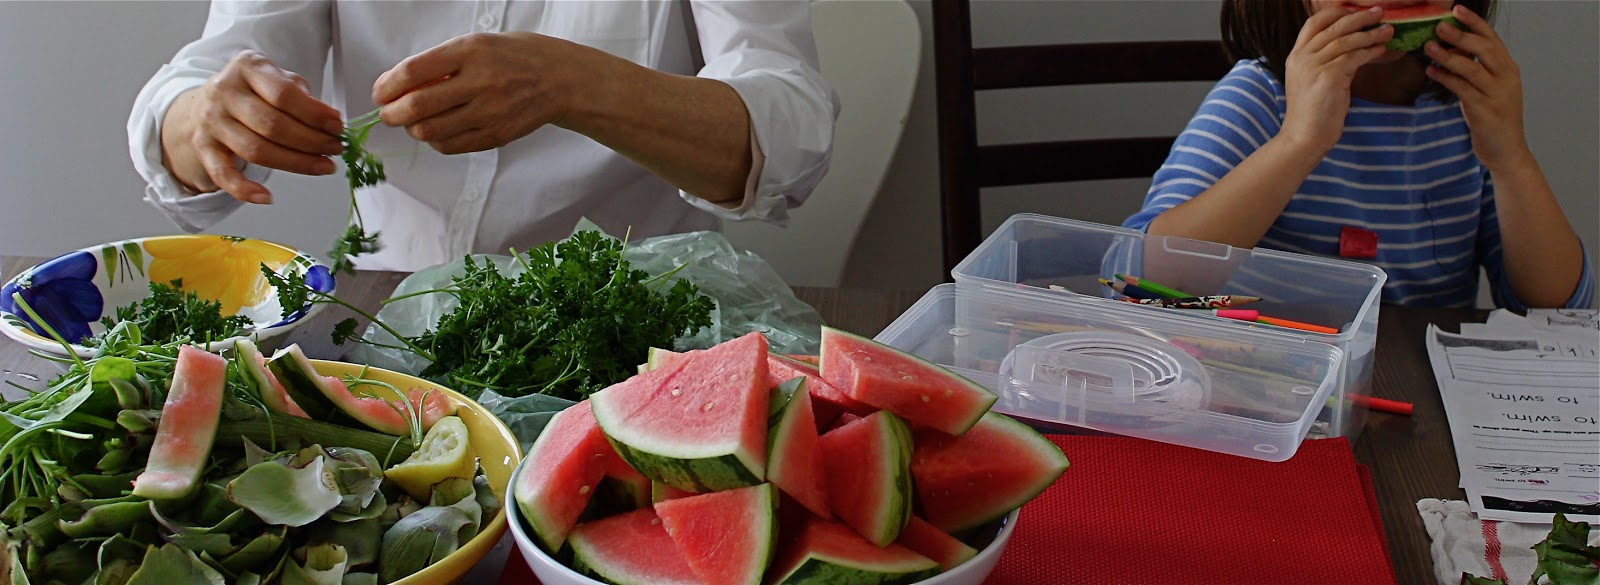
Every corner of the house was alive with activity.  Baba shelling and peeling the favas at the coffee tableSoleil perched in front of him watching attentively.  Kumi prepping the herbs for the koo koo at the kitchen tableLuna working on homework and munching on watermelon.  Me at the kitchen island – command central – wondering exactly how we got ourselves into this madness.  Every pot in use, both oven and stove in play, the background music trying to keep up with our tempo, children’s questions, costume changes (impromptu fairy performance!) and other needs being met.  Absolute wonderful chaos.  And somehow, as is usually the case, it all came together.  All of us gathered around that kitchen table digging into some baghali ghatogh
 
 
I was about Soleil’s age the last time we were in Shomal.  And now, all I have to recall from my visits are those hazy snapshots the salty air, the salty sea, the warm breeze. 

I wonder if many years from now the girls will all of a sudden get a flash, a snapshot of a bustling and loud kitchen filled with the aroma of fresh dill and parsley, homework with a side of watermelon, aged but still strong and gentle hands of a grandfather shelling fava beans… 

Fava Bean, Dill And Egg Stew – Baghali Ghatogh

Inspired by Baba and my cousin F.

Ingredients:

Serves 4-6

1 pound fresh fava beans shelled and outer skin peeled*, OR 1 pound frozen favas or lima beans, thawed,  OR 1 14-16oz can white kidney beans (cannellini beans), rinsed and drained
3 tablespoons olive oil, or butter or ghee
2 fresh spring garlic, finely chopped (green parts too!), OR 5 garlic cloves, minced
1 bunch fresh dill, finely chopped,  OR 4 tablespons dried dill  
2 teaspoons turmeric
1 teaspoon salt
1/4 teaspoon fresh ground pepper
1/4 teaspoon ground saffron steeped in 2 tablespoons hot water (optional)
4-6 eggs
olive oil for garnish (optional)
feta cheese, crumbled, for garnish (optional)

* I found roughly 4 pounds fresh favas in their shell yielded about 1 pound favas  shelled and peeled

1- In a dutch oven or pot or deep skillet heat oil over medium heat.  Add garlic, give a quick stirAdd beans and dill.  Gently stir to combine for 2 minutes. Until the dill begins to wilt and release its aroma.  Take care not to over stir.  You want the beans to maintain their shape and not break down.

2-  Add the turmeric, salt, and pepper.  Stir to combine.  Saute for 2 minutes. Add the saffron water (if using).

3-   Add enough water to cover the beans.  I used about 2 cups of water.  If the stew starts to dry out add more water.  Bring to a gentle boil.  Reduce heat to medium-low.  Cover and cook with the lid slightly ajar until the beans are fork tender.  About 15 minutes for fresh favas.  Take care not to overcook the beans.

4- Taste and adjust seasoning.  Right before serving crack the eggs one by one (one egg per person) into the stew.  Cook until the egg whites set, about 3 minutes Sprinkle the tops of eggs with a little salt and pepper.  Finish off with a drizzle of olive oil.

Serve over rice with a side of your preferred smoked fish (you can skip the fish all together if you want) or serve over crusty bread topped off with crumbled feta cheese.

Will keep in the fridge for up to 3 days.


Side Dish

Rice and the Art of Getting to the Bottom of the Pot – Chelo Ba Tahdig

They gather around me with bated breath.  The air is thick with anticipation and hope.If it all goes as planned, the fruits of my labor will be met with thunderous applause and joyous cheers.  High fives and high jumps and quasi-cartwheels all around.  Maybe even a little impromptu jig.

If it all falls apart (literally), shoulders will slump, and slight groans will replace the cheers.  Dissapointed little feet will shuffle back to the table.  And once they recover from this let-down, they will do their best to make me feel better.

It’s ok Mama.  Next time.

It’s not as great as usual Mama but it’s still ok…

These are the pressures I face.

They crowd in even closer.  My audience of two.  I place the serving dish over the pot.  Inhale.  Hold my breath.  Tighten up my abs.  Chant a little mantra.  Flip the pot over.

First it’s the triumphant sound of success, the swish sound of the release, as the rice drops from pot to dish.  I gently pull the pot up and away and there she is in all her glory – golden and regal  – TAHDIG.  Merrymaking ensues.  Exhale.  The Muse of Cooking decided to smile upon me  – this time.

Rice is the crown jewel of Persian cuisine.  A platter of fragrant saffron-steamed rice is almost always present at the dining table.  The perfect companion to the many flavorful stews (like celery stew), koo koos and kababs.  As a child there was nothing more comforting and reassuring as a bowl of polo* ( cooked rice), crunchy tahdig, with mast o khiar and a few sprigs of fresh mint and parsley.

* Technically, plain saffron-steamed rice served alongside a stew is called chelo-khoresh.  Polo is steamed rice mixed with other ingredients like vegetables and meats.  But in our house we refer to all cooked rice as polo.

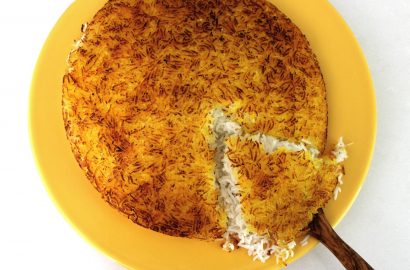
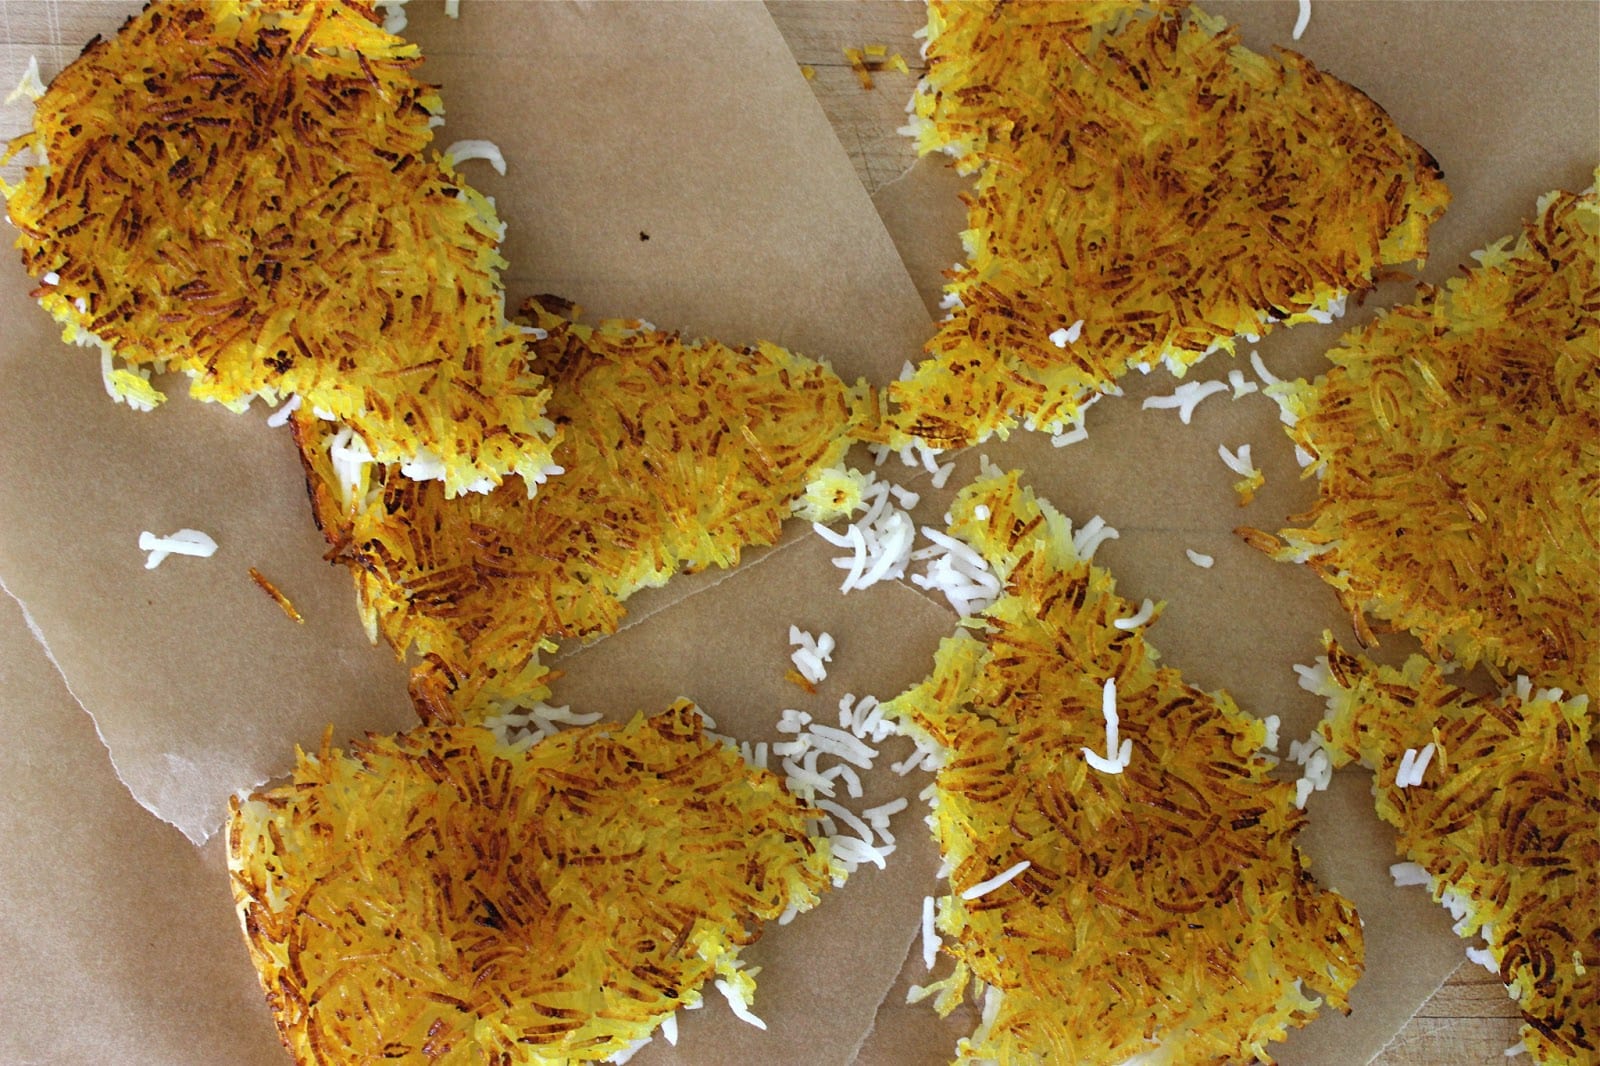
A Persian cook’s reputation rests first and foremost on his or her ability to turn out the perfect pot of fluffy rice and tahdig (pronounced “tah DEEG”).  Tahdig literally means the bottom of the pot.  The most common type of tahdig is made with rice (using bread or potatoes is popular as well).  The crispy, golden fried rice, nestled at the bottom of the pot – and the most coveted dish at the table.

Making Persian rice is truly a creative process.  No pot of rice ever turns out exactly the same and a perfect golden tahdig is never assured.  But even at it’s most imperfect, it’s as close as one can get to delicious perfection.  Really.

Every grain of rice should be separate, long, individual, fluffy – and shine on its own.  No clumps.  No sticking together.  Every grain is a jewel.

These are the words that echoed in our kitchen as my mom gently, methodically and artistically scattered the steamed rice – the jewels – on a platter.

There are a few key ingredients and techniques that you must follow to achieve this:

RICE
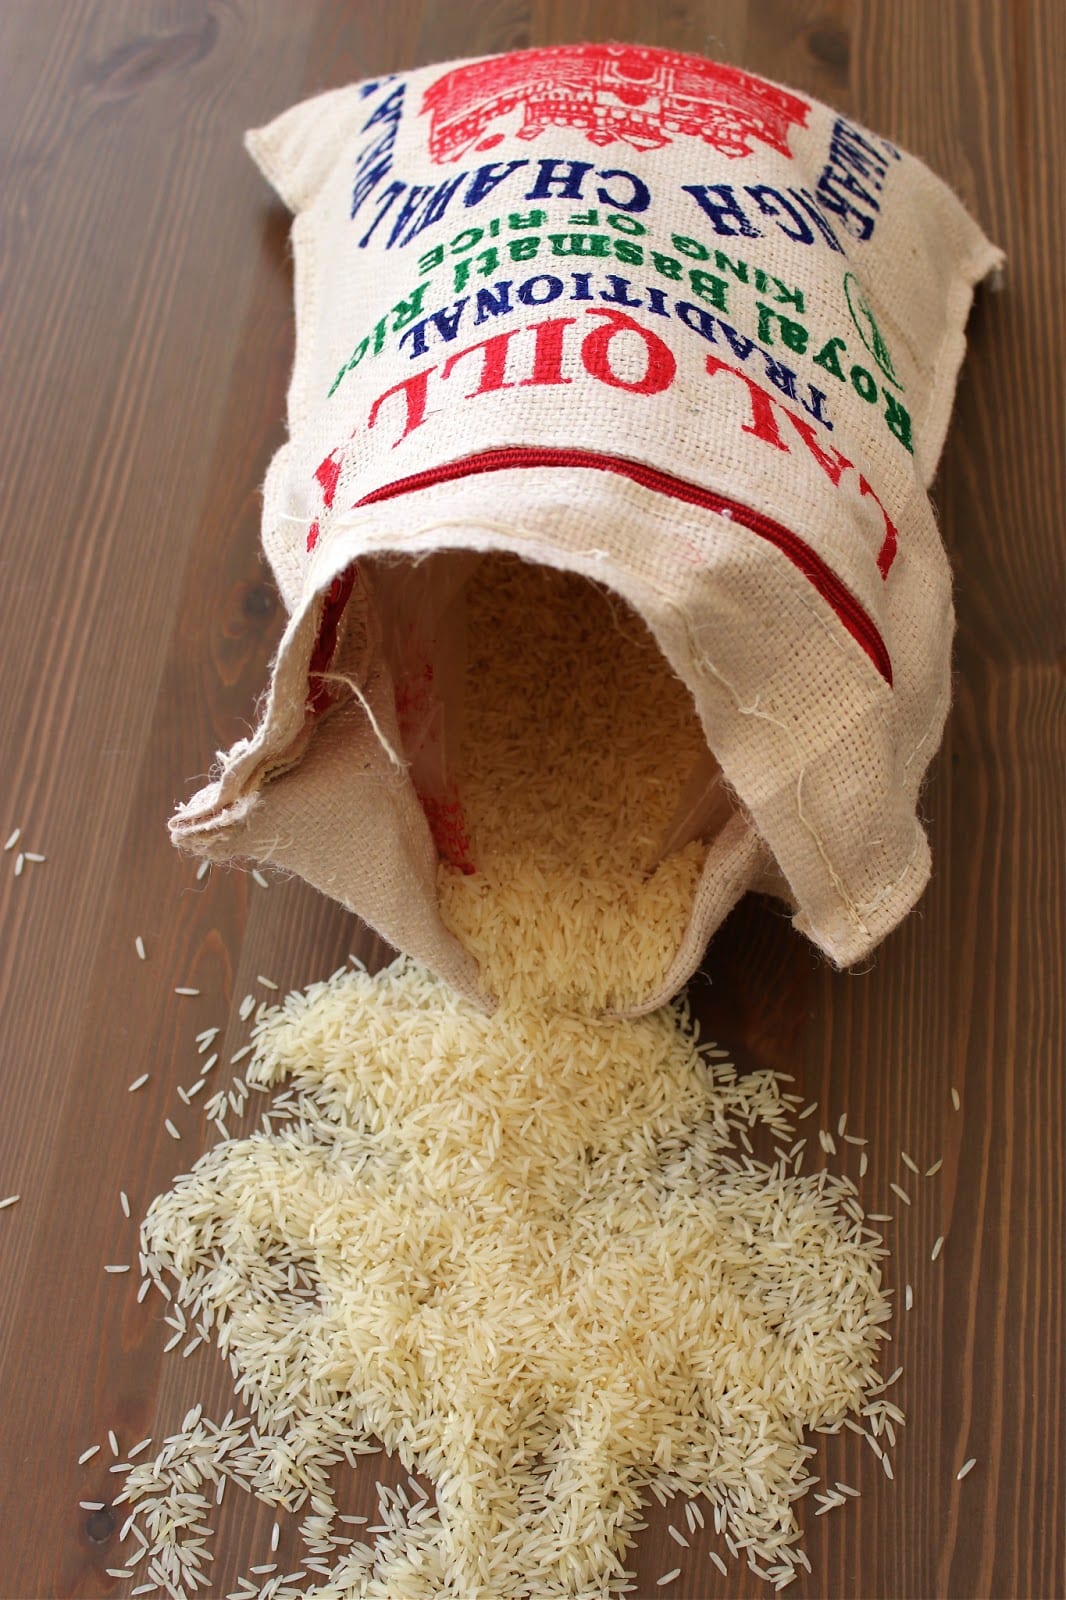
You have to start with a long grain rice.  Indian white basmati rice is very similar to the rice enjoyed in Iran.  On any given day if you go the Persian market you can overhear the ladies AND gentlemen passionately discussing the merits of one imported basmati brand over the other.  I use the Lal Qilla brand (which means committing to a 10lb sack).  I have also found the Trader Joe’s white basmati works quite well too.   Try a couple of different brands.  You’ll get a feel for which will turn out the fluffier rice.  Or visit a Persian market and ask.  But beware you might get a twenty minute thesis on rice!  We are very serious about our rice.

I should also mention that we made the switch to brown rice many years ago, for all the obvious nutritional, health conscious, waistline-minded reasons.  But there are times when nothing else will suffice but a dish of white saffron-steamed basmati rice.

POT,  PAN AND HEAT DIFFUSER
You have to use a non-stick pot or a deep non-stick pan.  A well-seasoned cast iron works too. DO NOT USE A STAINLESS STEEL POT.  To get the most tahdig, try to use a pot or pan with a flat bottom and one large enough that will give the rice plenty of room to expand.  If your pot or pan is too small the rice will clump together.  For this recipe I used a pot with a 10″ bottom.  If using a pan, make sure you have a lid that will tightly fit it.  The zeery – heat diffuser – is used to ensure the tahdig doesn’t burn.  If you don’t have one don’t worry about it.  It’s just extra insurance.

HEAT SOURCE
Heat temperatures differ on any given stove.  This is where you have to get a feel for your heat source and its relation to your rice.  It’s basically knowing when to go from a high heat to a low heat.

THE TWO STEP METHOD
Here comes the art.  You will first par-boil the rice (much like making pasta) so it is al-dente.  This also comes down to a feel for knowing when it’s al-dente and ready to drain.  It all depends on the quality of the rice you use and how long it has soaked.  You want the rice to be soft but still with a bite to it, not completely cooked through.  Boil it too long and you’ll end up with clumpy overdone rice; boil it not long enough and your rice will be slightly hard.

The second part is the steaming process.  There is a dichotomy at play here.  As you want to gently steam the rice up top you also want to crisp up the tahdig at the bottom of the pot without burning it.

SERVING
There are two options on how you can serve the rice.  First, with a spatula you can gently scatter the fluffy rice onto a serving dish.  (No dumping the rice out of the pot onto a dish in one fell swoop.  Remember, you are dealing with jewels!)  And then gently loosen and remove your tahdig from the bottom of the pot, divide in portions and serve separately.

Or, you can place a serving dish big enough to fit over the pot, and carefully but with purpose, flip the pot over.  Tahdig still intact.  Kind of like a cake.  This option has a great “tada” and “wow” appeal.

Think of Persian rice as a coy lover.  You have to treat her with respect.  You have to be patient.  You have to know when it’s appropriate to make a move and when to pull back, give her space.  You have to seduce her with a gentle touch, poetry and love.  And ultimately you have to dive in with complete and utter unbridled passion and abandon.  If she turns you down the first time – try, and try, and try again.  Because she’s worth it.  Really.

Please do share and let me know how your rice and tahdig turns out.  Were you good to your lover? Was your lover good to you?

SAFFRON STEAMED RICE – CHELO

Ingredients:

Serves 4-6

2 cups white basmati rice
5 tablespoons salt, divided
10 cups water, plus additional for soaking
2 1/2 tablespoons ghee or butter or oil of choice
1/8 teaspoon ground saffron steeped in 1 tablespoon hot water, plus a pinch for tahdig
2 tablespoons butter or ghee, melted,  divided for drizzling over rice (optional)

1- Place rice in a medium sized mixing bowl.  Fill with cold water.  Wash rice in water by gently swirling the rice around in the water.  Drain and repeat process about 5 times.  Until the water that is rinsed runs clear, not cloudy.  Soak washed rice in 2 cups cold water and 2 tablespoons salt for at least 1 hour.

2- In a large pot bring 10 cups water and remaining 3 tablespoons of salt to a boil.  Drain soaked rice.  Add the rice to the boiling water and bring back up to a boil.  Leave pot uncovered and don’t go anywhere!  The water can boil over very easily. With a spoon scoop off any foam that rises to the top. Watch your timer.  Start testing your rice after 4 minutes.  My rice was al-dente and ready to drain at 5 minutes.  It shouldn’t take longer than 6-8 minutes.  Once al-dente, drain in a colander and quickly rinse the rice under warm water.  Make sure your colander’s holes are small enough so you don’t lose any rice. When rinsing the rice under warm water make sure you don’t open a gushing amount of water on the rice.  If your faucet has a spray option use that.  If not place your hand under the tap and with fingers create a spray.  Gentle.  Let rice completely drain off any excess water.

3- In a non-stick pot or pan (if using the same pot you boiled the rice in make sure you wash and dry it first) melt 2 1/2 tablespoons ghee or butter over low heat.  If using oil heat the oil over low heat for a couple of minutes. The cooking oil should cover the entire surface of the bottom of the pot. (If your pot is bigger add more oil or butter accordingly) Add a pinch of saffron to the oil. Swirl around. (You want to work fairly quickly here, so the oil at the bottom of the pot doesn’t cool off too much)  With a spatula add enough rice to fully cover the bottom of the pot.  Using the back of the spatula or the back of a wooden spoon pack  down the rice firmly.

4- With a spatula gently scatter the rest of the rice into the pot in the shape of a pyramid.  This is to give the rice enough room to expand and lengthen.  With the handle of a wooden spoon poke a couple of holes in the rice to allow the steam to escape.   Don’t poke all the way down to the tahdig.  Drizzle half of the melted butter a 2 tablespoons hot water over the rice.  Cover and turn heat up to medium-high.  Cook for 10 minutes.

5- Turn the heat down to medium.  Lift lid without allowing any of the condensation collected on the lid to drip back in the rice.  Cover the lid with a clean kitchen towel or a couple of layers of paper towel. This is to catch the condensation.  Place lid firmly back on the pot.  Cook for 10 minutes.4- With a spatula gently scatter the rest of the rice into the pot in the shape of a pyramid.  This is to give the rice enough room to expand and lengthen.  With the handle of a wooden spoon poke a couple of holes in the rice to allow the steam to escape.   Don’t poke all the way down to the tahdig.  Drizzle half of the melted butter a 2 tablespoons hot water over the rice.  Cover and turn heat up to medium-high.  Cook for 10 minutes.

6- Turn heat down to low.  Place heat diffuser under pot.  Cook for 40 minutes.  7- Turn heat off.  Remove lid.  If serving like a cake, place serving dish over pot and flip.  Otherwise,  set aside a couple of spatula fulls of rice.  Scatter remaining rice on a platter and gently remove the tahdig.   In a small bowl mix the saffron water with the remaining melted butter.  Mix the reserved rice with the saffron water/butter mixture.  (if not using butter just mix the saffron water with the reserved rice) Scatter the saffron/rice mixture over the white rice.6- Turn heat down to low.  Place heat diffuser under pot.  Cook for 40 minutes.

Serve immediately.  Enjoy and do a cartwheel for a job well done!

The tahdig  should be eaten right away.  It does not keep.  And frankly I’ve never had any tahdig left over.  The rice will keep in the fridge for up to 3 days and can be frozen for up to 3 months.

Soup

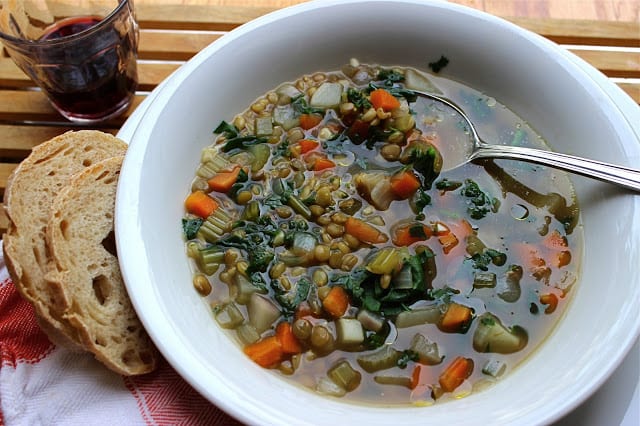
The Best Soup in the Whole Wild World – Lentil and Barley Soup

Mama, this is the best soup in the whole wild world.

Soleil is right, Mama.  Make this soup every day and every night and every afternoon.

Can we have this for lunch tomorrow, Mama?!

Allow me to explain.

Although I’d like to take full credit for all the glowing adulation of my-soup making abilities, I  also need to extend a big thank you to my not so silent cohort – sugar.  The white, refined, not-so-natural variety.  Oh what the heck – let’s give credit where credit is due.  Thank you:  corn syrup, red dye #40, blue #1, yellow# 5…

Allow me to explain further.

The girls had had a busy, fun-filled day at a kid function, and had – as expected –  indulged in kid function goodies.  Candy, baked goods, non-food food and more candy.  By the time they were back home the clock edged closer to the precarious 5:30ish hour.

The sun begins to set, their voices reach a feverish sugar-induced shrill; suddenly all goes silent – cue Ennio Morricone.

What was once an inviting family living room is now a barren desert.  The tumbleweeds roll by in the form of half-clothed barbie dolls.  Once sisters, once compadres, forever tied in blood and love – now square off on either side of the rug.  Hands on hips, fire and determination in their eyes, ready to pounce at any moment, at any slight misspoken or misunderstood word by the other.  We have entered no man’s land, no man’s time…We need to reset.  We need something to make us feel whole again.

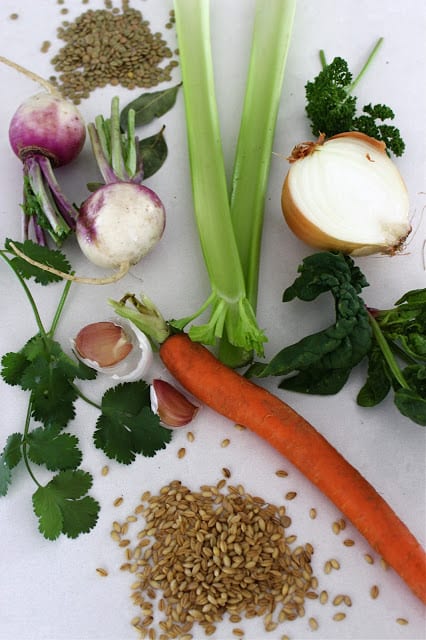
This is our go-to meal any night of the week.  Although quite hearty, we enjoy it all year round.  Barley and lentils are the stars of this soup, followed by a supporting cast of nutrient rich vegetables. Both barley and lentils boast numerous health benefits.  They are both high fiber foods which help in stabilizeing blood sugar levels.  Might explain why this soup was so needed and appreciated after a sugar filled afternoon.

Whenever possible I try and use hulled (or hulless) barley.  This means that the barley is in its whole grain form, and unlike pearled barley hasn’t been stripped of its nutrients.  If you can’t find hulless barley the next best options would be pot/scotch barley or semi-pearled barley.  Hulless barley is much chewier and heartier than pearled barley so I recommend that you soak the hulless barley overnight to cut down on the cooking time. Soaking the grain also helps in better digestion and absorption of the nutrients.  I also soak the lentils for the very same reasons but not as essential as soaking the barley.

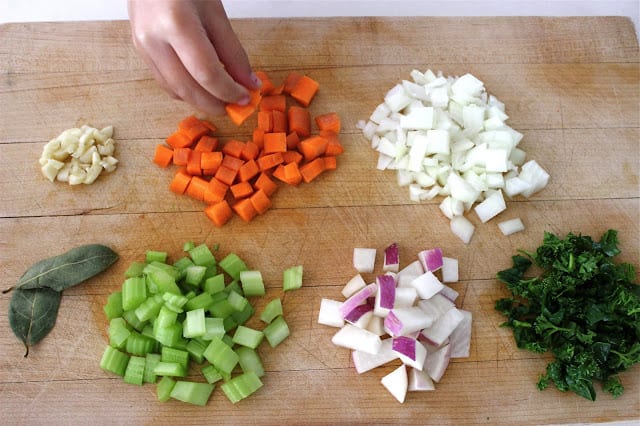
Onion, garlic, celery and carrots are the main vegetables I use.  From there I add any other vegetables I have roaming around in the fridge or available in our farm box. The particular addition of  turnips, spinach, cilantro and parsley seem to work quite well with a certain six and three year old in from the cold of the wild west.  I like to add my herbs and greens right at the very end to maintain their color and fragrance.  But if you’re using a heartier green like kale, I suggest you cook it a bit longer.  We like to finish off the soup with a number of different toppings.  Usually it’s a drizzle of olive oil and some crunchy salt.  It is also delicious with a sprinkling of parmesan, a dollop of yogurt, or a squeeze of a lemon.

When we start to fall apart, this soup puts us back together again.  It’s what grounds us when the whole world seems to have gone WILD.


Lentil and Barley Soup

Ingredients:

Serves 8

8 cups vegetable stock or chicken stock*
2 cups water
3/4 cup hulless barley, soaked overnight
1 teaspoon salt plus 1/2 teaspoon salt, divided
1/4 teaspoon ground back pepper
1 medium onion, chopped
4 cloves garlic, chopped
3 fresh bay leaf or 2 dried bay leaf
3 celery stalk, chopped
3 medium carrots, chopped
1/2 cup green lentils, preferably soaked for 4 hours or overnight
4 small turnips, chopped
1/2 bunch spinach, chopped
1 handful parsley, chopped
1 handful cilantro, chopped

* I make my own stock which contains much less salt than store bought stocks.  If using store bought stock, keep this in mind when adding additional salt.  Taste first and add salt as needed.

  1. Drain and rinse barley and lentil.  Put lentil aside.
  2. Put stock, water and barley in a large soup pot.  Cover the pot with the lid slightly ajar.  Bring to boil.
  3. Add bay leaf, salt and pepper.  Turn heat down to medium.  Put lid back on slightly ajar.  Let simmer for 30 minutes, the barley should get softer and chewy.  (In the meantime chop all vegetables and herbs.)
  4. Add onion, garlic, celery and carrot.  Bring everything back up to a quick boil.
  5. Turn heat back down to medium and simmer with lid ajar for 20 minutes.
  6. Add lentils and turnips. Simmer for 10 minutes.  Or until lentil is cooked through. (If you did not soak the lentil, you will need the lentil to cook a little bit longer.)
  7.  Add greens and herbs.  Simmer for 2-5 minutes.
  8. Adjust seasoning to taste.  Serve with favorite topping.

Will keep in fridge for up to 3 days and in the freezer for up to 3 months.

Uncategorized

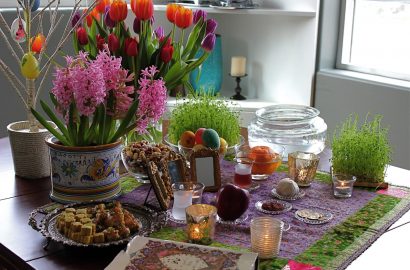
Our Haft Seen Table

Nowruz celebrations last for thirteen days.  During this time families and friends visit each other and homes are always ready to greet well wishers with hot tea and sweets.  It all culminates on the thirteenth day – seezdah bedar –  with a big picnic outdoors.

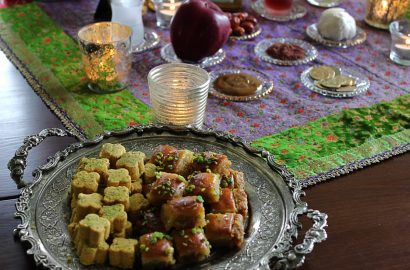
We have had a wonderful Nowruz surrounded by good friends and family.  Our Haft Seen table will stay up for a few more days – although the sweets and mixed nuts dishes  are quite depleted.  Little fingers always find their way to the Haft Seen table…

Side Dish

Fresh Herb Koo Koo – Koo Koo Sabzi

Mmmm…what’s that smell, Mama?

It’s koo koo again.  Do you think you’ll want to have more, Luna?

With that smell all in the house, how can I ever say no!

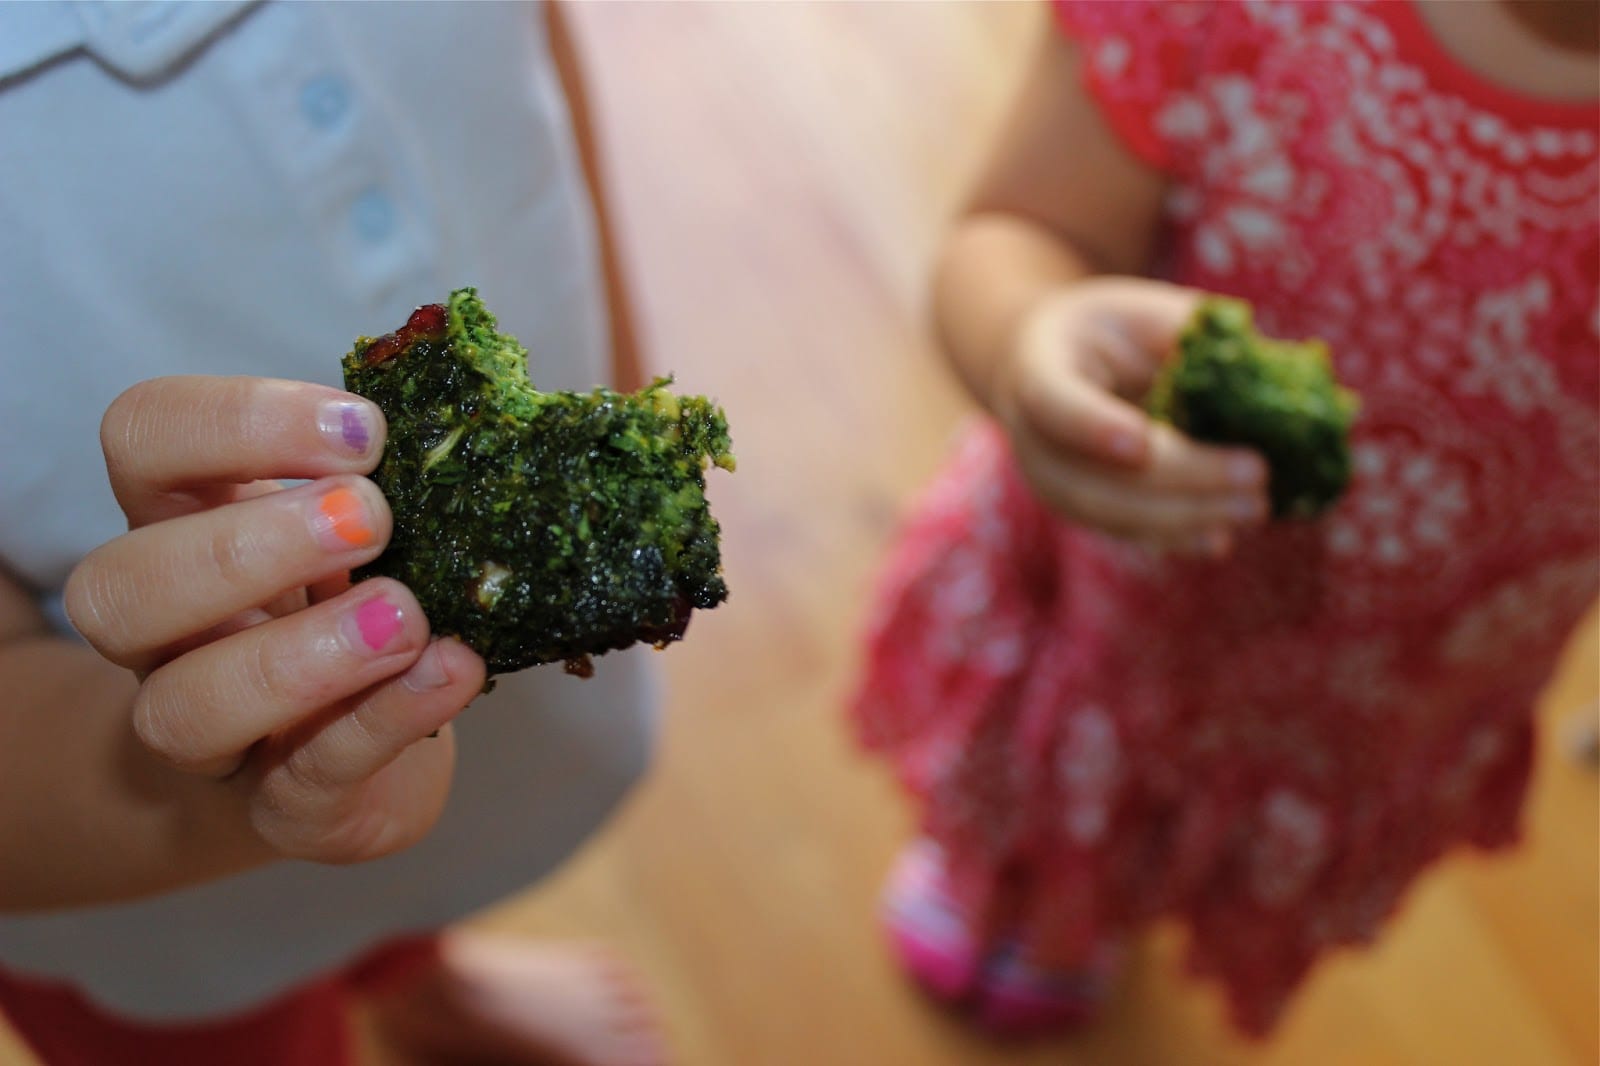
This was our third batch of herb koo koo in three weeks.  After days of koo koo for lunch, dinner, after-school snack; and having exhausted every cuckoo – koo koo joke, I was certain there would be no interest in yet another bite.  But once that smell takes over the house…how could we ever say no…

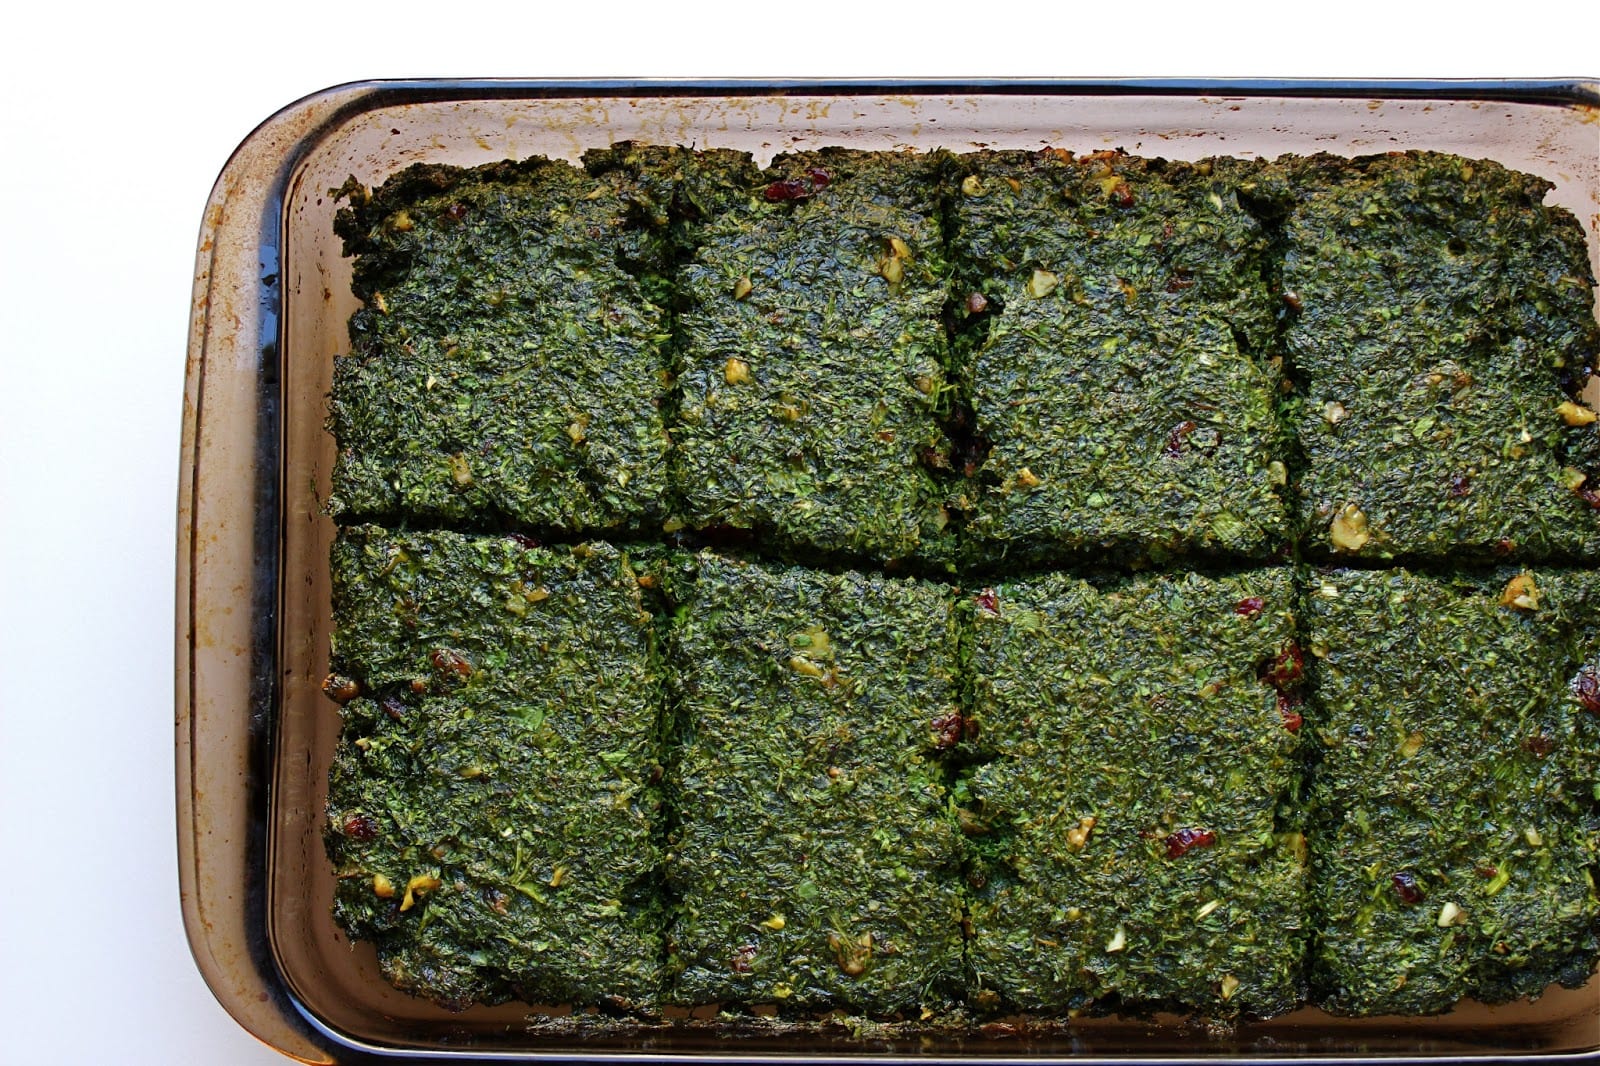
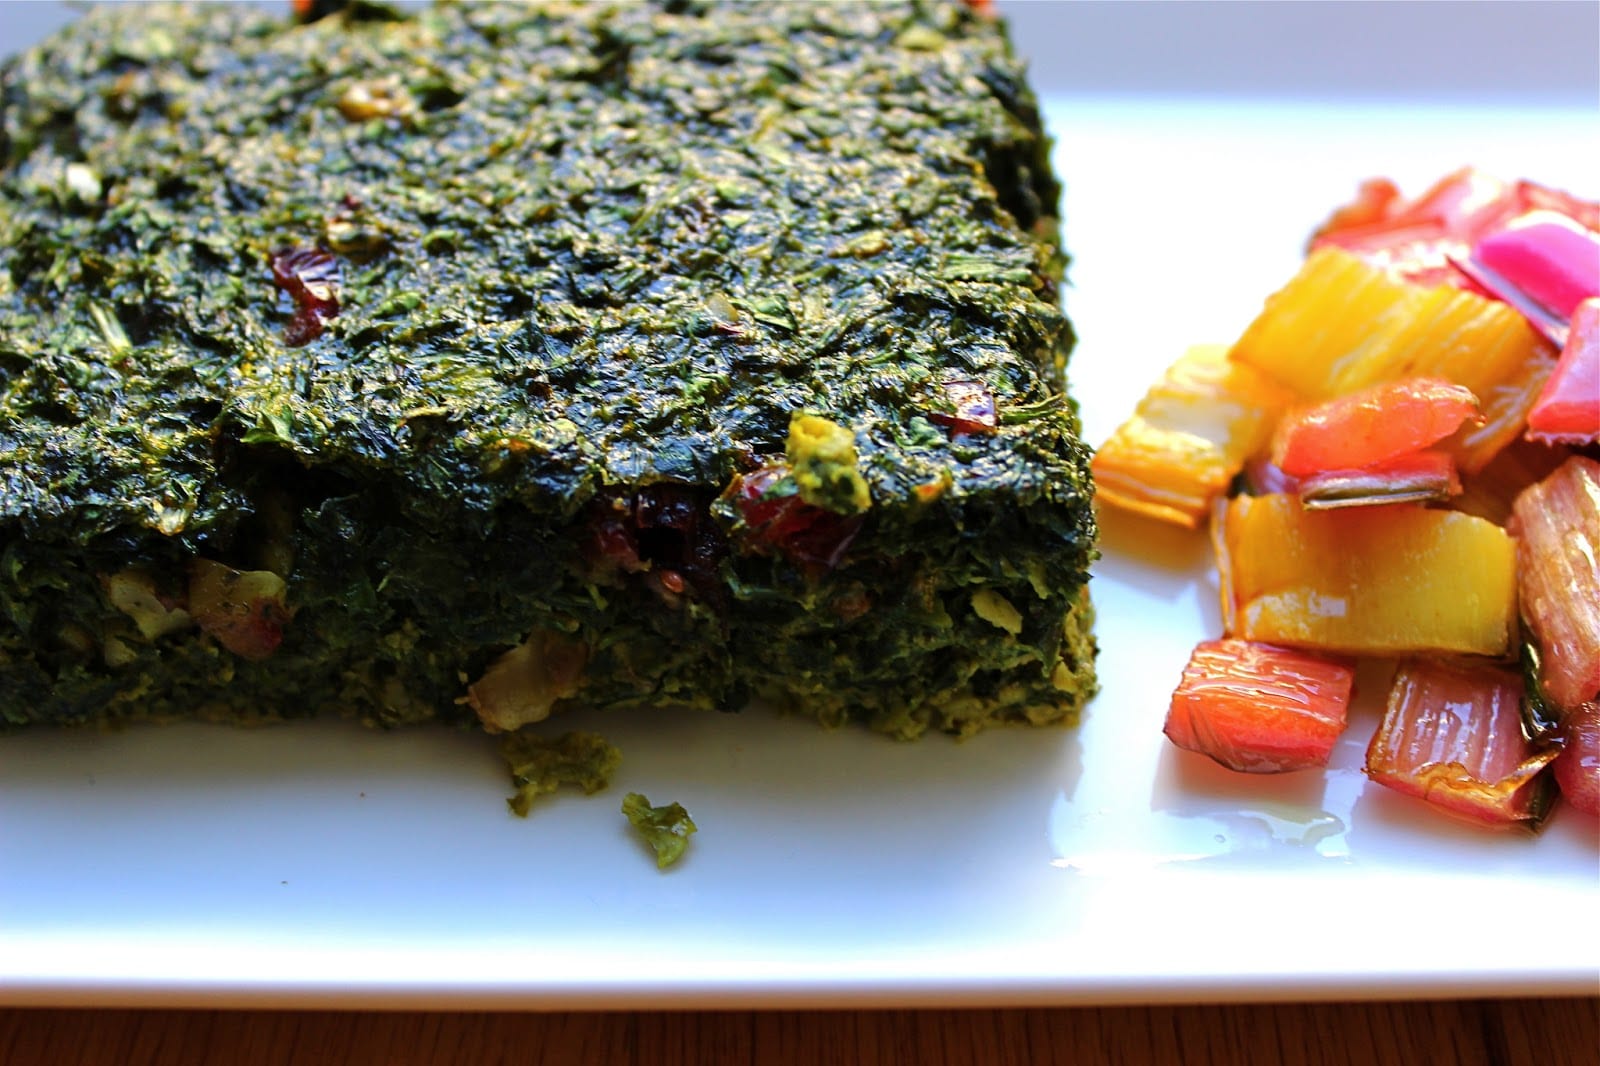
Koo koo is a dish somewhat similar to a quiche or a frittata. There are many different preparations for koo koo.  Fresh herb koo koo is one that is traditionally enjoyed as part of our new year – Nowruz – meal.

Nowruz is a celebration of Nature and Life.  We welcome the arrival of spring, by celebrating and honoring all that we are surrounded with.  The air that fills us with life; the fire that gives us warmth and light; the water that quenches our thirst; the flora that intoxicates us with their perfume and beauty; the fauna that reminds us that life extends beyond the human form; the eggs that represent new life and fertility; the book of poetry that lifts our spirits and fills us with hope for the future; the baked goods that sweeten our tongues and our hearts; and the green herbs and vegetables that nourish us and give us strength.

This koo koo was inspired by the overflow of greens in our farm box.  Swiss chard is not typically used in a koo koo but I thought it would work well alongside the spinach and abundance of fresh green herbs.  I also like to simply saute the rainbow-hued stems in a little olive oil, garlic, salt and fresh lemon juice, and serve it alongside the koo koo for a little added color.

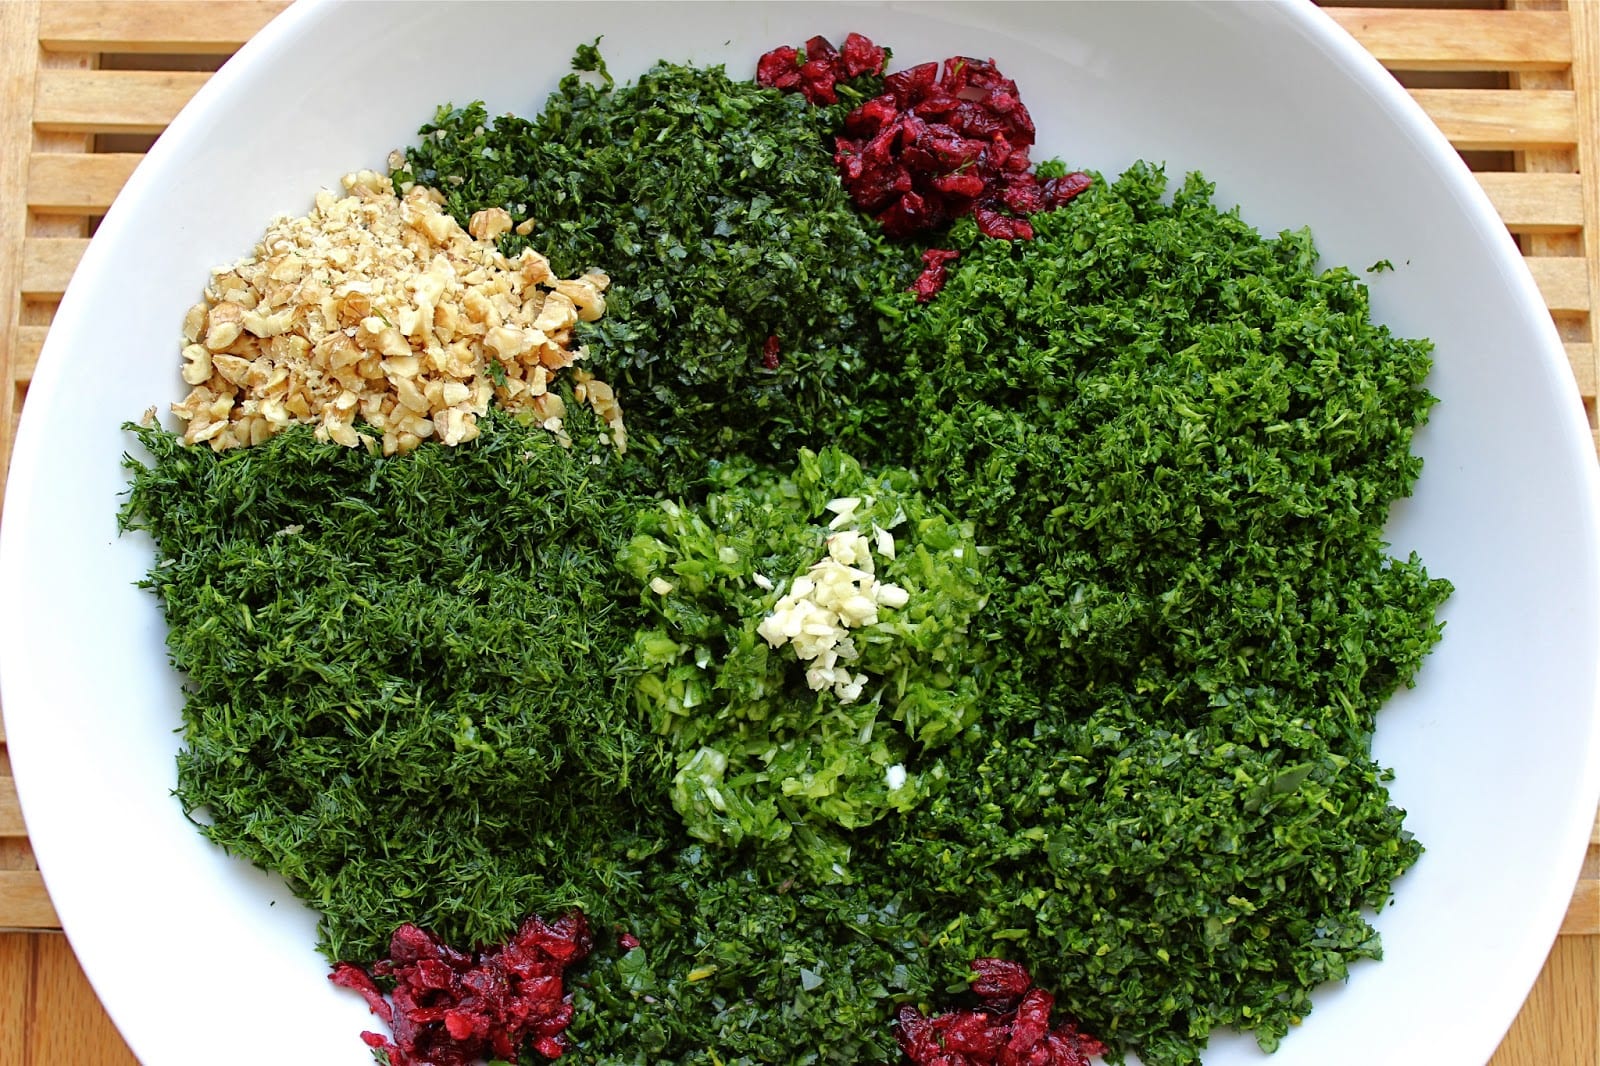
As for that smell – that would be the combination of the sabzi – the fresh green herbs.  Dill, cilantro, green onion, fenugreek, tarragon and parsley.  Curly parsley.  There I said it.  I, like you, have been programmed to to turn my nose up to the unsophisticated step-sister of the much cooler and popular Italian parsley.  For years my mom and I have been arguing the “chicness” of Italian parsley (me) vs  her preferred curly parsley.

It is juuuuicier.  It is more flavorful.  It is more fragrant.

I am here to admit (once again) that my mother was right.  When it comes to cooking Persian food, curly parsley – is just better.  But of course, if Italian parsley is what you have at hand then use that.  That will work too.

We enjoy fresh herb koo koo with a side of mast-o-khiar and a salad for lunch.  It is also fantastic as a sandwich with your favorite kind of bread – a typical school lunch for the girls these past three weeks.  It also makes for a simple and nourishing dinner served with rice.  Fresh herb koo koo would also be a great vegetarian addition for an Easter brunch.

Within the first few minutes of putting the koo koo in the oven – the kitchen fills with that smell.  The smell of spring.  A new year.  New possibilities.  Family.  Health.  Love.  Life.

Wishing you all a Happy Nowruz.

FRESH HERB KOO KOO -KOO KOO SABZI

Ingredients

Serves 6-8

1 bunch parsley
1 bunch cilantro
1 bunch dill
1/2 bunch spinach
1/2 bunch swiss chard, approximately 3 large leaves, stems off
6 green onion
1 clove garlic, chopped
1/3 cup cranberries, roughly chopped
1/2 cup walnuts, roughly chopped (optional)
3/4 teaspoon dried fenugreek  (optional but really adds to that smell)
1 teaspoon dried tarragon, or 1 1/2 teaspoon fresh tarragon, chopped (optional)
1/4 teaspoon cinammon
1/2 teaspoon turmeric
1/4 teaspoon ground saffron
1 teaspoon finely ground sea salt
1/4 teaspoon ground black pepper
1/4 teaspoon ground rose petals (optional)
6-8 large eggs, as needed
1/3 cup olive oil, plus 2 tablespoons

Heat oven at 350F degrees.

  1. Roughly run your knife through the first 5 ingredients.  Working in batches chop the first 5 ingredients in a food processor.  About 25-30 pulses for each ingredient.  Make sure you don’t over do it.  Or you can finely chop everything by hand with a sharp knife. Place everything in a large bowl.
  2. Run your knife through the green onion.  Place in food processor.  Chop.  About 15 pulses.  You want to make sure everything is finely chopped but not mushy.  Add to the bowl of herbs and greens.
  3. Add the next 11 ingredients to the bowl.
  4. Beat 6 eggs in a separate bowl.  Add to your mixture.  Stir and combine well.  You want the mixture to have the consistency of thick yogurt, or as my mom says “ice cream that is starting to melt”.  Crack in the other 2 eggs if necessary, and combine.
  5. Pour 1/3 cup olive oil in a baking dish.  I used a 15″x10″x2″ rectangular glass pyrex dish.  You don’t want your dish to be much deeper than 2″, otherwise baking time will vary.  Spread the olive oil along the bottom and sides of the dish.
  6. Pour in your mixture and spread evenly.
  7. Place in the middle rack of oven. Bake for 30 minutes.  Take out of oven.  It should have set.  Make one cut along the middle horizontally and three cuts vertically. Gently flip the pieces over. So the bottom is facing up now.  Drizzle in remaining 2 tablespoons of olive oil in between the cuts.
  8. Bake for another 15-20 minutes.
  9. Take out of oven.  Let cool for a few minutes.  Cut into squares or triangles and serve.  Can be made ahead of time and served at room temperature or warmed through.

Will keep in fridge for up to 3 days.  Will keep in freezer for up to 3 months.
Uncategorized

Looking Forward

We are deep into preparations for Persian New Year.

Nowruz (sounds like know rooz).

We celebrate the first day of spring.  New beginnings, new life, new blossoms, fresh green grass – rebirth.  Nature – Mother Earth wakening from her deep winter slumber.

Nowruz this year falls on Wednesday March 20  at 4:01:56 am (PST).  Vernal equinox.    Exactly the moment when the Earth’s axis tilts neither towards nor away from the sun.   When day and night are exactly the same length.  Equal.  Balanced.

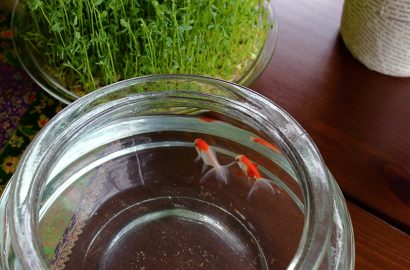
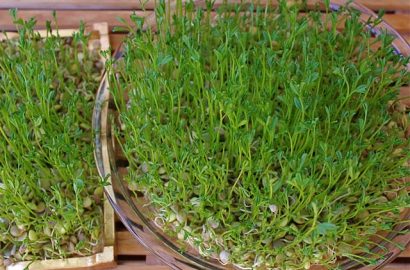
We are preparing our Nowruz dinner menu.  Contemplating which sweets to bake.  The girls will be coloring eggs.  Watering our sabzeh (sprouted lentils) for the traditional haft seen table.  Much to be done.  And much to look forward to.
And so it is with this new promise of life and new beginnings that I want to thank you all for all your enthusiasm, your kind words, your support. Thank you for joining me on this food journey.

Thank you for sharing all your pomegranate juicing tales, your quest for sweet lemons, the saffron treasure hunt…It has made me so happy to receive all your pictures of mast-o-khiar and celery stew.

With new beginnings also comes my foray into social media.  You can now find bottom of the pot on facebook and instagram where I have been chronicling our sabzeh-sprouting  and will be posting more about our Nowruz preparations.  So like, follow, become a fan, share with your friends. It’s all new to me but I’m enjoying working through all the kinks.  Many of you have also asked about subscribing and being unable to.  If you would like to subscribe  but don’t have a gmail account and don’t want to open one, just send me a note and I will subscribe for you.

Thank you for joining us at our communal kitchen table.  And I look forward to a brand new year filled with enticing aromas.

Stew

A Comforting Parallel Universe Celery Stew – Khoresh Karafs

The skies have turned grey.  The fog is rolling in.  There’s talk of rain.  Yes, this does happen in Los Angeles.

I need everything to slow down.  A break from the daily routine.  I begin to yearn for my parallel universe.

That alternate life where I curl up on the couch with my boyfreind – now my husband.  Watch a movie at three in the afternoon. And then ponder whether we should watch another – and quickly agree that we should.  Just like we used to.

No responsibilities.  No errands.  No school lunches.  No 6am wake ups.  Little three year old fingers prying open our eyelids – literally.

Simultaneously I move through my current universe. My girls burst through the front door.  I help them take off their coats, boots, sweet-sweaty-stinky-been-playing-working-hard at school socks.  Settle them into the afternoon routine.  Snacks, homework, play, bickering, hugs, melt-downs.

I feel little three your old fingers tugging on my pants, demanding more sweet lemons, more pistachios and toot (mulberries), and can she please! please! have some chocolate today.  Please mama!

I am bombarded with fantastical tales, profound declarations, and silly knock – knock jokes from a wise-beyond-her-years six year old.  And if her sister is going to have chocolate then it’s only fair that I have some too, mama!

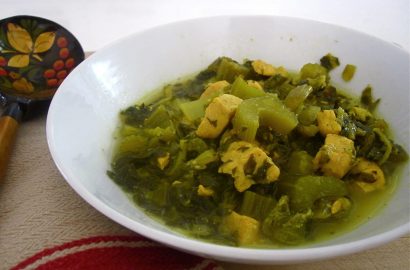
It is on days like these that we crave something comforting.  Something familiar.  Something that says home, love, family.  Something that will wrap us in its embrace and re-energize us for the week that’s to come.  And something that will partly bridge that gap between this reality and that parallel universe I sometimes yearn for.  That for us  is khoresh karafs – celery stew.

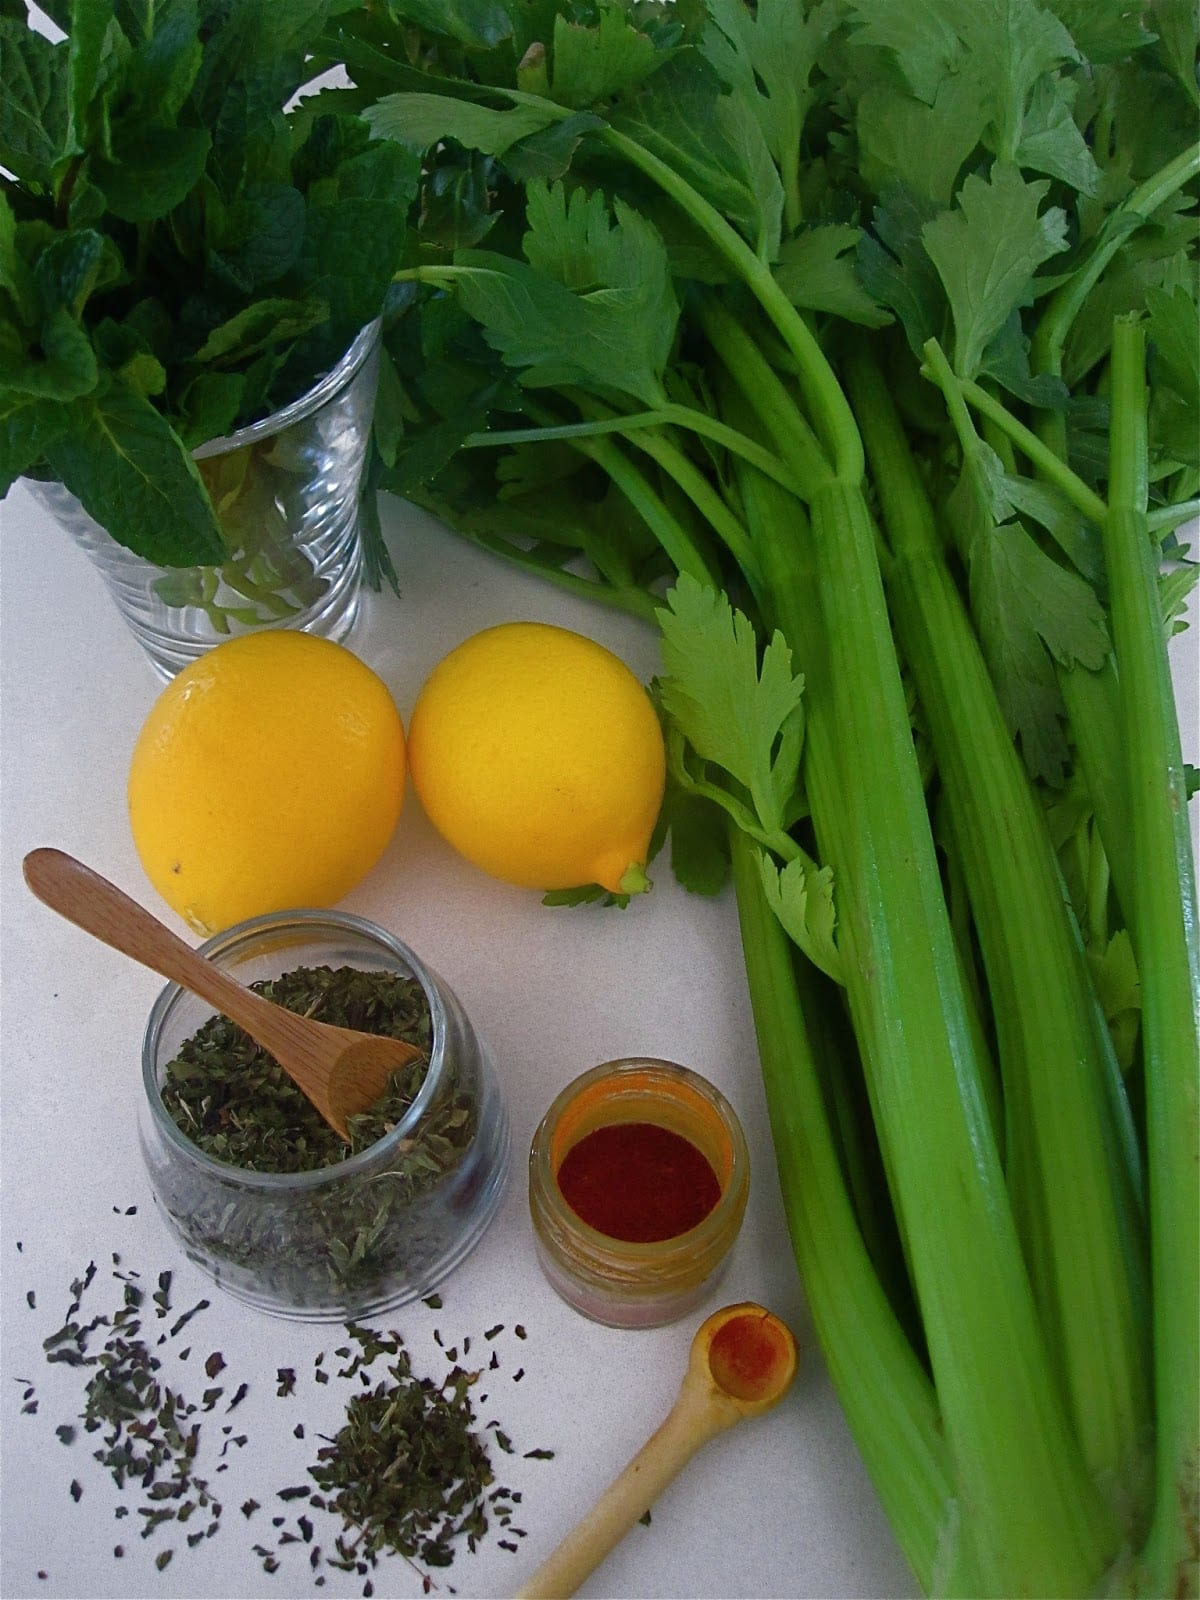
This dish used to be one of my favorites as a child and has now become a staple Sunday supper for us.  Whenever I pull out a luscious green head of celery from my weekly farm box, I know this meal is in our near future.  I use the entire celery head – green leaves included which add so much flavor along with fragrant parsley and mint.  And I am once again reminded (by my mom) of the method behind the creative and sometimes haphazard art of cooking.  There is actually more to the combination of celery, and aromatics like mint and parsley.  Celery can cause excessive gas.  Mint and parsley are known to help with flatulence and digestion – helping to offset the possible indigestion of celery.  An elegant dance choreographed by our ancestors hundreds of years ago.

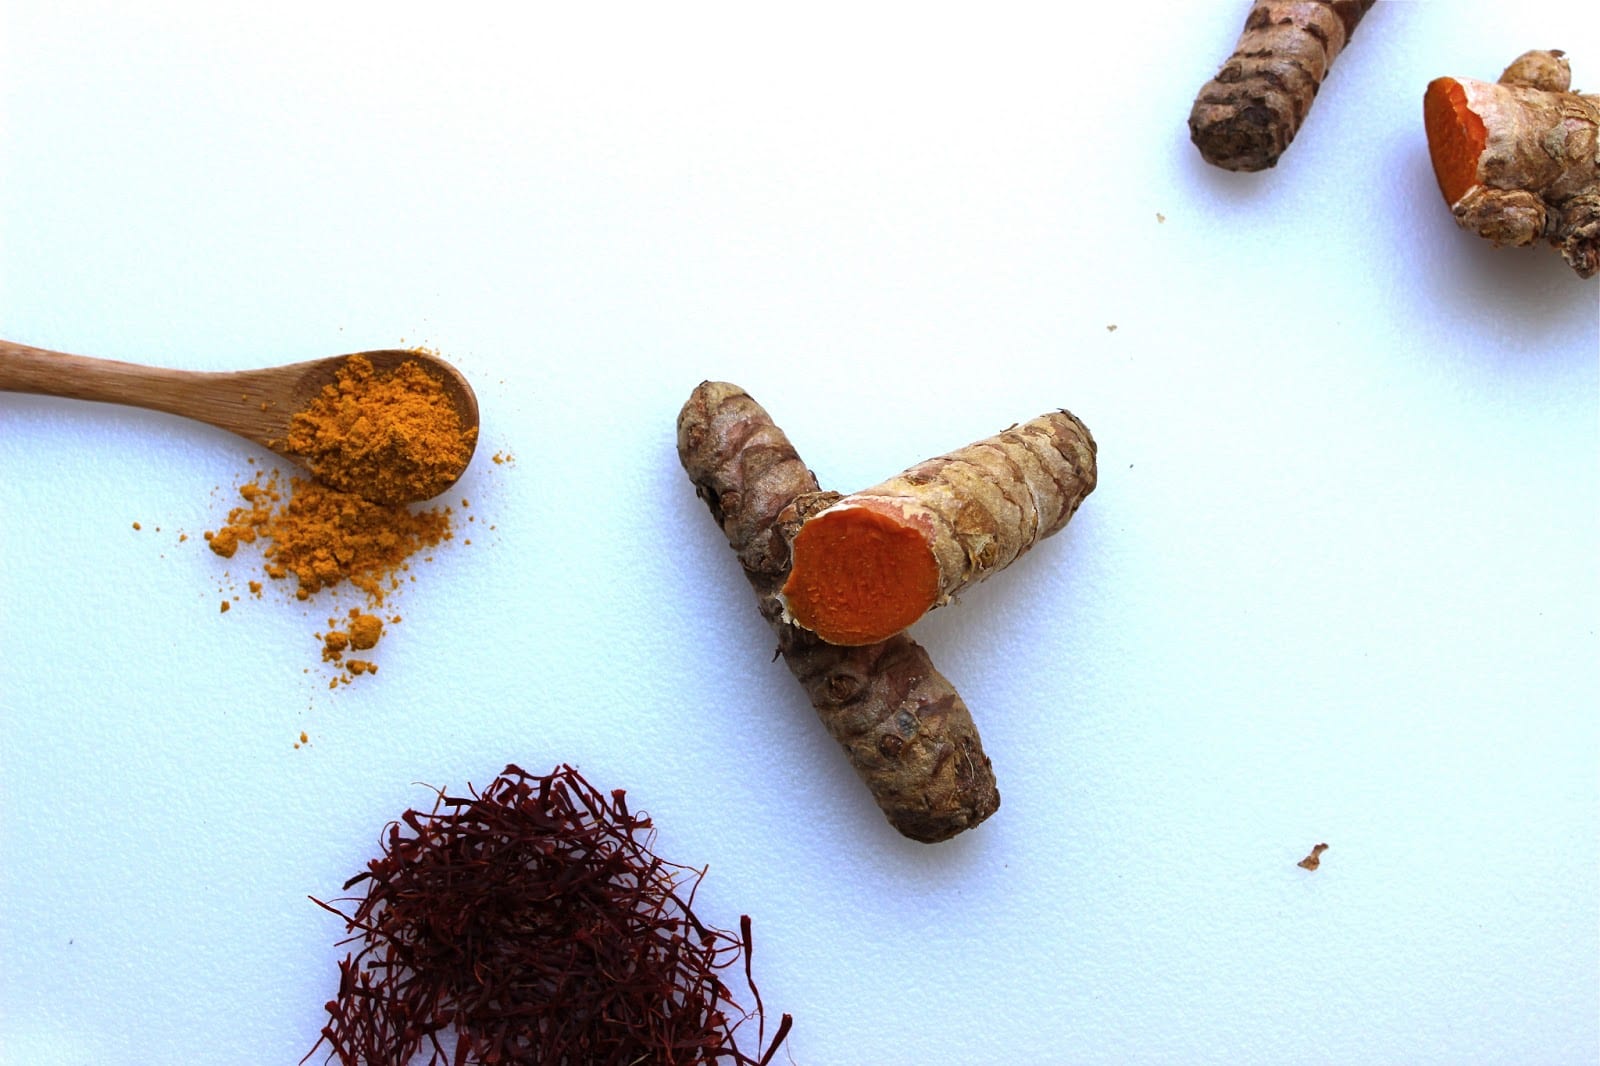
This stew is also a classic example of the marriage of saffron and turmeric in most Persian dishes.  Combine these two spices together in one form or another and you’ll have the makings of a Persian stew.

Like most stews, the longer you let it simmer on a low flame the more flavorful it will be.  This is also a great make-ahead-of-time dish.  It tastes even better the next day (and makes an excellent school lunch – the girls’ thermoses come back licked clean).  If you do make it ahead of time just make sure that when you reheat it you adjust the liquid. You will most likely need to add more water and adjust the seasoning.  This is not a dry stew, nor should it be runny like soup.  But you do want it to be juicy.  Traditionally it is served over rice. This is how we enjoy it, but you can also serve it with a side of quinoa or other grain of choice.

My husband – my then boyfriend – walks through the door.  I hear the shrieks of Dada! Dada! greet him before he has even had the chance to step inside.  The girls launch into telling him all about the ins and outs of their day.

As I make my way to the kitchen table I catch a glimpse of the fog rolling by, the last of the winter light settling behind the trees, making way for spring – new beginnings.

We all come together around the table.  Tucking into a warm dish of khoresh karafs over rice with a side of mast o khiar.

This is my universe.  I wouldn’t want it any other way.

Well, maybe I could occasionally time travel back to the three in the afternoon movie watching days with my boyfriend…


CELERY STEW – KHORESH KARAFS

Ingredients:

Serves 6-8

6 tablespoons olive oil, divided
1 medium yellow onion, diced
2 skinless boneless preferably organic chicken breasts, cut in 1″ stewing cubes
salt
pepper
1 teaspoon turmeric
1 head celery, sliced in 1/2″-1″ slices
green celery tops (leaves) chopped (if using)
1 bunch fresh parsley, chopped
3 tablespoons fresh mint, chopped plus 1 teaspoon dried mint OR 2 tablespoons dried mint (if not using fresh mint)
juice of 2 lemons or limes, more according to taste
1/4 teaspoon ground saffron dissolved in 5 tablespoons hot (not boiling) water
water

  1. Heat 3 tablespoons olive oil in a large pot or Dutch oven over medium heat.  Add onion, sprinkle with a little salt and saute until translucent, about 6-8 minutes.
  2. Add chicken.  Give a quick stir add 1/2 teaspoon salt, 1/4 teaspoon pepper, and turmeric.  Stir and saute for 5 minutes.
  3. Cover, and turn down heat to low.  Simmer for 15 minutes until chicken releases some of it juices.
  4. In the meantime heat up remaining 3 tablespoons olive oil in a large pan over medium heat.  Add celery and celery tops (if using).  Add 1/2 teaspoon salt.  Saute celery for 10 minutes until softened but not cooked through, stirring occasionally so the celery doesn’t stick.
  5. Add parsley and fresh mint.  Stir constantly and saute with celery for about 3 minutes.  Turn down heat if needed.  Mint can burn very quickly.  Keep an eye and a nose on it.  If using dried mint, rub the mint between your palms to release fragrance and flavor and add it to the celery only in the last minute.  Give a quick stir and turn heat off.
  6. Transfer the celery, parsley, mint mixture to the chicken.  Add lemon juice, saffron water, 1 cup water and remaining 1 teaspoon salt. Stir everything to combine.  Bring to a VERY GENTLE boil.  Partially cover and simmer over low heat for at least 45 minutes.  You want the celery to be cooked and tender but NOT mushy.  It should hold its shape.  Add more water as necessary. Taste. Add more fresh lemon or lime juice if needed.  Adjust seasoning as needed. Maybe a little more dried mint?  Salt?  Taste again.  Adjust again to taste.  Taste.  Adjust.  Taste.  Adjust.

Serve over rice.  Will keep in the fridge for up to 3 days.  And in the freezer for up to 3 months.